Students: Advising Degree Progress & What-If Reports
This resource covers the Degree Progress and What-If Reports from the student perspective. MyBU Student Degree Progress presents to students the requirements of their Degree Progress Report, including what has or has not been satisfied. The What-If function allows students to review hypothetical Degree Progress details for alternative programs, plans, or other scenarios.


Introduction
In Degree Progress, students can browse the requirements of their Degree Progress Report and see what is satisfied and what is not satisfied. Drilling down to the course lists for requirements, students can view course and section details. From the Degree Progress pages, students are also able to directly enroll in classes or add them to their Schedule Builder and Shopping Cart.
The What-If Report allows for the view of the same information provided with Degree Progress page, but for a different Career/Program/Plan Scenario. In other words, it’s a tool that generates a hypothetical Degree Progress report for if the student were to change their Program/Plan.
⚠︎ Screen options and menus will vary by user; please note that displays may differ for you based on access that has been granted. All screens shown are for training purposes only.
Degree Progress
VIEW DEGREE PROGRESS REQUIREMENTS & COURSES
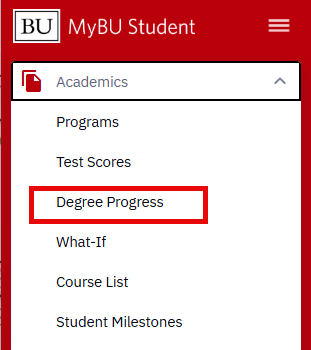 Navigate to Dashboard Menu > Academics > Degree Progress.
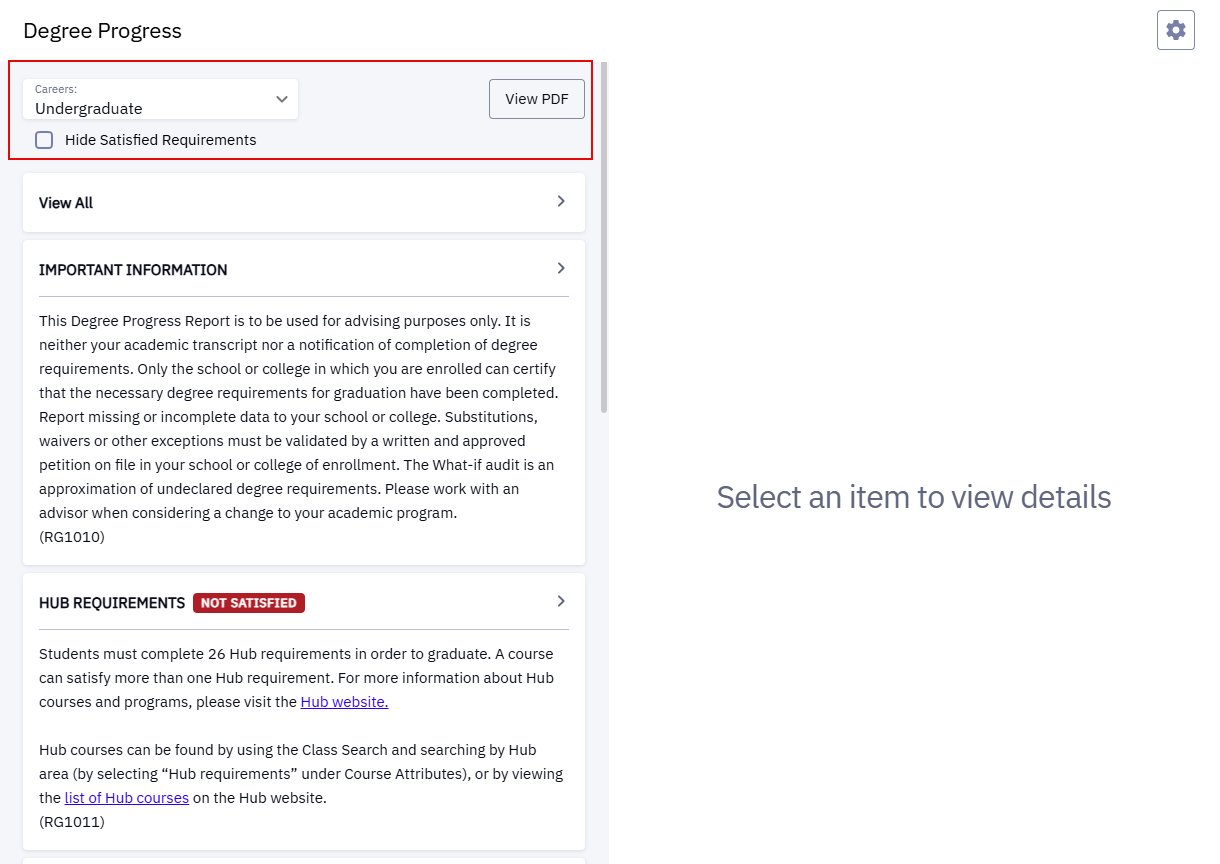
- The Degree Progress page displays. Several actions are available from the top of the left-side display:
- If there are multiple active Careers, the Careers dropdown menu can be used to select the progress details of the desired Career.
- Click the View PDF button to open a downloadable or printable format of the Degree Progress Report.
- Check the Hide Satisfied Requirements checkbox to only view requirements that are not yet complete.
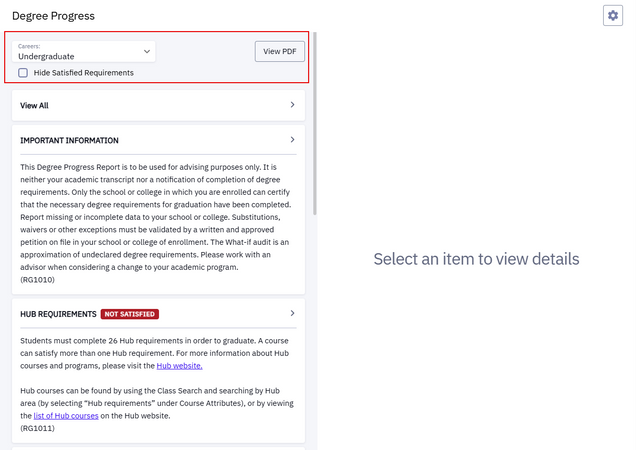
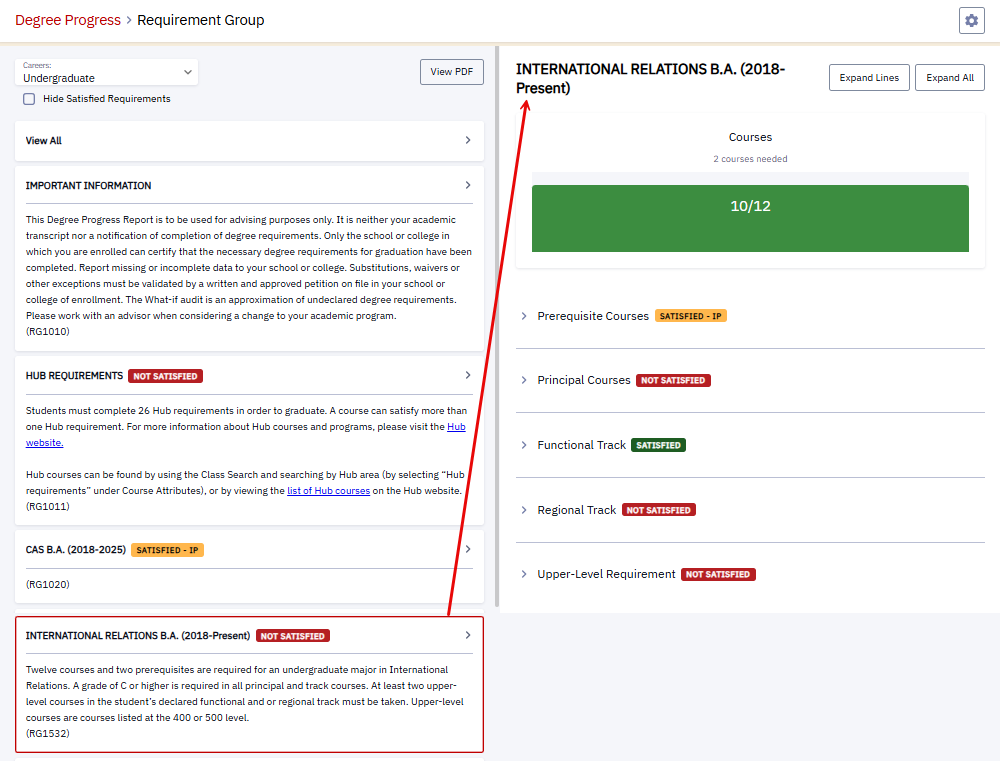
- Further down the page, either click on the View All section, or scroll and click on the desired requirement section, to view those specific requirements.
- Notice the “Satisfied” (green), “Satisfied – IP” (In Progress, yellow), or “Not Satisfied” (red) label listed with each requirement:
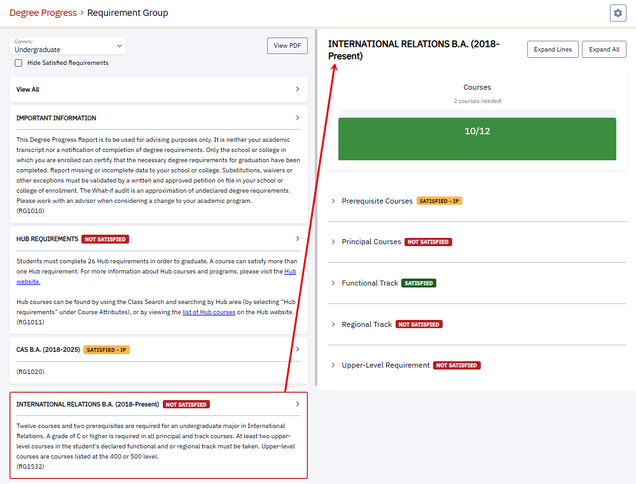
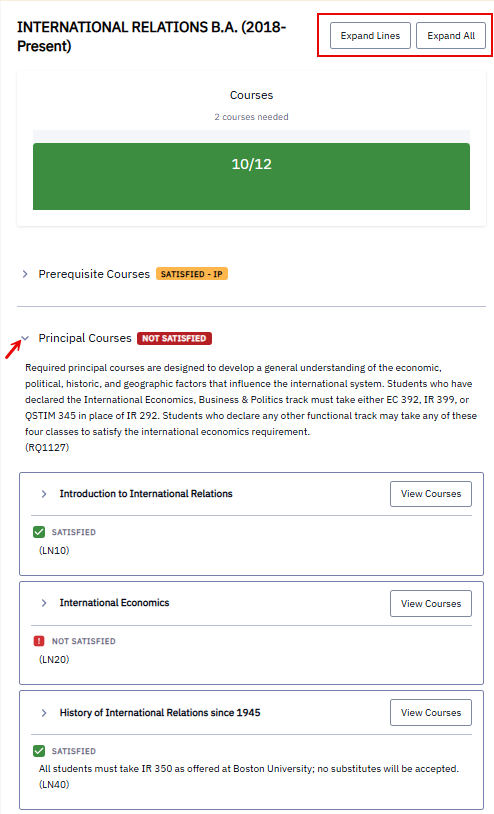
- See all requirement details for that requirement group by using the individual Expand Lines or Expand All buttons (click Collapse to minimize them) or click the arrow on a specific requirement group section to view those details.
- Upon selection, the course details will expand.
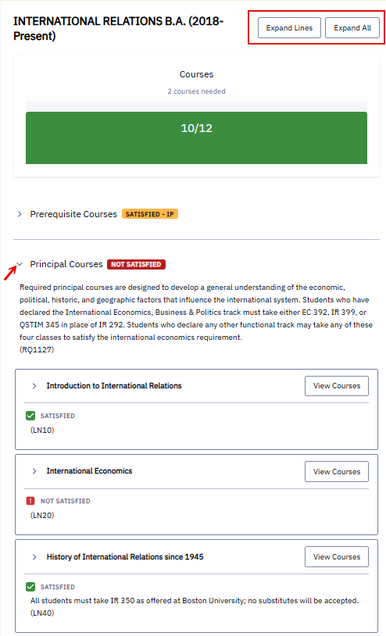
- Click on the View Courses button to view the courses that can be taken to satisfy the individual requirement.
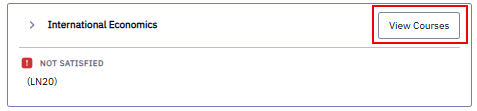
- The course information will display in a new window; click on the course to see additional details.
ENROLL OR ADD CLASSES TO SCHEDULE BUILDER & SHOPPING CART
- The course can be added to the Schedule Builder from this courses page. Click on the vertical dots to open the Additional Actions menu and select Add to Schedule Builder.
- Refer to the Schedule Builder resource for more information.

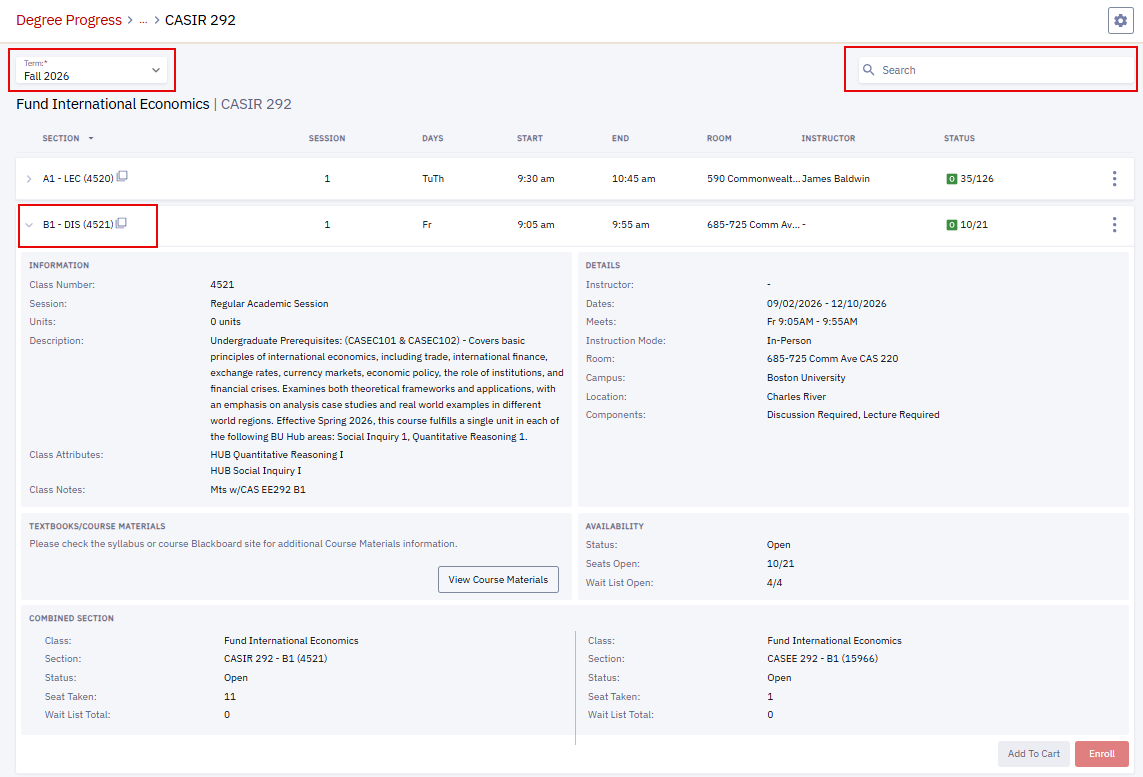
- Click on View Sections (see previous image) to open a display of section information; ensure the desired Term is selected.
- Use the Search field at the top of the page to filter the list.
TIP! Sections will only display if they have been scheduled.
- Click on the section to see additional details.
- To learn more about any symbols or icons that display next to a class or section, refer to the Class Status & Wait Lists resource.
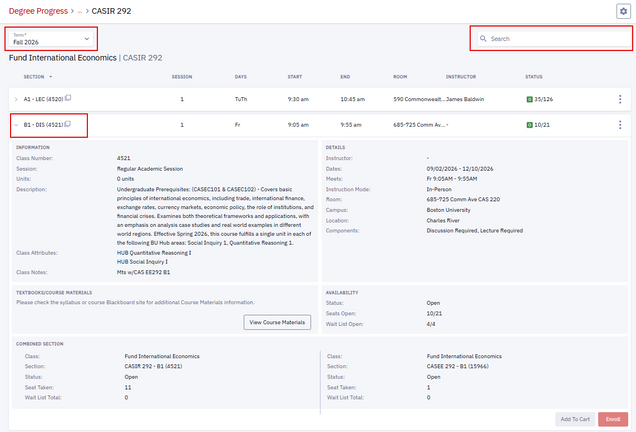
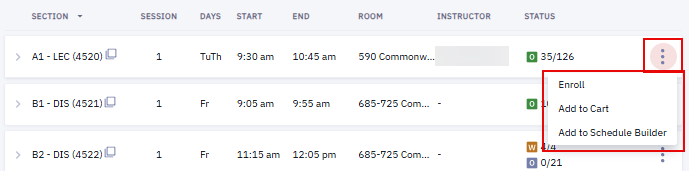
- For the next possible steps, click on the vertical dots to open the Additional Actions (three dots) menu:
- Select Enroll to register for the class.
- Use the Course List in the Academics menu or the Schedule to validate that enrollment was successful.
- Select Add to Cart to add the class to the Shopping Cart.
- Select Add to Schedule Builder to add the class to the Schedule Builder.
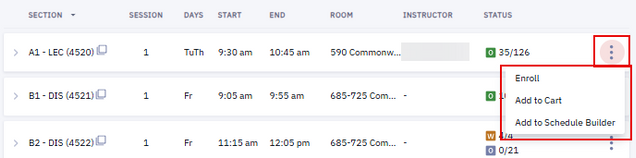
- Refer to the Shopping Cart and Schedule Builder resources for complete instructions for these features.
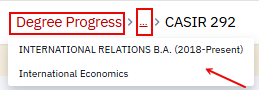 To move back to prior pages, use the navigation at the top of the page. Clicking the breadcrumbs allows for the selection of the specific Degree Progress page or click the Degree Progress link directly to go back to the main Degree Progress Report page.
What-If
The What-If Report is a tool that generates a hypothetical Degree Progress report for if the student were to change their Program/Plan.
- Navigate to Dashboard Menu > Academics > What-If.
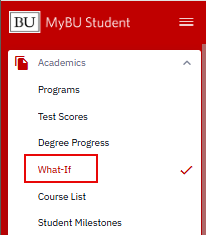
ⓘ NOTE: It’s possible there may be no What-If Reports that have been generated. If there are previous reports, they will be listed here with overview information.
- In the What-If window that opens, click Create Report.
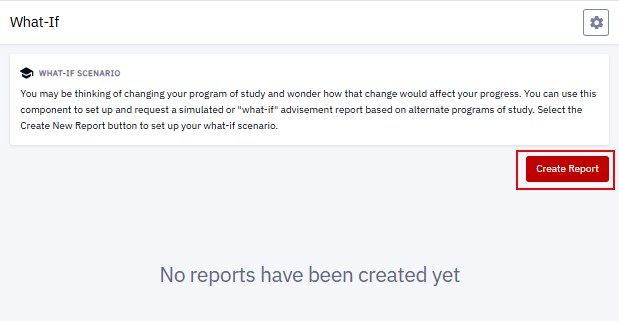
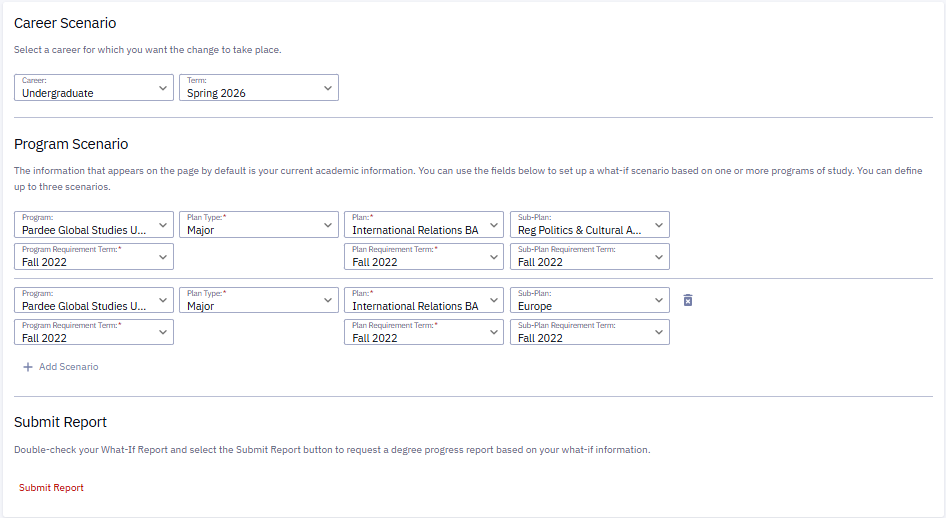
- In the window that opens, begin to enter the criteria for the desired What-If scenario. A Degree Progress Report will generate based on the details entered in these scenario fields. Steps for entering these details are explained in the next section.
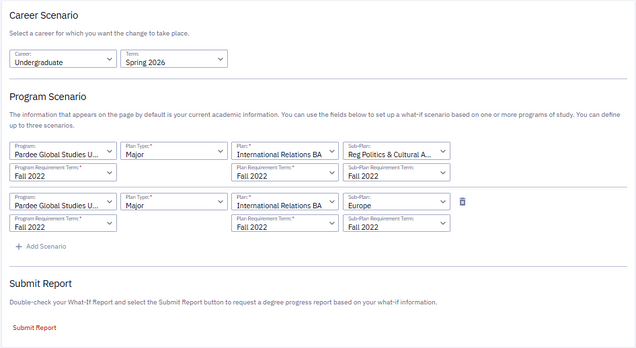
Career Scenario
- Select a Career for which you want the hypothetical change to take place.
- Select a Term for the What-If Career.
The program and plan information may default into the next set of fields.
PROGRAM SCENARIO
Using the Program Scenario fields creates a What-If report identifying what Degree Progress would look like if the student were to enter into a different program or plan.
TIP! Be sure to enter values in the required fields (indicated with an asterisk*).
- Select a Program.
- Select a Program Requirement Term.
- The Requirement Term is associated with the catalog year. It determines degree requirements or conditions that must be fulfilled by a student.
- Select a Plan Type.
- Select a Plan.
- Select a Sub-plan if applicable.
- Select a Plan Requirement Term. See 2a above for explanation of Requirement Term.
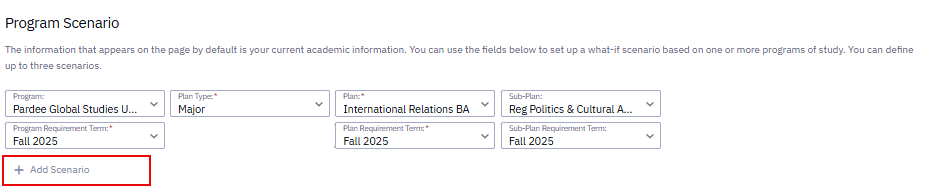
- Multiple scenarios can be added here. If desired, click the Add Scenario button.
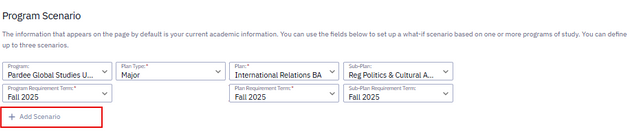
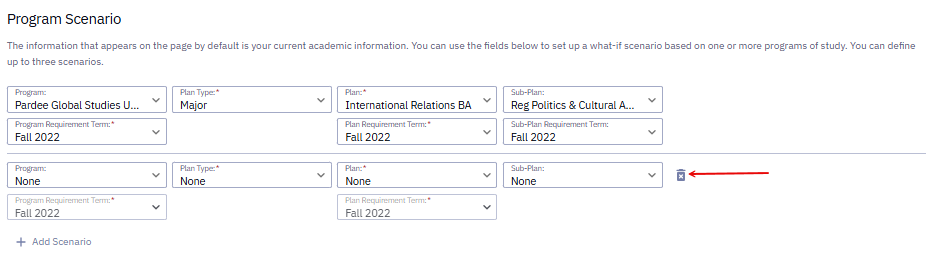
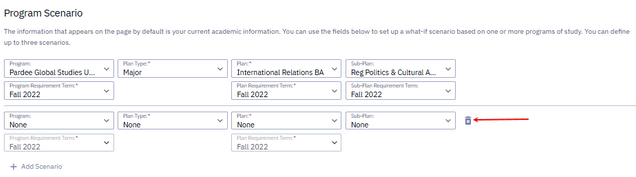
- Another set of Program, Plan, and Term fields will be inserted; fill in as appropriate.
ⓘ NOTE: If there is more than one What-If scenario, and it includes blank required fields, be sure to select the Trash/Delete icon. An error will be returned if the required fields are blank upon submission.
COMPLETING & REVIEWING A WHAT-IF REPORT
- When the desired information has been entered in the Program Scenario Section, click the Submit Report button. The Degree Progress Report will generate to reflect the What-If scenarios entered:
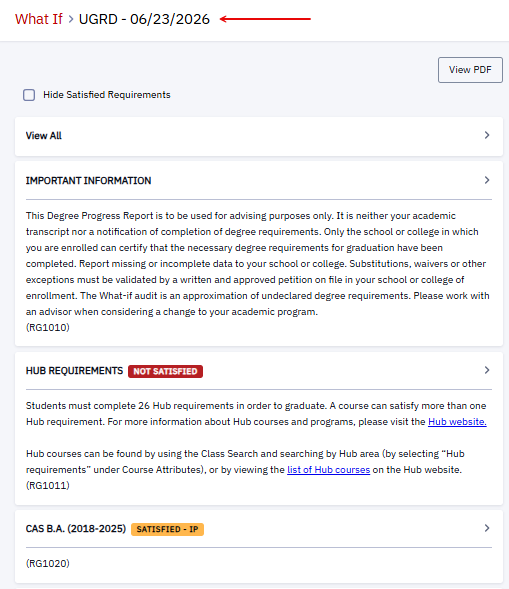
If multiple Program scenarios were entered in the What-If page, they will all be listed in the Degree Progress Report that generates. Proceed with reviewing the requirements, referring back to the Degree Progress section above for guidance on understanding Degree Progress details.
- To return to the What-If page, click the What-If link at the top of the Degree Progress report.

- The first page of the What-If function will display.
- More scenarios can be generated by clicking the Create Report button and following the steps above.
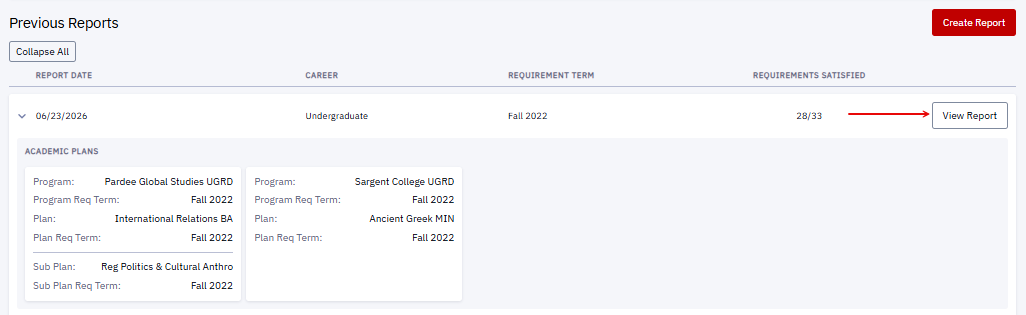
- To review the existing What-If reports, click the View Report button.

Page last updated June 2026. For a PDF copy, print this webpage as a PDF. Other resource formats can also be accessed via the relevant icons below.