Class Search
This resource covers the process of navigating to Class Search, exploring available classes, and enrolling directly from the Class Search results. The search processes are the same for students, staff, and faculty.


Introduction
Class Search in MyBU Student allows for easy exploration of offered classes for a term. This page provides the most robust set of criteria to view and narrow down available classes. This resource will outline how to filter and search for classes, various actions available with the search results, and how to enroll in a course directly from Class Search once the appropriate enrollment period opens.
For information on enrollment appointments or class permissions, please refer to:
⚠︎ Screen options and menus will vary by user; please note that displays may differ for you based on access that has been granted. All screens shown are for training purposes only.
CLASS SEARCH
NAVIGATION
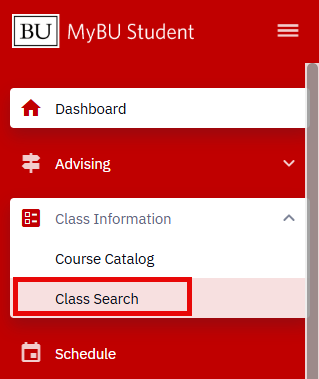
- Login to MyBU Student and access the Dashboard.
- Navigate to Class Information and then Class Search.
- The Class Search page will appear.
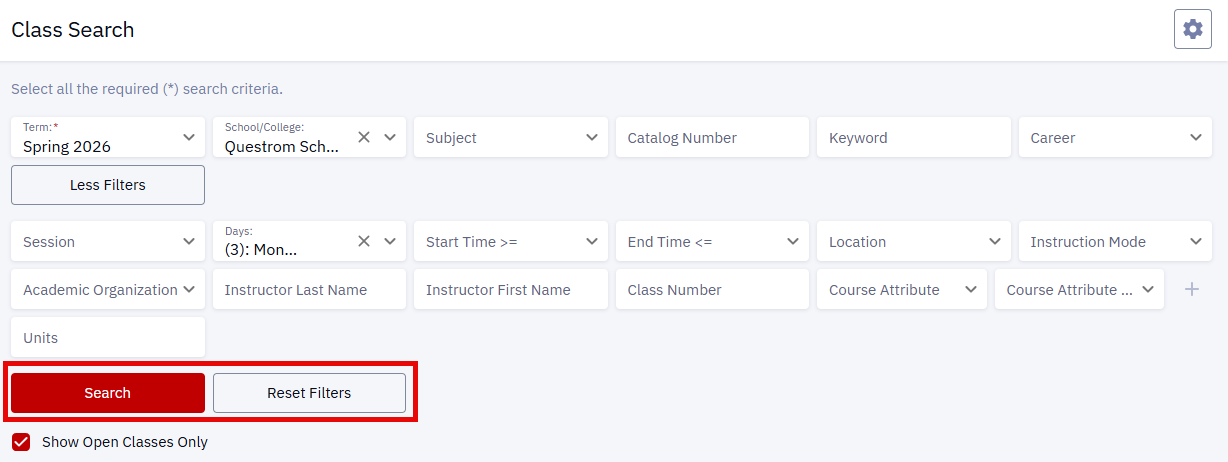
SEARCH FILTERS
- Enter any relevant Filters to narrow down the list of classes:
- Term (required): select the appropriate term (e.g., Fall 2024).
- School/College: click the drop-down menu to identify the School/College.
- Subject: click the drop-down menu to indicate the specific area of instruction (e.g., CASBI – Biology, ENGEK – Engineering Core). Available options are impacted by the Career field selection.
- Catalog Number: enter a number and subject code identifying a course (e.g., CASEN 141, CFAMU 632).
- Keyword: enter a descriptor (e.g., literature).
- Career: click the drop-down menu to select the Career category (e.g., Undergraduate, Graduate, Law, Medicine, Dental).
- Show Open Classes Only: check the box to only display classes that are not full.
- Click the More Filters button to review additional filters to further narrow down the list of classes:
- Session: click the drop-down menu to specify a session.
- Days: click the drop-down menu to select desired day(s) to include in the search.
- Start & End Times: click the drop-down menus to select preferred class start or end times.
- Location: click the drop-down menu to select a campus location.
- Instruction Mode: click the drop-down menu to specify In-Person or Online methods.
- Academic Organization: click the drop-down menu to select an organization (department or School/College).
- Instructor Last Name: enter a faculty last name.
- Instructor First Name: enter a faculty first name.
- Class Number: enter a specific number identifying a class.
- Course Attribute: click the drop-down menu to specify a type or category of course (e.g., Hub).
- Course Attribute Value: enter specific value for the Course Attribute type identified. Options here are determined by the previous selection in the Course Attribute field.
- Click the plus icon to enter multiple values.
- Units: enter the number of class units to search.
- Click Search when ready to browse classes.
- Click Reset Filters to remove the criteria previously entered.

USING SEARCH RESULTS
- After completing the steps in the Search Criteria Filters section above, a list of available classes will appear based on the filter criteria entered.
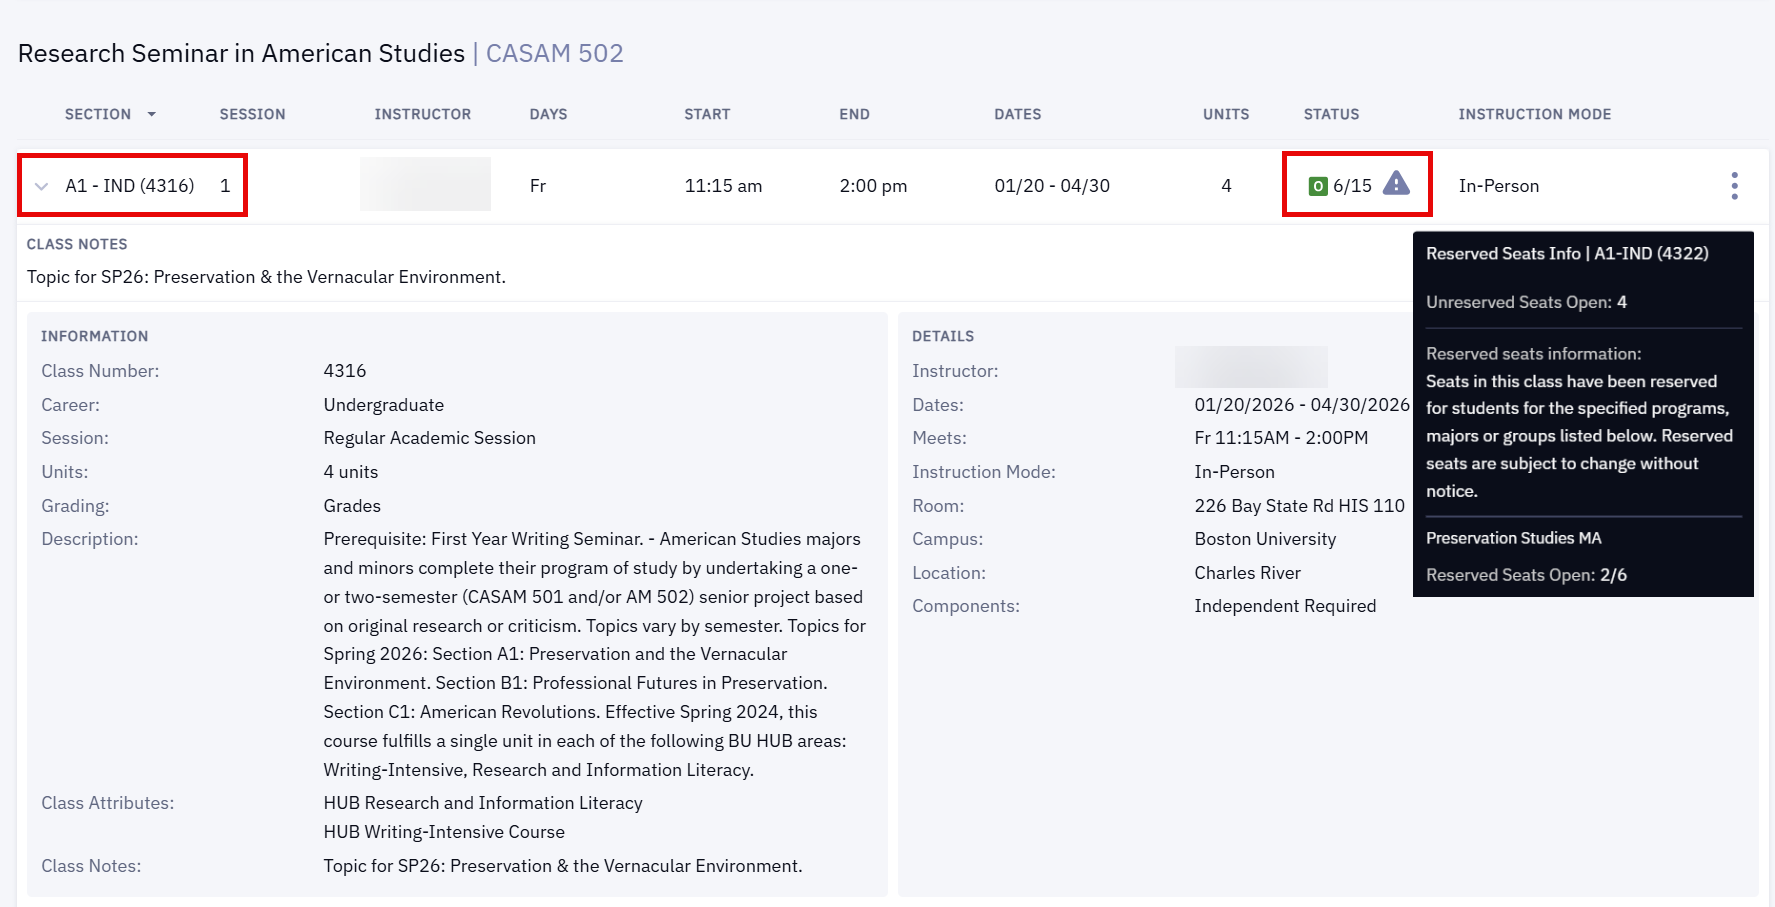
- Section, Instructor, Days, Start & End Times, Units, Enrollment Number Status, and Instruction Mode will display with each section of the class.
- Status: the green “O” icon symbolizes that the class has available seats. It will also list the number of available seats left in the class out of the total allowable capacity. A gray “!” icon indicates an enrollment warning. Hover over the icon to see information that could impact the ability to enroll, as in the “Reserved Seats Info” pop-up in the image below.
- Click the drop-down on the Section Number, as shown in the image below, to view additional details:
- Information: Class Number, Career, Session, Units, Grading Basis, Full Description.
- Details: Instructor, Start & End Dates, Meet Times, Instruction Mode, Room, Campus, Location, Components.

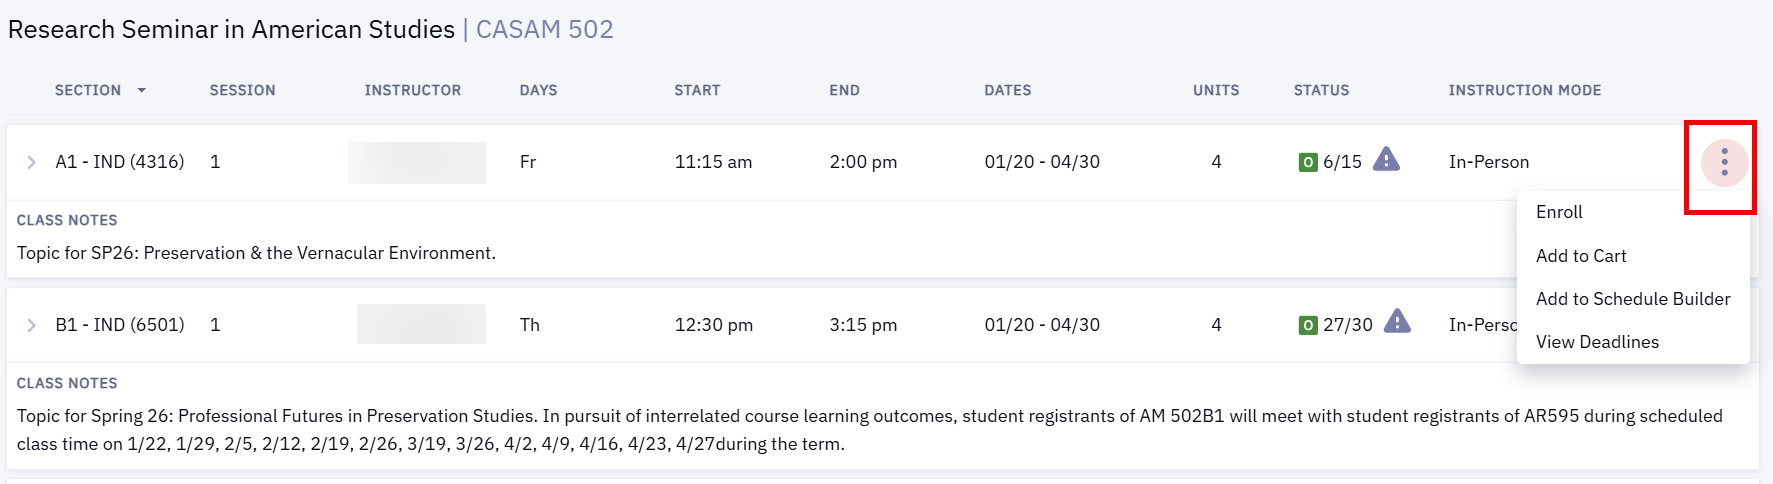
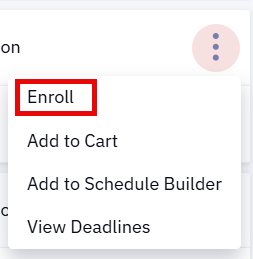
- Click the three dots to view additional actions for a listed section.
-
Continue to the ‘Add Course to Shopping Cart & Schedule Builder’ and ‘Enroll from Class Search’ sections below for next steps in those actions.
- View Deadlines: in addition to class details, the Academic Calendar Deadlines such as drop, cancel, and withdrawal dates will display.

ⓘ NOTE: The current period in the academic calendar will determine which options are available in the three dots menu. For example, if registration is not yet open, Enroll will not appear. If the appropriate registration period has opened, then Enroll will display.
For more information about assigned enrollment appointment periods, refer to the ‘Viewing Enrollment Dates’ section above, and visit the BU Registrar website.
ADD TO SHOPPING CART & SCHEDULE BUILDER
- Click the three dots for a menu of additional actions for a listed section that are available for the current period in the academic calendar.
- Click Add to Cart to add the selected class to the Shopping Cart.
- In the top right corner of the page, a confirmation will appear if the class was successfully added. Also notice a red shopping cart icon will display next to the class section name.
- Click Add to Schedule Builder to add the selected class to the Schedule Builder.
- In the top right corner of the page, a confirmation will appear if the class was successfully added.
For more information on using the Shopping Cart or Schedule Builder features, please visit Preparing for Registration or Schedule Builder.
ENROLL FROM CLASS SEARCH
- Click the three dots for a menu of additional actions for a listed section. If the assigned enrollment period has opened, registration can occur directly from this menu by selecting Enroll.
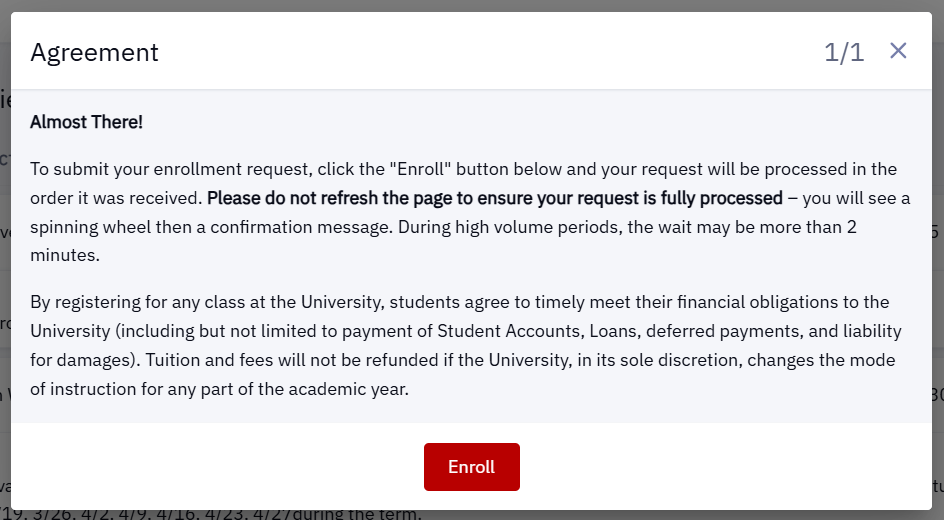
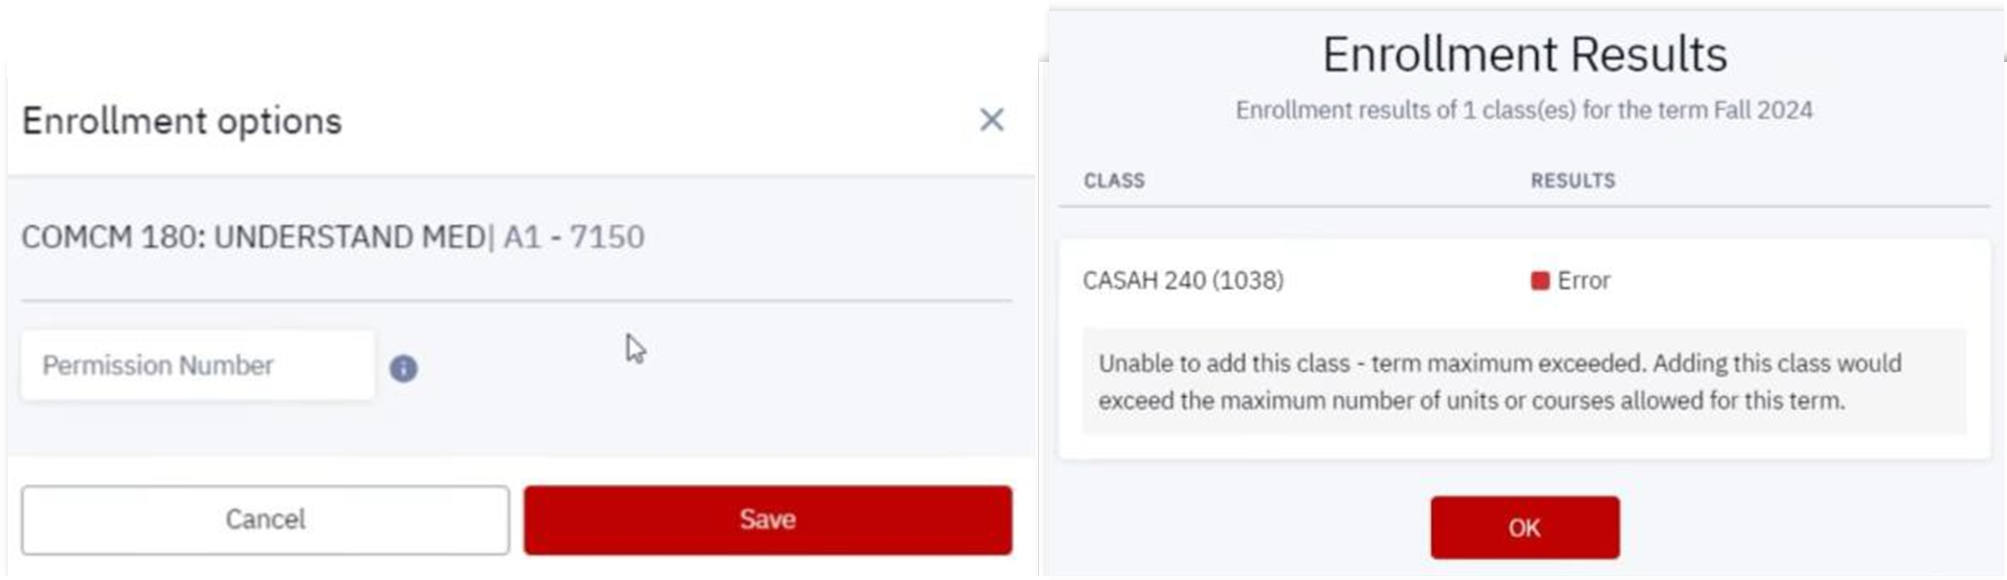
- Review the Agreement pop-up and click Enroll when ready to enroll in the course.

- Validation checks will provide alert messages for any possible conflicts that need to be resolved (i.e., the class requires special permission, or the class registration limit has been reached for this term, illustrated in the examples below):

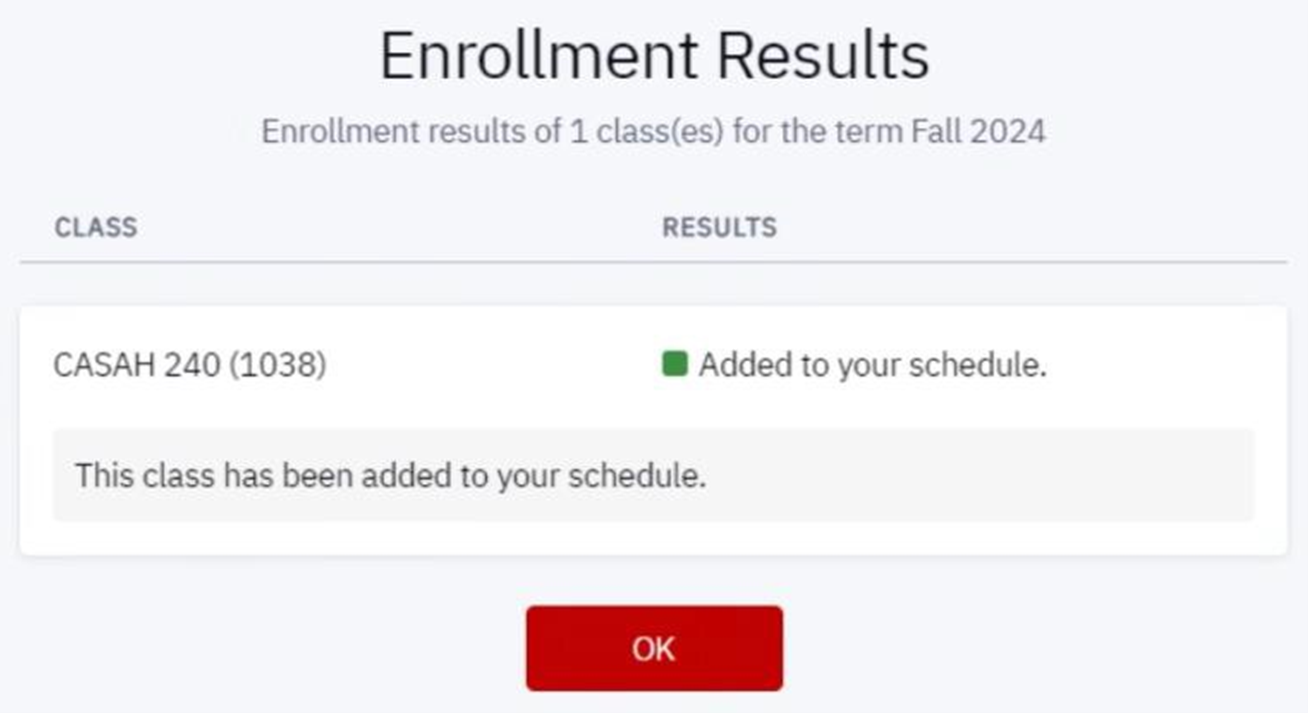
- If there are no conflicts or issues, a message will appear confirming enrollment in the selected class.

For more information on potential conflicts and messages that could be encountered, please visit Enrollment Messages for Conflicts & Issues.
CONFIRMING ENROLLMENT WITH A SCHEDULE
- In the MyBU Student Dashboard, navigate to the menu and select Schedule.
- A Calendar View of the current schedule will open.
- Choose preferred Time Period view: Month, Week, or Day.
- Click directly on a class to see more details.
- Choose to display enrolled classes, waitlisted classes, or both by selecting/deselecting checkboxes.
- Click Download to save a digital file.
- Click the printer icon to Print the schedule.

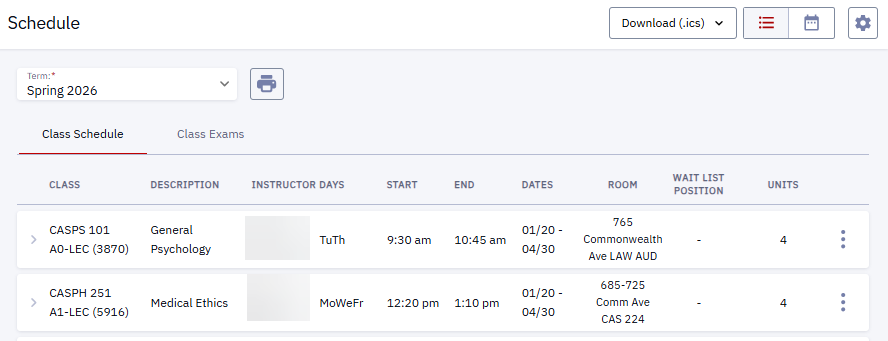
- Toggle the view icons in the top right of the window to switch between Calender view and List view. In List view:
- Click on a class to expand to see more details.
- Download or Print the Schedule from the List view.

SUPPORTING RESOURCES
The following links provide further details about concepts and actions explained on this page:
Page last updated March 2026. For a PDF copy, print this webpage as a PDF. Other resource formats can also be accessed via the relevant icons below.