This information covers the process of navigating to and viewing class rosters in MyBU Student. It explains the various elements and features available to instructors on the Class Roster page.
Introduction
The Class Roster is an interactive list of all the students in a class section. Instructors can use the Class Roster to view which students are in each section of their class(es), access academic and contact information about those students, and send emails to them. The Class Roster can be downloaded or printed and is also accessible when using MyBU Student from a mobile device.
For a comprehensive downloadable guide, please click the PDF icon above. Other resource formats can also be accessed via the relevant icons.
Note that the Class Roster is different from the Grade Roster. The Grade Roster is used specifically for entering and submitting grades and is not included in Class Roster resources.
⚠︎ Screen options and menus will vary by user; please note that displays may differ for you based on access that has been granted. All screens shown are for training purposes only.
Access & Navigation
Instructor access is assigned as part of each semester’s class scheduling process.
If Teaching Assistants need access to the Class Roster in MyBU Student, they need to be added to the Schedule of Classes accordingly. Contact department schedulers for assistance.
If a class isn’t displaying for an Instructor as expected, check with department schedulers to confirm if the appropriate Instructors are added to the class in the Schedule of Classes pages.
Upon landing on the Dashboard, navigate to Class Roster.
The Class Roster landing page will appear.
Class Roster Landing Page
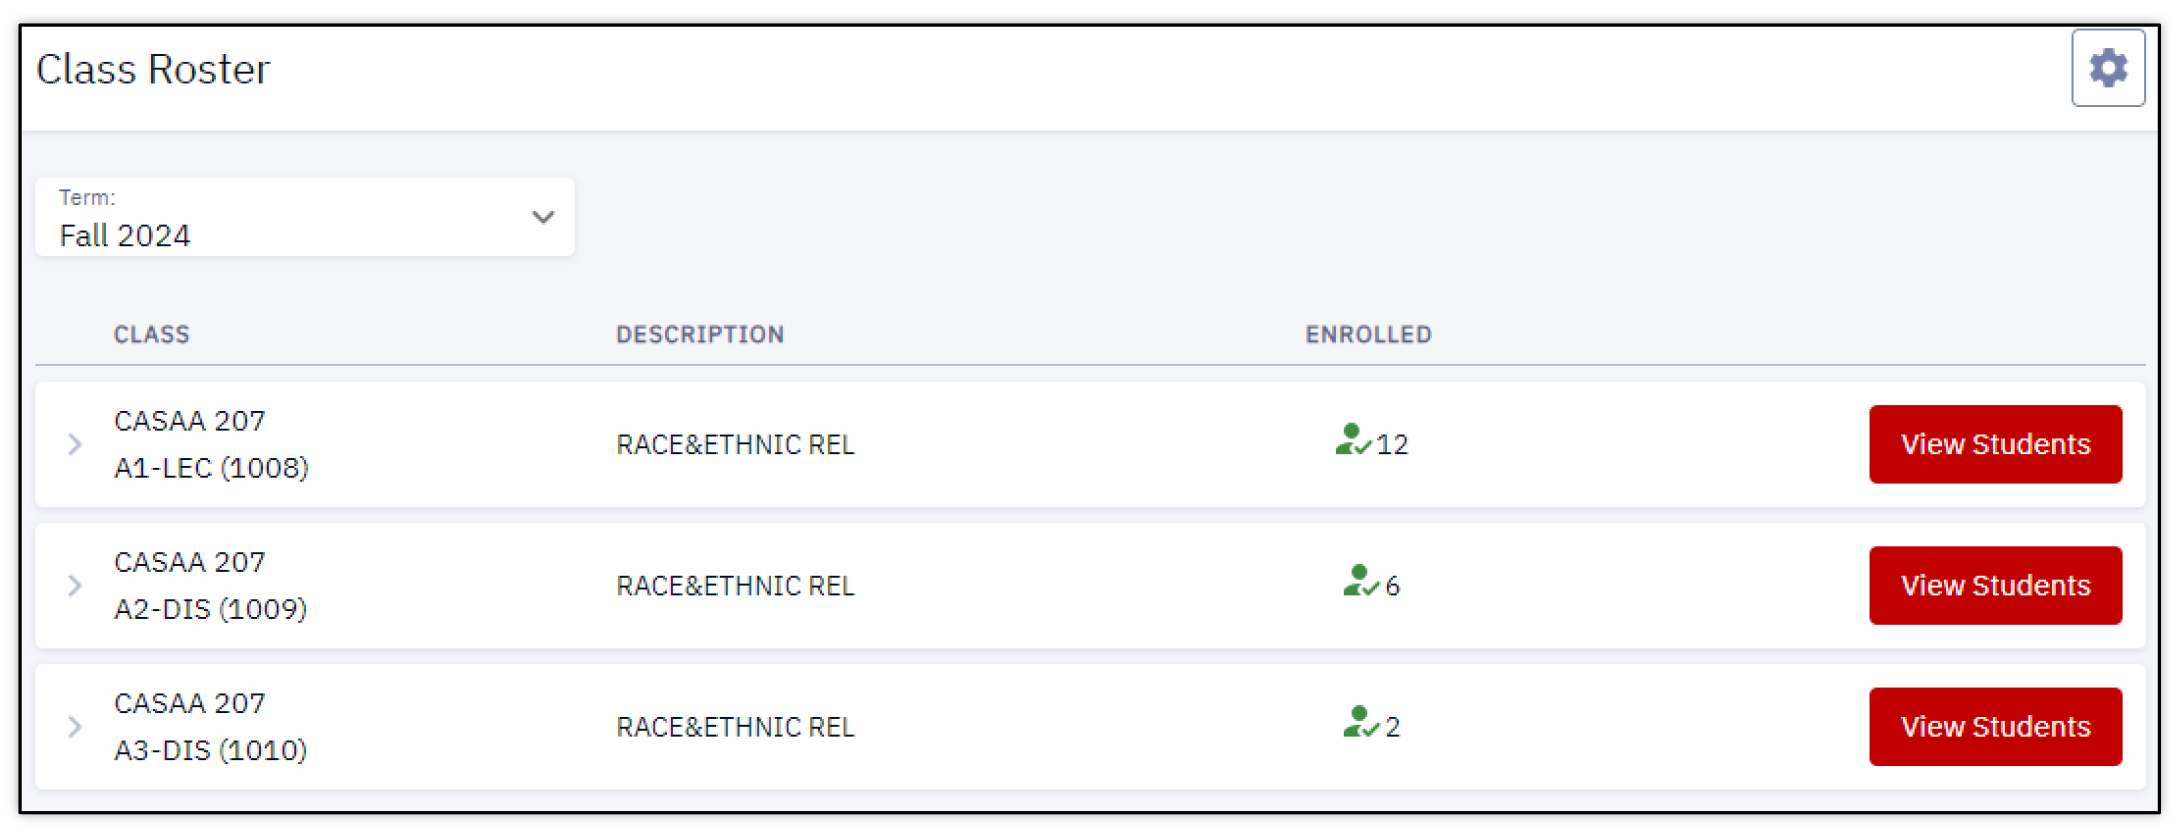
A list of all assigned classes is displayed by term and includes the following the information:
Term: defaults to the current or upcoming term. Choose from the dropdown menu to view classes for a different term.
Class: lists each assigned class for the given term by Catalog Number (e.g., CASAA 207), followed by the Section Number (e.g., A3), Course Component (e.g., DIS, indicating discussion section), with each class’s unique Class Number in parenthesis for each class. Refer to the Class Numbers resource for an explainer on these identifiers.
Description: displays an abbreviated version of the course title.
Enrolled: displays how many students are currently enrolled in the class.
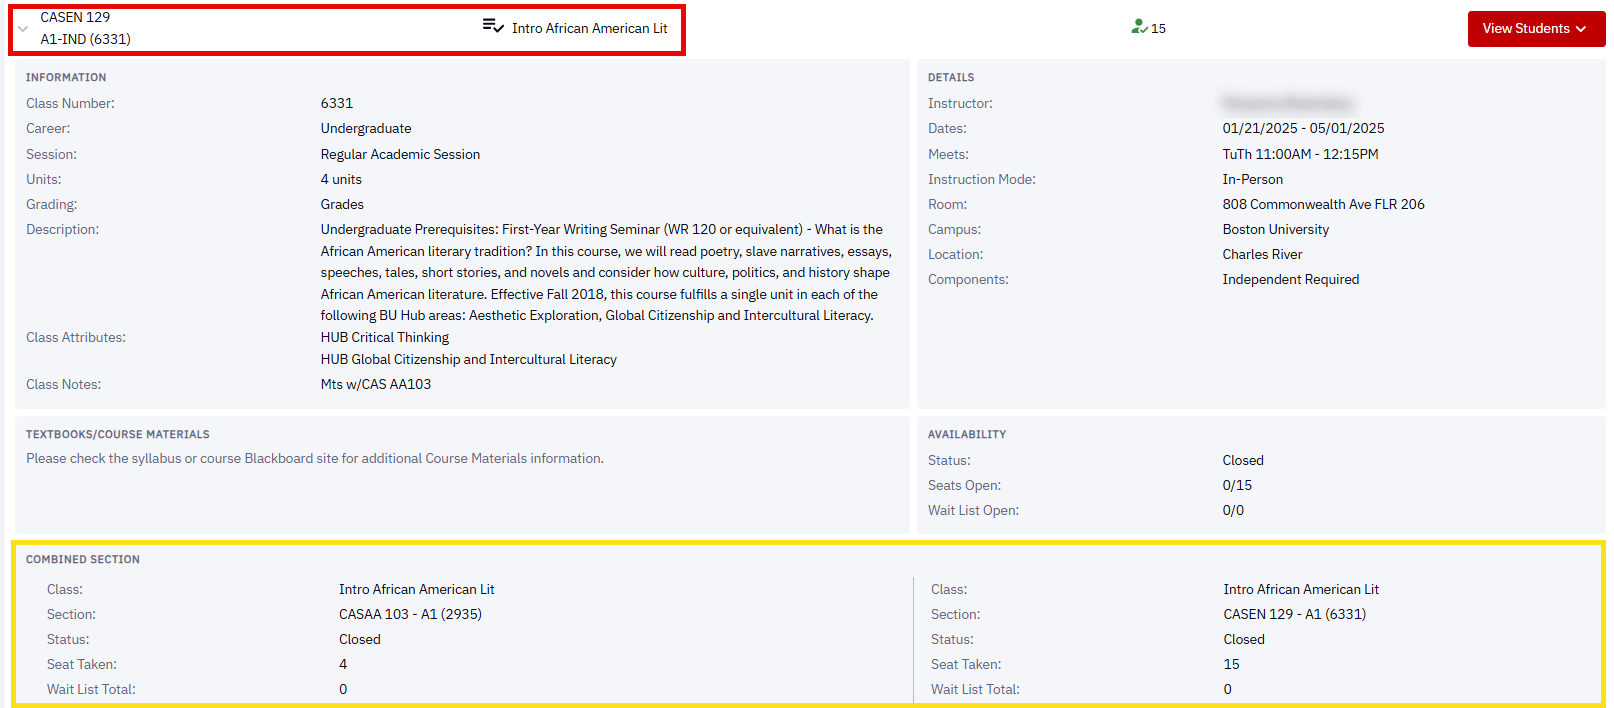
Click the dropdown arrow on a class to view additional details:
Information: Class Number, Associated Career, Session, Units, Grading Basis, Full Description, Class Attributes (e.g., HUB requirements), Class Notes
Textbooks/Course Materials: Lists assigned texts with a link to the BU Bookstore
Availability: Status (e.g., Open, Closed), Number of Seats Open, Number of Students on Wait List (if applicable).
Classes with combined sections (i.e., cross-listed classes) will also display the combined section details, as shown in the screenshot below:
(To zoom in on the above, click on the screenshot.)
Select the View Students button for a particular class to navigate to its roster.
For classes with combined sections (i.e., cross-listed classes), there is an option to view the roster for the selected section only, or to view all the students across cross-listed sections.
Class Roster
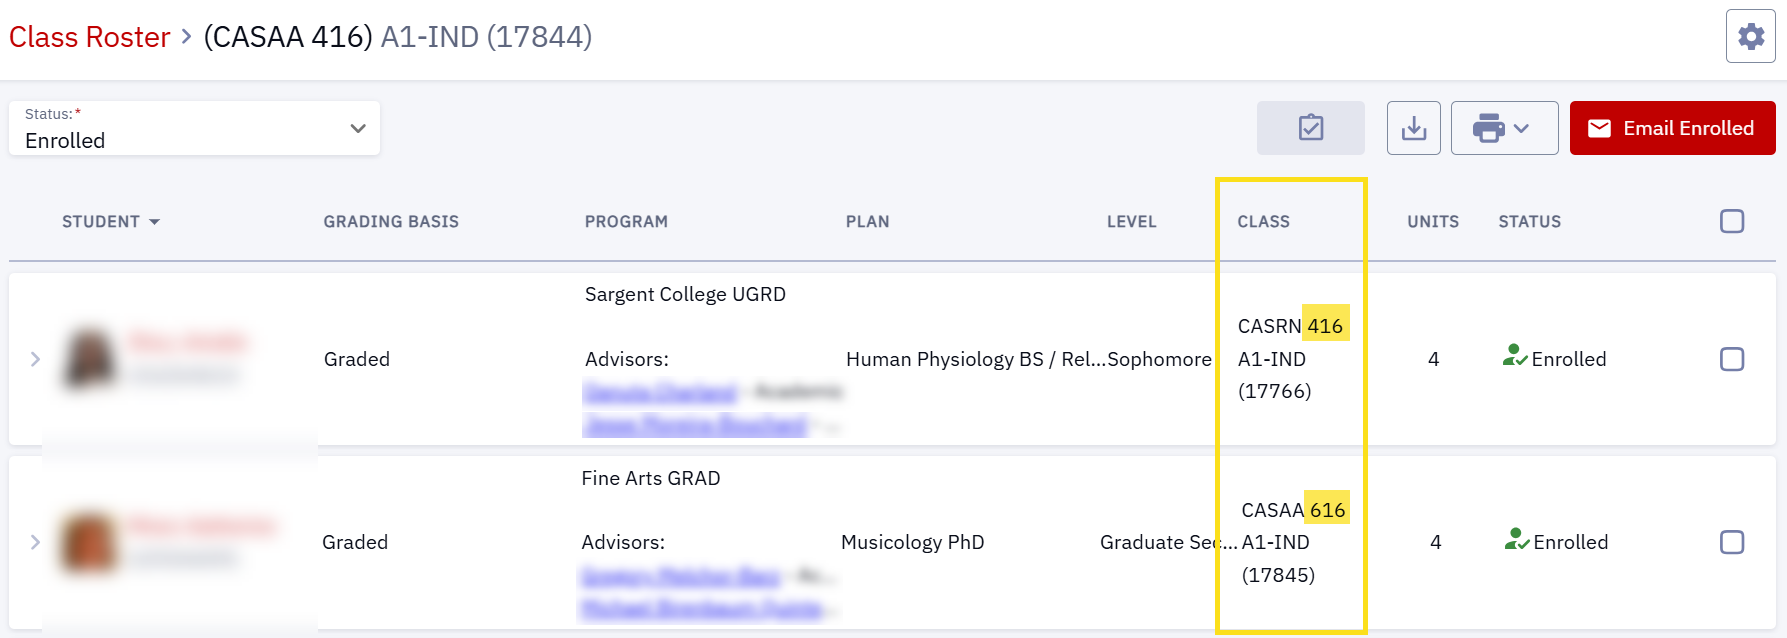
A list of students currently enrolled in the class will be displayed. Refer to the numbers in the image below to learn more about the primary fields displayed:
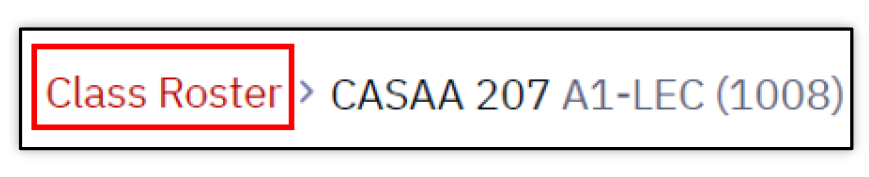
Navigation: the Catalog Number, Section Number, Class Component and Class Number display the specifics of which class’s roster is displayed.
To go back to the Class Roster landing page, navigate back by clicking the Class Roster link in the top left:
Status: indicates the enrollment status of the students displayed. This will default to “Enrolled”. Choose from the dropdown menu to view a list of students with other statuses: All, Enrolled, Waitlisted, or Dropped, or Withdrawn.
Student: lists all the students that match the enrollment status selected at the top of the screen; defaults alphabetically by last name, with each student’s UID listed below their name (more on student information below).
Grading Basis: displays the student’s grading basis for the class. Most students will have the Grading Basis that has been defined for the class in the Curriculum Scheduling pages. Students may also display a different value; for example, if the student has opted to take the class as an audit, this will be indicated here.
Program: student’s Academic Program, indicating the primary school/college of their enrollment and their Academic Career (e.g., undergraduate, graduate, law, medicine, etc.)
Plan: student’s Academic Plan is their area of study. In the Class Roster list view, the student’s current plan(s) will be visible in this column (most commonly their major), but any sub-plans (such as minors or concentrations) will not be visible.
Level: student’s Academic Level, indicating the specific stage of the student’s Term progression in their BU Degree Program. This reflects the student’s Level as of the beginning of the current Term. Classes currently in progress this Term or any enrolled classes in future Terms will not yet be reflected (e.g., First Year).
Units: number of academic units (sometimes referred to as credits) the student is set to receive for this class.
Student Status: indicates the student’s enrollment status in the class. The date the status was applied will display in parenthesis (e.g., the date they added or dropped the class).
If viewing a combined roster for a cross-listed class, the roster will also list which section each student is enrolled in.
Tip! The roster list can be rearranged if needed by sorting by different column values. Click a column header to sort the roster by the values in that column in ascending or descending order.
STUDENT INFORMATION
In addition to the information displayed on the roster and outlined in the Class Roster section above, a student’s phone number and pronouns can be viewed from the Class Roster by clicking on a given student’s row to expand:
Clicking on the student’s name will open an email to that student. Refer to the Class Roster Actions section of this resource for more information about how to email students from the Class Roster.
ⓘ Note: The email feature will open whatever email service is the default on the device being used.
Class Roster Actions
Download: Click the download icon at the top of the screen to download a CSV file of the roster. Some additional fields may be available to view in this download, such as student email address.
TIP! The export will follow the sort order applied in the user interface, so the downloaded CSV or print file will match how the roster is currently displayed on the screen. The sort order of columns can be modified by clicking on a column header.
Print: Click the printer icon to send to a printer or print as a PDF. There are two options to print the Class Roster:
Print Summaries: Includes the Class Roster as initially viewed, without expanding the details of any students.
Print Detailed: Includes the expanded details for each student.
For an alternative display of student pictures, review the Instructor Photo Roster steps from the Faculty Queries resource.
Email Students: Click the Email Enrolled button to open a blank email with all currently enrolled students already populated in the “To” field.
If a Status other than “Enrolled” is selected for the roster view, the email button will adjust accordingly. For example:
Email Selected Students: Select one or more students from the roster to email. Click the checkbox on the applicable student(s) row(s), click the Email button, and choose “Selected” from the dropdown.
ⓘ NOTE: The email feature will open whatever email service is the default on the device being used.
Action Items: Select the student name(s) from the roster, then click the checkbox icon to open a Create Action Item window. Provide the required Action Item Type and Comment, then press Create to submit the Action Item to the appropriate advisor.
Faculty Queries: provides steps for the Instructor Photo Roster report.
Last updated December 2025. To download a PDF copy of this resource, print this webpage as a PDF. Other resource formats can also be accessed via the relevant icons below.