Advising Student Lists
This resource provides information on the Student Lists function that supports advising responsibilities. Student Lists allow advisors to group together student advisee populations to be used for messaging and tracking.

Introduction
Student List processes are for advisors and those assigned advisor functionality and are accessed from the Advisees & Student Lookup page. They function as an organizational tool and will be unique to the advisor.
Examples:
- Graduating seniors who need review
- Potential orientation leaders
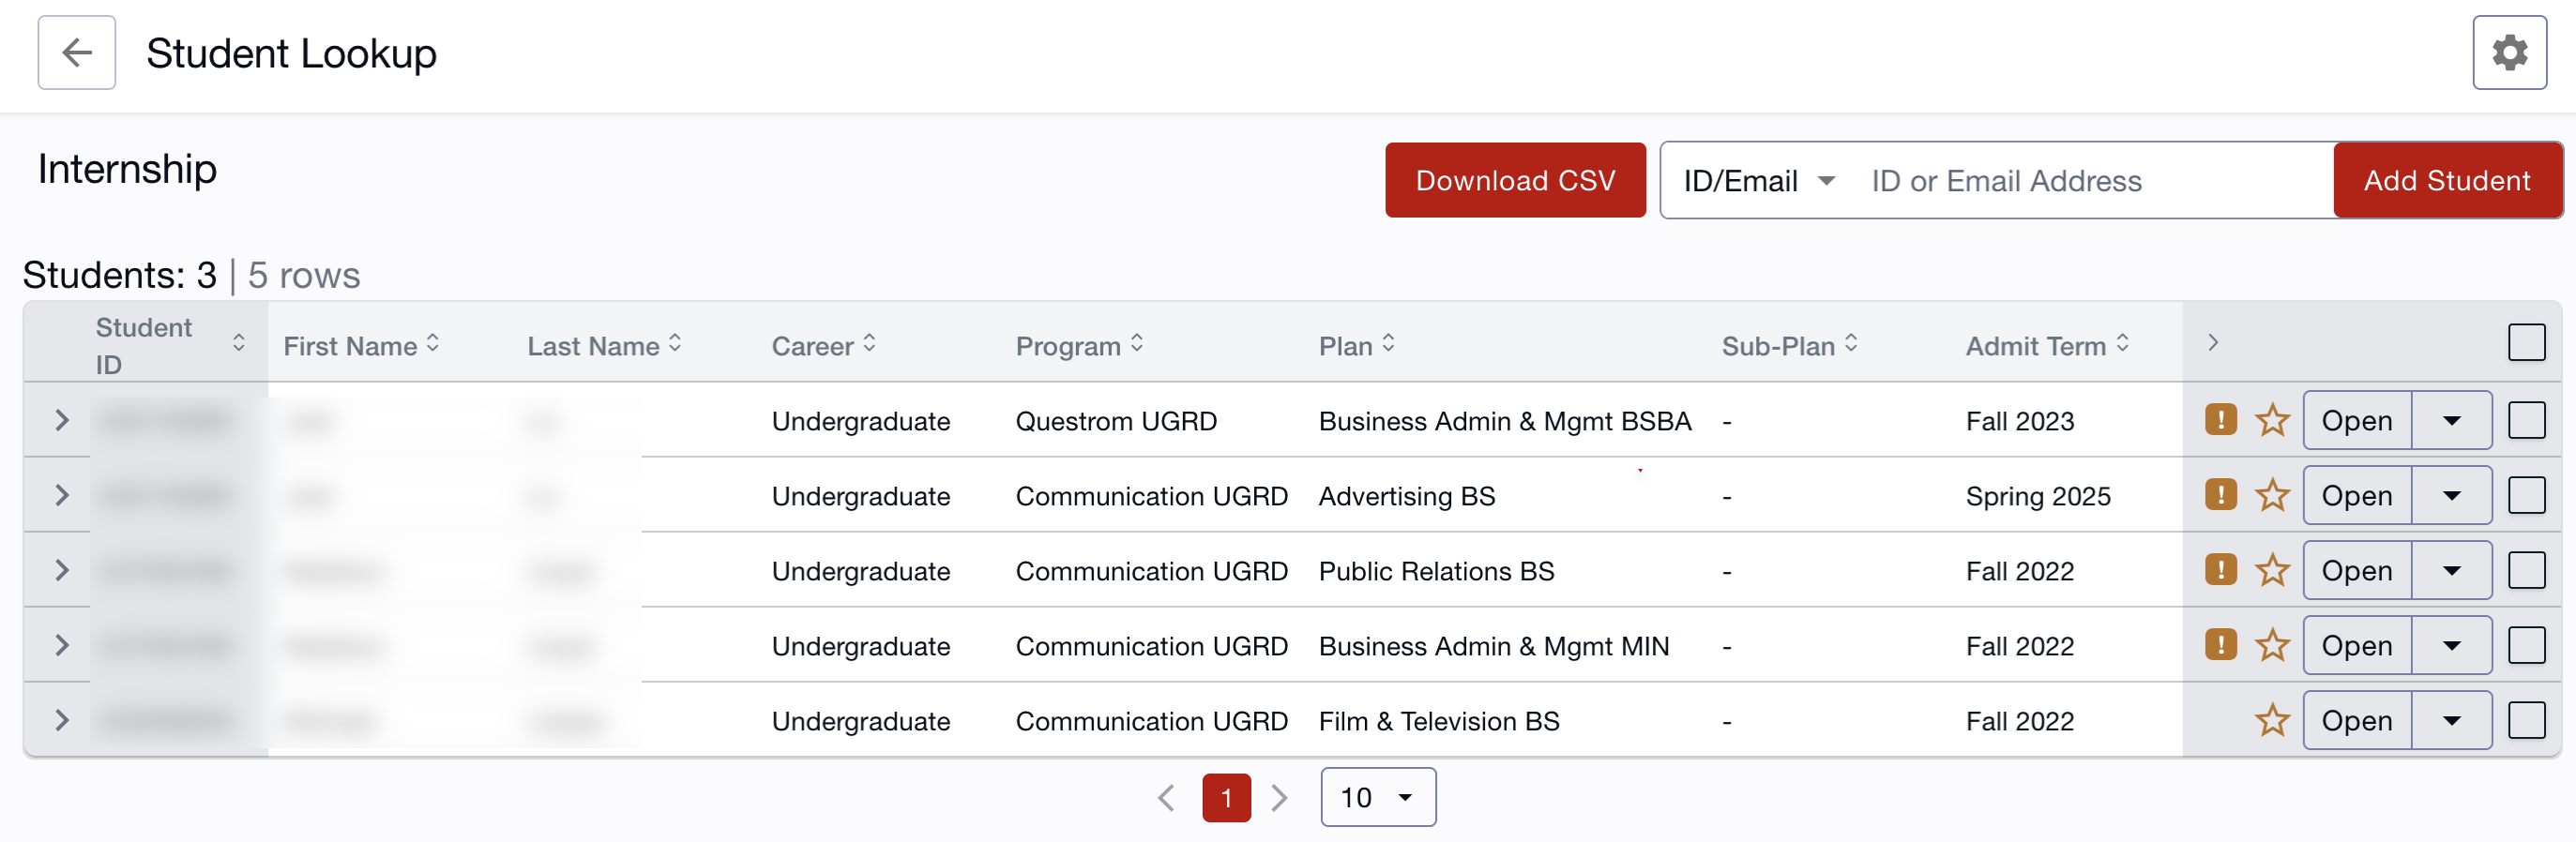
- Baroque ensemble fall 2024
- Pre-clinical cardiologists
- Students interested in summer internships, etc.
Students cannot see lists they are associated to. Security does vary amongst different types of advisors. Please be aware that processes and pages identified here may differ from your views.
⚠︎ Screen options and menus will vary by user; please note that displays may differ for you based on access that has been granted.
All screens shown are for training purposes only.
View, Create, & Edit Student Lists
VIEW LISTS
- Navigation: Advisor > Advisee & Student Lookup
- To view existing Lists or create a new Student List, click the Student Lists button at the top of the Advisees & Student Lookup page.
- If there are existing lists, the count will display with the button.

The Student Lists page will launch displaying all created lists and the number of students that have been added to each.

CREATE NEW LIST
To create a new Student List from this page:
- Click the Create Student List button.
- The Create Student List window will display. Enter the list name and click Create.
- If successful, a confirmation message will display in the top right of the page and the new list will appear on the Student List page.
EDIT OR DELETE LIST
- To edit the name of a list, click the 3 dots menu and select Edit.

- An Edit Student List Name field will display allowing for the edit. Click Update when finished.
- To remove the Student List entirely, click the 3 dots menu and select Delete.
- If successful, a confirmation message will appear in the top right.
Add Students to List
ADDING AN INDIVIDUAL ADVISEE
Process 1:
- On the Student List page, click the View button.
- In the field, enter the student ID/Email or Name and click the Add Student button.
Process 2:
- On the Advisee & Student Lookup page, click the down arrow button on the far right of the student line.
- Select Add to Student List.

- Select an existing Student List from the drop-down field (or create a new one).
Process 3:
- On the Advisee & Student Lookup page, click Open on the needed student. The Student Details page displays.
- Click the 3 dots menu and select Add to Student List.

- Select an existing Student List from the drop-down field (or create a new one).
ADDING MULTIPLE ADVISEES
- On the Advisee & Student Lookup page, select multiple checkboxes and click the Actions button that displays next to the multi-select checkbox above the student list.
- Select Add to Student List.

Whether adding an individual or multiple advisees, the Add to Student List window will open.
Select the existing Student List that the indicated students are to be added to. If the desired list does not exist, select +Create New Student List.

If +Create New is selected, a field will appear where the list name can be entered. Click Add.
Manage Students in Student Lists
VIEW STUDENTS IN A LIST
- From the Advisee & Student Lookup page, navigate to Student Lists.
- To view students in a list, click the View button on that list.
The students associated to that list will display and is the same view of information as the Advisee & Student Lookup page: UID, Name, Career, Programs/Plans, Admit Term, and Expected Graduation Term.
- Remember that a student may be listed more than once if there are multiple
Program/Plans associated to them.
- There may only be one student added to the list, but multiple rows.
- Click the left ‘>’ arrow on a student to expand for more program/plan details and to see the primary.

- Search using the ID/Email field and click the Add Student button to add more students to this list. Refer to Process 1 in the Add Student to List section above for more instructions.
REMOVE STUDENT(S) FROM LIST
- To remove an individual student from the list, click the arrow next to the Open button for the menu. Select Remove from Student List.

- To remove multiple students from the list, check the box on the students and the Actions button will appear next to the multi-select checkbox above the student list.
- Click the Actions button and select Remove from Student List.

- If successful, a confirmation message will appear in the top right of the page.
Similar actions to the Advisee & Student Lookup page can also be performed from the Student List page.
To return to Advisees or all Student Lists, click on the back arrow link at the top of the page, next to ‘Student Lookup’ title to return to list of compiled students.

Page last updated September 2025. To download a PDF copy of this resource, print this webpage as a PDF.