Advising Appointments: Setup Schedule
For appointment scheduling to be available within MyBU Student, advisors must set up their availability. The process for completing that setup is provided here.
![]()
![]()
Introduction
This resource walks through the steps for advisors to define their schedule availability and sync their calendar in the MyBU Student User Settings page. Once this process is completed, students and advisors can book and manage appointments.
- Instructions for advisors on how to schedule an appointment can be found here.
- Information about managing existing appointments can be found here.
PREREQUISITE: For advisors to setup their availability, they must be associated with a department that has configured Advising Appointments in MyBU Student.
⚠︎ Screen options and menus will vary by user; please note that displays may differ for you based on access that has been granted.
All screens shown are for training purposes only.
Getting Started
Advisor availability must be defined before appointments can be scheduled. In addition to the appropriate department configuration, this is also a prerequisite for either advisors or students to be able to book an  appointment. The advisor setup process follows these major steps:
- Sync Calendar
- Configure Locations
- Define Schedule Availability
To begin setup, navigate to Advisor > User Settings.
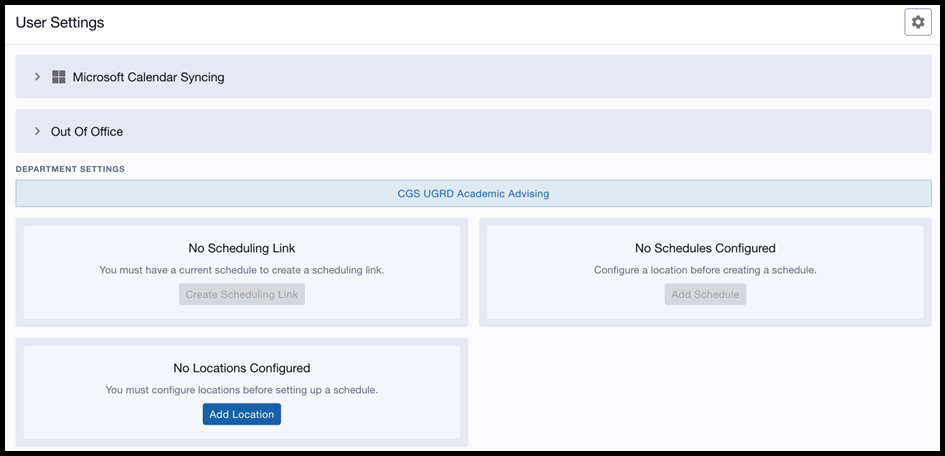
The User Settings page is used to sync with the advisor’s Microsoft Calendar, configure appointment locations, and define the overall parameters of their availability. Once these elements have been set up, a Scheduling Link will be created that the advisor can share with students to book appointments. Advisors can continue to modify the settings as needed, including setting up Out of Office settings. Refer to the sections below for detailed instructions on each of these elements.
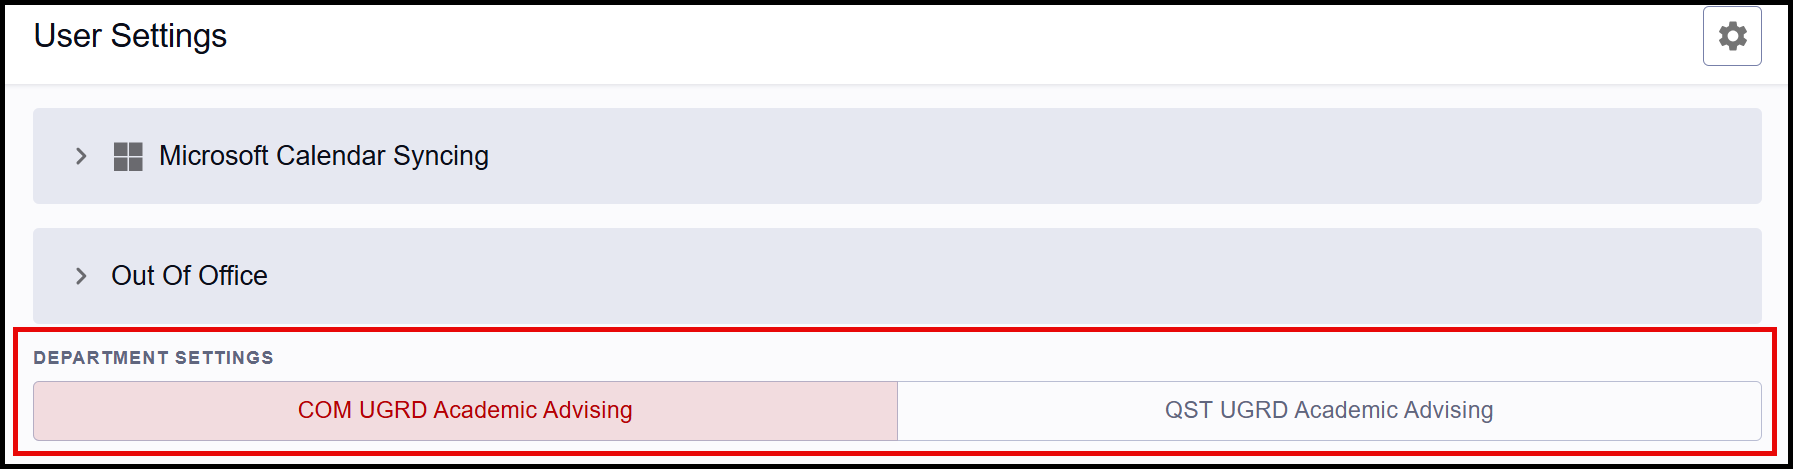
ⓘ NOTE: If an advisor has been set up in multiple departments in MyBU Student, each will be listed. Schedules need to be defined for each department where appointments are to be scheduled. Click on a department’s tab to enter appropriate availability.
If an advisor has not been set up in the system department settings, then a message will display indicating security is not configured. Please contact the relevant department with questions.
Sync Calendar
Adding the external (Outlook/Office 365) calendar is an important step to setting up the advisor’s schedule. This integration automatically marks unavailable times from the external calendar as unavailable in the appointment scheduling interface, ensuring accurate availability is shown to students. Advisors retain the ability to book appointments during their unavailable times, if they choose. Appointments booked through MyBU Student will also be added to the external Outlook calendar.
- The calendar only needs to be synced once even if an advisor is a member of multiple departments.
- TIP! Because of the two-way calendar sync, it is recommended to add general day and time blocks when defining the schedule in User Settings, rather than specific times. Then, more specific “unavailable” time blocks can be maintained using the Outlook calendar.
Instructions:
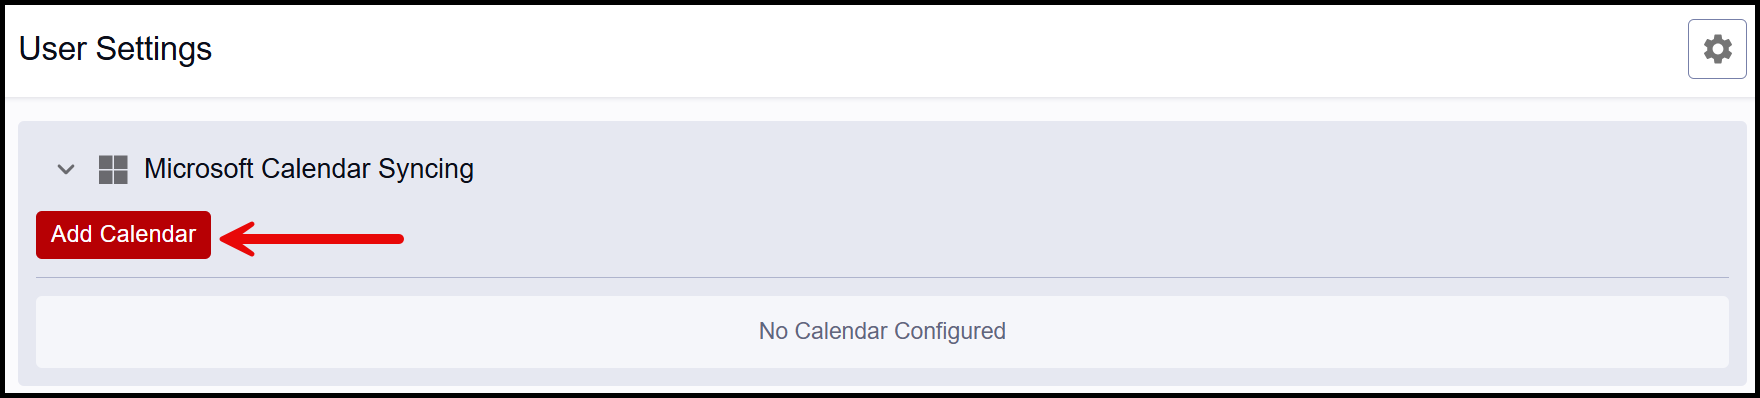
- Click ‘Microsoft Calendar Syncing’ and then select the Add Calendar button.

- The regular BU Microsoft login page will open. Select or enter the appropriate credentials.

- A successful sync will be confirmed on the User Settings page—if the advisor’s email appears under the Microsoft Calendar Syncing section, the connection has been established.


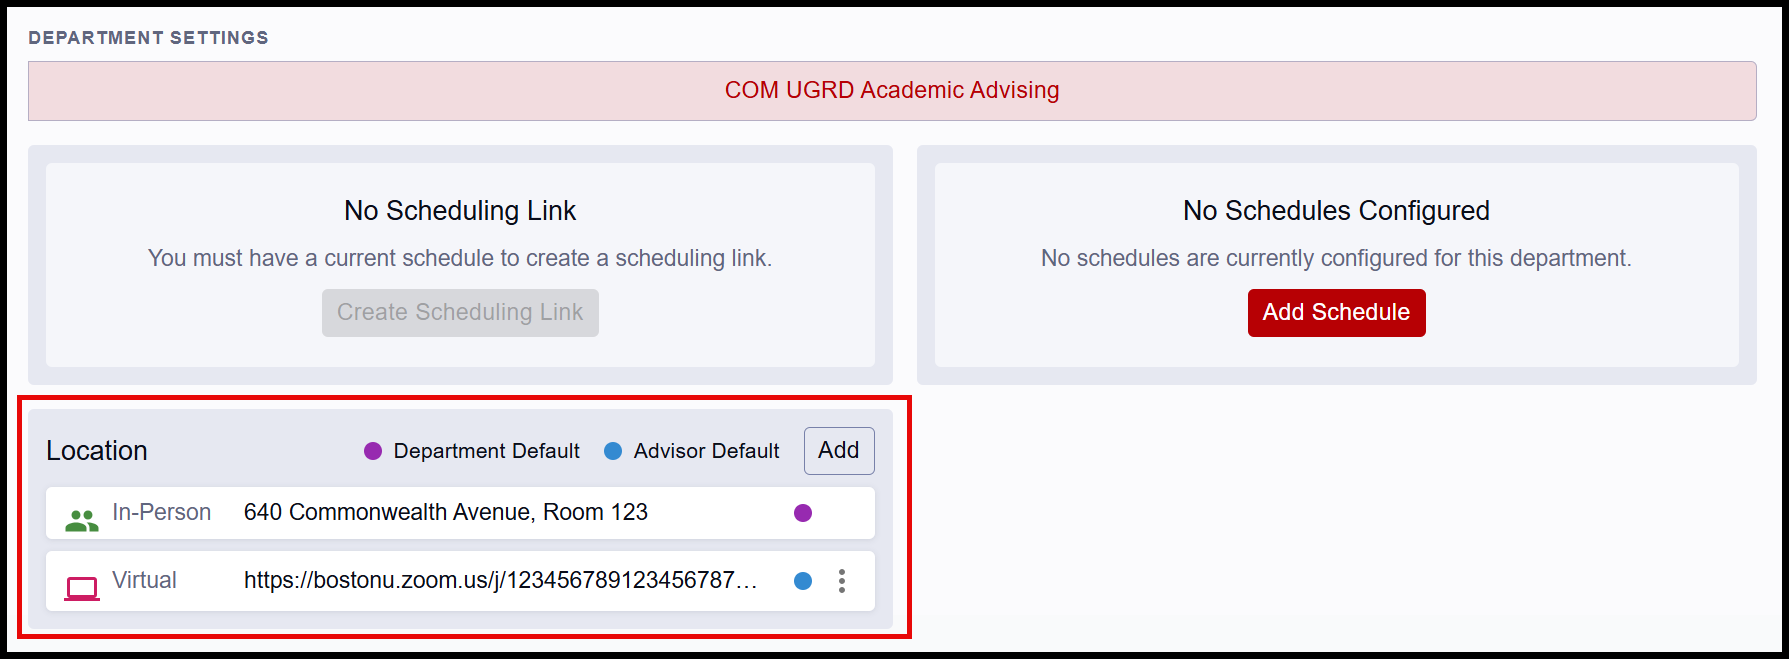
Configure Locations
An appointment’s Location includes how the meeting is to take place, the meeting mode, and the specific location details. If an advisor is a member of more than one department, they must define their Locations for each department in order to schedule appointments for that department.
ⓘ NOTE: Some departments may define a department-wide default location in their settings. If this applies, that option will be listed with a purple dot. Advisors can use their department’s default locations and still add other locations.
Instructions:
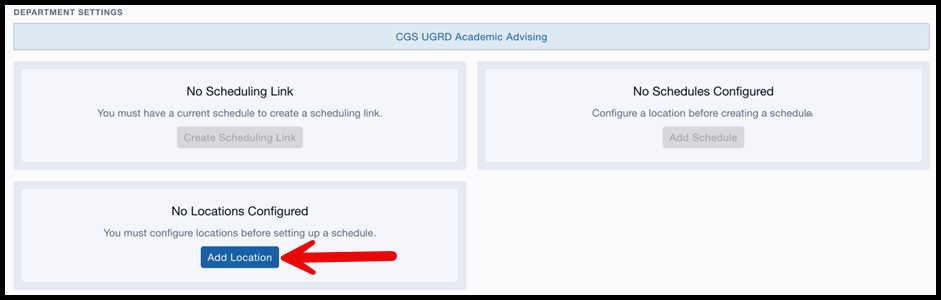
- In the Location section, click the Add button. (If no locations have been configured by the department, the ‘Add Location’ button.)

- The Add Location window appears and a location can be selected in the Meeting Mode dropdown field. Options may include: In-Person, Phone, Virtual.
- Department configuration will determine which options will display.
- Enter text in the Location field to identify the place where the meeting will be held. This does appear to the student so enter clear and specific details:
- In-Person: enter the physical address, including floor and/or office number.
- Phone: enter phone number.
- Virtual: enter full meeting URL.
- If the department has not already set a default location for the selected mode, the ‘Make default location’ checkbox can be selected to make that location the default for that meeting mode. (In the above screenshot, the department has already established a default location for In-Person meetings, so the default cannot be changed.)
- Click Save. The new location will display back on the User Settings page.
- If marked as default, it will be listed with a blue dot (a pre-defined department default will have a purple dot).

- To add additional locations, click the Add button in the location section.
- To edit or delete an existing location, click the 3 dots menu.

Define Schedule
Once Locations are defined, the Schedule section opens and allows advisors to enter general availability for appointments. If an advisor is a member of more than one department, they must define their Schedule for each department in order to schedule appointments for that department.
These time blocks, in conjunction with a synced calendar, will be available for students to book appointments. Advisors are able to book outside of the availability defined; see appointment booking steps in the Schedule Advising Appointments resource.
Instructions:
- Click the Add Schedule button.

- The Schedule window will appear.

ⓘ NOTE: Schedule blocks are meant to define overall availability for a set period of time. Exact unavailability does not necessarily need to be defined in the schedule section; syncing the calendar will account for that kind of specificity.
- Enter the desired Schedule Name (e.g., “Spring 2026”). This identifier is used only for the purpose of User Settings and is not visible to students.
- Select the Date Range this schedule applies to.
- Select Availability Days/Times. Up to three time blocks can be created per day. Use the plus icon at the far-right to add a time block. A block or whole day can also be fully removed from availability by using the Delete circle icon.
- For each availability block, select which Locations can be chosen by a student when booking. These options are based on what was defined in the previous Location setup step. Default location(s) will populate, but different or additional options can be selected as needed.
- Specify available Meeting Types. By default, all the Meeting Types configured for the department will be selected for each availability block. If an Advisor does not want students to be able to book appointments with a particular Meeting Type, they can de-select as needed.
- If desired, input the Max Appointments for each time block, preventing students from booking beyond the advisor’s configured limit.
- Mon 9-5, in person or virtually
- Wed 8-5, in person or virtually, only for the specified Meeting Types, with a maximum number of 5 appointments that can be booked during that time
- Thu 8-12:15 or 4-5, in person or virtually
- Fri 8-5, virtually only, with a maximum of 5 appointments that can be booked on that day
- Click Save when complete. The defined schedule will display back on the User Settings page.

- To modify an existing schedule, click the Edit button. The same Schedule window appears allowing for edits.
- To remove a schedule, click the Delete circle icon.
- To create a new schedule by copying the existing schedule, use the Duplicate icon. The same Schedule window appears allowing for modifications if needed.
- To create an additional schedule without copying, click the Plus icon. Repeat the process for any additional schedules.
TIP! schedules can be edited to extend a date range or to modify the availability times.
 If multiple schedules have been defined, click on the Schedule Name dropdown to switch views to other schedules.


TIP! Creating the schedule by semester may be the simplest approach, however multiple schedules can be set up and any date range can be entered to appropriately capture availability needs. Edits can also be made to schedules.
![]()

Availability Example: The schedule in the screenshot below indicates that a student can book an appointment during these times:
These times are available unless there is a conflicting meeting or event on the advisor’s Outlook calendar. Any existing Outlook calendar events will override availability, even if they fall within the general schedule.


Scheduling Link
After defining availability in the Schedule section, a Scheduling Link can be created.

The Scheduling Link can be copied and distributed as desired. If a student clicks on a provided link, they will be directed to the appointment scheduling page for the advisor.
- Because a Scheduling Link can be generated per department, providing the appropriate department’s link for those relevant students simplifies the booking process for them. Upon clicking the link, students will be directed to the scheduling page with the correct department listed – they do not need to select department, therefore preventing possible restrictions if the wrong value is chosen.
- If a student clicks a Scheduling Link for an advisor who they do not have permission to book an appointment with, they will receive a message informing them once they land on the appointment page. Reminder: advisors can bypass that restriction and book an appointment on a student’s behalf if needed.
If needed, click the Refresh icon to generate a new link. NOTE: this will invalidate previously shared links.
- The link does not need to be refreshed if availability is updated; the existing link will dynamically display that updated schedule.
Out of Office
An optional process for advisors is to set MyBU Student Out of Office settings. Define the date/time range and the message.

The language of the message will display to a student attempting to schedule an appointment during that set time frame.
NOTE: Even while an Out of Office message is displayed, students can book a meeting during that time. Be sure to block Out of Office time on the synced Outlook calendar to ensure that those days and times are unavailable to students.
Page last updated February 2026. For a PDF copy, print this webpage as a PDF. Other resource formats can also be accessed via the relevant icons below.