Shopping for a Pandemic
Students in Karen Metheny's Anthropology of Food (MET ML641) class are contributing posts this month. Today's post is by David Ginivisian.
The rapid spread of Covid-19 and the resulting human response is cause for the end of the world as we knew it. Without being alarmist, my point is this: this pandemic will represent a crossroads in history, dividing how the world was before the outbreak and how the world will reconfigure in the years that follow. Both individual and collective reactions to this crisis will have far-reaching consequences causing sweeping changes in our ways of life.
Coronavirus first began to impact my lifestyle March 12. The school system in which I teach High School Culinary Arts had been ordered shut down for two days for ‘deep cleaning’. This was the beginning of an evolving response to the growing concern. These bonus days off allowed me to catch up on errands while my wife and daughter were working and attending their respective schools. It was quickly evident that my routine trip to the grocery store would be anything but.
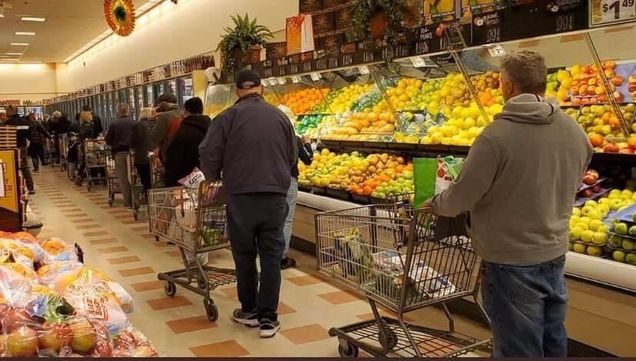
It was Wednesday morning and the store was unusually full with customers. Upon entering, mindful customers lined up for what was now an obligatory sanitizing wipe for their cart and hands. Some shoppers donned gloves to avoid direct contact with potential germs. Foreshadowing the weeks to come, the high volume of customers crowded the aisles with overflowing shopping carts. While large crowds shopping with fervor are nothing new to those who frequent Market Basket, on this day the scene was strangely different.
The growing volume of shoppers was not dissimilar to a pre-blizzard shopping frenzy; still, something was awry. People were not moving about the store as they normally did. The flow was out of step with the usual pattern of cart traffic. Concerned store goers were showing signs of panic evident in their altered regular habits. Shoppers were abandoning their usual routes and routines. Haphazard movements caused traffic jams at every corner. Customers leaving carts to grab-n-go created a jaywalking effect on the line of traffic. Impromptu U-turns, backtracking, and exploring unfamiliar aisles all contributed to the slowdowns.
The Salem, MA store was populated with the usual diverse clientele, all with a shared objective: to stockpile necessities and niceties for an extended time. Some shopped in tandem, enlisting a divide and conquer approach of grabbing goods for one or two carts. Darting through the traffic, they would occasionally rendezvous to plan their next move. One of the ‘Dads’ (eyes glazed like a deer in the headlights), appeared to have been dispatched to run ‘Mom’s’ errand only to find himself engulfed in the fray. Senior citizens moved cautiously, pulling over to let the faster carts by. Some parents, with a sudden need to shop for breakfast, lunch, and dinner, were stocking up. Others had to bulk up home inventory for the anticipated arrival of college students' unexpected homecoming. Usual shopping strategies interrupted and abandoned became the norm, instead navigating as quickly as the congested aisles would allow.
As one would now realize, the sanitizing products aisle had long been cleaned out. Most goods had been seemingly well stocked, but the relentless wave of shoppers would ultimately pick the shelves bare. The checkout line began to wrap around the store. The logjam left many in line for over one hour. I’m pleased to report that while there appeared to be mayhem, there was no malice. Fellow consumers collectively recognized that this was unchartered territory - extraordinary circumstances - and everyone was in the same boat. Examples of these shopping frenzies quickly posted to all media. Was it hoarding or simply stockpiling resources as a precaution? Some have described these behaviors as irrational, unethical, inappropriate, even shameful. Was it socially irresponsible to take more than one’s “fair share?” Who is to say?
The food industry, in particular, is suffering on all counts. Distribution systems have been compromised. Restaurants are either closed or struggling to remain viable, offering takeout, curb-side pickup, and delivery. Alarmed consumers now rely more than ever on the local supermarkets for provisions. The stores, in turn, are working tirelessly to stem the tide of overwhelming demand while addressing mounting concerns about how to keep all food and people safe.
Creativity and Collective Action amidst the COVID-19 Crisis
Students in Steve Finn's spring special topics course on Food Waste (MET ML702 E1) are contributing this month's blog posts. Today's post is from Stacey Terlik.
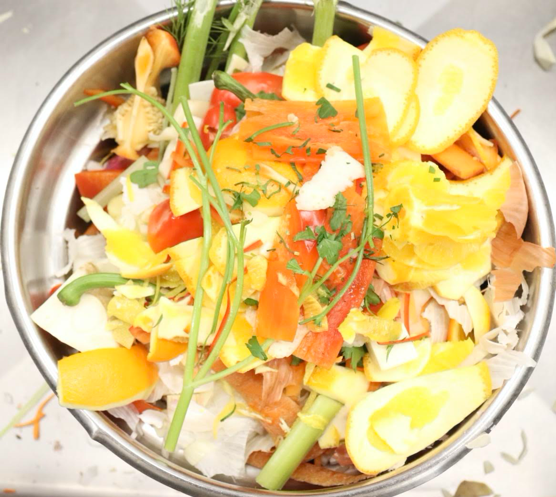
There is no doubt that the coronavirus has impacted your life these past few weeks. It is a global pandemic that is changing all aspects of our society and has the potential to impact future policy. As a Gastronomy student, focusing on food policy, I cannot help but question: how will this pandemic influence food policies and future sustainable development goals? How will it affect food waste practices of corporations, businesses, and consumers? Will it perpetuate the problem of food waste? Or will it be a wakeup call about the fragility of our world?
It is evidenced by the empty shelves in grocery stores that people are buying way more than they would ever need during this unprecedented situation. There has been a rush on supermarkets, with people stocking up on foods they consider essential: canned, prepackaged, and processed foods. This undoubtedly will lead to a higher percentage of packaging waste then if people were strictly buying fresh foods. Moreover, once this crisis passes, what will happen to this overstock? Based on current food practices, it is likely these foods will go to waste and people will revert to their typical habits. However, it is possible that our society will learn from this experience and begin to place greater value on food and the environment.
In Sara Roversi’s presentation at the COVID-19 Virtual Summit, she frames the pandemic as an opportunity to reset, reconnect, and re-understand the power of food. She cites chef, Massimo Bottura, who asserts that “This virus has the power to make visible the invisible.”[1] While of course, this situation is a forced cultural reset, it creates the time and space to encourage individuals to think differently about food. People have to be creative with what is in their pantries, and they also have the extra time to access to cookbooks/ tutorials to learn how to can, preserve, and pickle produce in order to eliminate waste and ensure future nutrition.
Food creativity can also extend beyond the consumer level during this pandemic. We have seen innovative solutions by restaurants that have moved to takeout, created family meal boxes, or have sold out their inventory in attempts to sustain revenue and prevent food waste. In this same vein, because restaurants, businesses, and schools have been forced to close their doors, we have witnessed people taking care of each other in regard to food. Many organizations are distributing lunches to children in need and delivery services are transporting meals to vulnerable populations.
This notion of taking care of one another can be transformed from local to global food policies and systems. As Roversi stated, moving from “design thinking” to “prosperity thinking” can impact the ways in which we think about food difference, inclusion, diplomacy, and the environment.[2] While we may have to physically distance ourselves from one another right now, we still have the capacity to build an evolved food community that can positively impact global Sustainable Development Goals (SDGs). SDG 12.3 states: "By 2030, halve per capita global food waste at the retail and consumer levels and reduce food losses along production and supply chains, including post-harvest losses."[3] My recommendation during this time of quarantine is to focus on the consumer aspects of this goal, as this is where advocacy and change can begin.
While we have the time and space, let’s reconnect to our roots, attempt to eat locally, experiment with new recipes, and use all the components of our food. The wild part is that with technology, we can all do this together. We can reach out to family and friends to make and eat dinner together over FaceTime or Skype. We can share recipes and cooking demonstrations over social media; it is all quite literally at our fingertips.
The biggest challenge for consumers will be the desire to return to their former food habits after this crisis. Of course, everyone is craving some semblance of normalcy, but let’s create a new normal of being intentional with our food procurement, production, and waste practices. While it may sound overly optimistic in the face of this trying time, simply modifying our food habits and taking care of one another can move us towards achieving each one of our interconnected SDGs.
[1] COVID-19 Virtual Summit - Day 2 - How Do Global Epidemics Affect the Future of Food? W/Sara Roversi. n.d. Accessed March 19, 2020. https://www.youtube.com/watch?v=J6eyuBl25ig.
[2] COVID-19 Virtual Summit - Day 2 - How Do Global Epidemics Affect the Future of Food? W/Sara Roversi. n.d. Accessed March 19, 2020. https://www.youtube.com/watch?v=J6eyuBl25ig.
[3] “12.3.1 Global Food Losses | Sustainable Development Goals | Food and Agriculture Organization of the United Nations.” Accessed March 20, 2020. http://www.fao.org/sustainable-development-goals/indicators/1231/en/.
I Didn’t Order That: How Freebies are Adding on to Food Waste.
Students in Steve Finn's spring special topics course on Food Waste (MET ML702 E1) are contributing this month's blog posts. The first in this series is from Christina Grace Setio.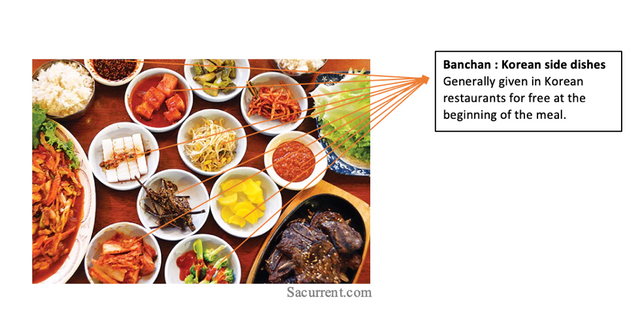 If you have ever dined out to a Korean, Mexican, or European restaurant, chances are you have gotten some type of a freebie. Specifically, the food items served free of charge as you patiently wait for your meal. This practice is now so culturally instilled that most servers don’t even ask if you actually want it, they just assume it can’t do much damage to just serve it. While it is a gesture most customers appreciate, some argue that they would rather be charged for a more palatable and better-quality product. How often are these food items left unfinished? Regardless of whether it has been touched or not, food safety regulations prohibit any food that has been placed on a customer’s table to be reused. Now, this may not be an issue if everyone takes away and finishes any leftovers at home. However, a study by Brian Wansink of Cornell University shows that 55% of leftovers at restaurants are not taken home, this just adds to the many other food waste issues that happen within a restaurant. Now you may ask, isn’t it fine if they just compost the food? While this is a better solution than landfill, think about of all the wasted natural resources used in growing food that goes to waste – water, energy, labor, occupied soil – these are additional costs to be considered.
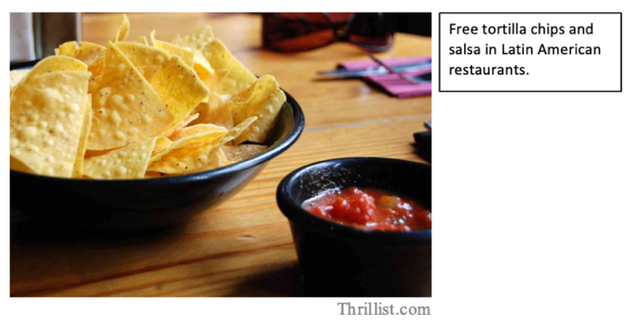 There may be several reasons as to why restaurants serve freebies; first, it is a low-cost way of keeping customers calm during a busy service. Second, it creates a good image of generosity for the restaurant, and people feel taken care of when they receive complimentary gestures. Expectations from other restaurants of the same style may also pressure other restaurants to follow the flock. If you are the only one that does not offer free food like your counterparts, people might see it as a travesty. I remembered going to a Korean restaurant and was told that I had to pay for their Banchan (small side dishes), and feeling slightly cheated since I have never had to pay in the past. Not fulfilling a customer’s expectations can damage the image of a business. But how did we start to have this culture of expectations in the first place?
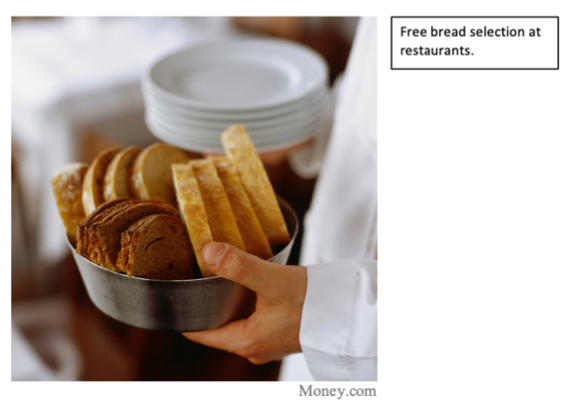 When restaurants offer free food items, they generally don’t ask if a customer wants it, nor do they consider a customer’s possible intolerance, for example gluten (found in bread) or nightshade vegetables (bell peppers, tomatoes, and eggplants). They also often serve a significant quantity even for individual diners. How many times have you seen steakhouses serve you multiple varieties of bread for a single person? Abundance gives people sense security and pleasure, and America has a food culture that values size when food is relatively cheap and plentiful in most of its cities. Nevertheless, should we fulfill this temporary sentiment at the cost of wasting food?
In 2015, the UN created the Sustainable Development Goals to sustainably increase the well-being of the planet and people globally, ending poverty, hunger, all while protecting our land and seas. Target 12 of the 17 SDGs calls for “Responsible Consumption and Production,” encouraging consumers to take their roles in shifting to a better diet and more responsible food consumption. A powerful report by the FAO suggests that we lose and waste one-third of food produced yearly, and in the U.S. 40%, with the majority at the retail and consumer level. So individual consumers and households have a lot of power in making a big difference to reduce those numbers.
Should restaurants start asking customers instead of blindly offering complimentary food? Although the idea of receiving items free of charge is tempting, can we as customers be counted on to accept or refuse responsibly? Should restaurants serve at a gradual pace instead of serving once at a hefty quantity? What other dining out habits do you see contributing to avoidable food waste?
So the next time you eat out, remember that you have the power to decide where that food will end up. 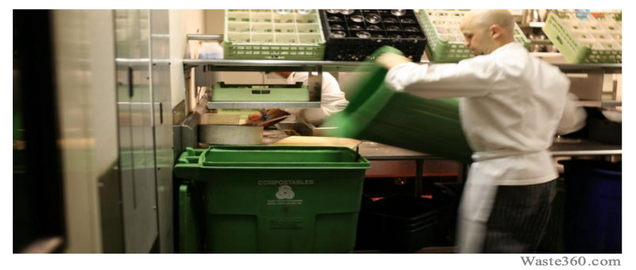
Saccharomyces Serenades, Lactobacillus Lullabies: The Soundscapes of Fermentation
By Dana Ferrante
It’s not everyday you meet a self-proclaimed ‘fermentation evangelist,’ let alone play a small part in his upcoming exhibition.
On February 1, 2020, I participated in a workshop for the members and friends of the Somerville Community Growing Center led by Joshua Rosenstock, an artist, musician, fermentation expert, and Associate Director of WPI’s Interactive Media & Game Development program.
The workshop had an eclectic mix of participants, including community garden and farm members, pickling enthusiasts, musicians, young children and their intrigued guardians. The task at hand was relatively simple: using produce from Waltham Fields Community Farm, we were to create pickle jars that would then be connected to Joshua’s living art piece, The Fermentophone.
According to Joshua’s website, the “Fermentophone is a multi-sensory installation in which an algorithmically generated musical composition is performed by living cultures of bacteria and yeast. The installation comprises a series of different vessels containing actively fermenting foodstuffs and beverages, wired with electronic sensors. Each colorful, odorous, and edible ferment has its own musical vocabulary which is expressed according to microbial activity. ”
Joshua created his first Fermentophone installation back in 2013 at a festival at MIT’s Media lab; since then, he’s exhibited his idea in an empty storefront in Wisconsin as part of the state’s Fermentation Fest, as well as a similar festival in Boston in 2016. The fruits of our labor in February 2020 were destined for a temporary installation within the Harvard Museum of Natural History’s exhibit, Microbial Life: A Universe at the Edge of Sight, a “multimedia journey into [the] fascinating, invisible realm” of bacteria and microbes (HMNH website, 2020).
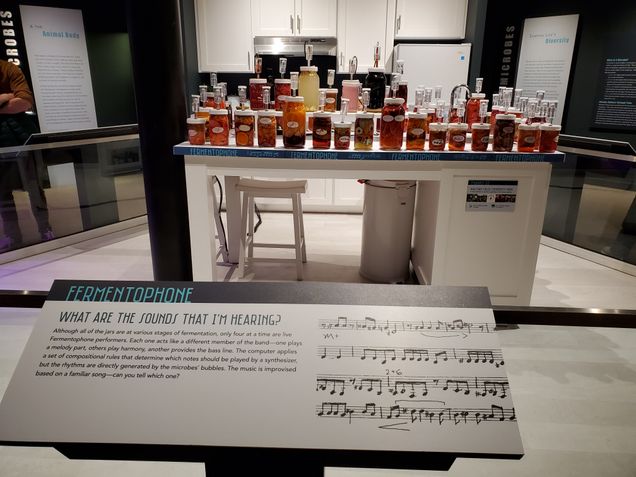
Before we began carefully stuffing our mason jars, Joshua gave us some very important background information on the history, power, and process of fermentation. Here are the key takeaways:
1) Microbes, or the yeasts and bacteria responsible for the fermentation process, are everywhere.
Evolutionarily speaking, microbes preceded humans, and likely exerted selective pressure on humans—which is both a humbling and somewhat terrifying concept. Humans are majority microbes, and we exist in a symbiotic relationship with them (you may have heard the term ‘microbiome’). Little is known about the gut-brain axis in the human body, which is organized around microbial activity, but scientists have established it plays a role in regulating some of our thoughts and emotions. (Hence, somewhat terrifying.)
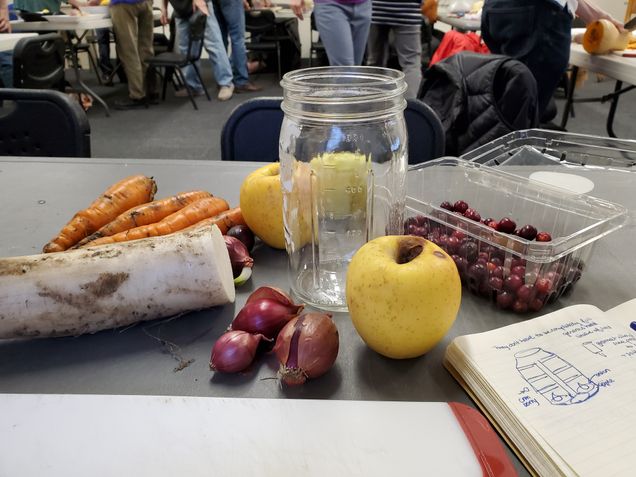
2) Saccharomyces, a genus of fungi, includes many types of yeasts humans have used to create food and drink for at least 12,000 years.
From beer in the Epic of Gilgamesh, to ancient Chicha pots unearthed in the Andes, to depictions of the Greek god Dionysus with satyrs and wine glasses, strains of Saccharomyces have been harnessed throughout human history, around the world, to produce fermented, alcoholic beverages. Many have attributed the existence of bread, beer, and other fermented food and drinks to a rise in surplus grains due to the agricultural revolution (approximately 10,000 BCE).
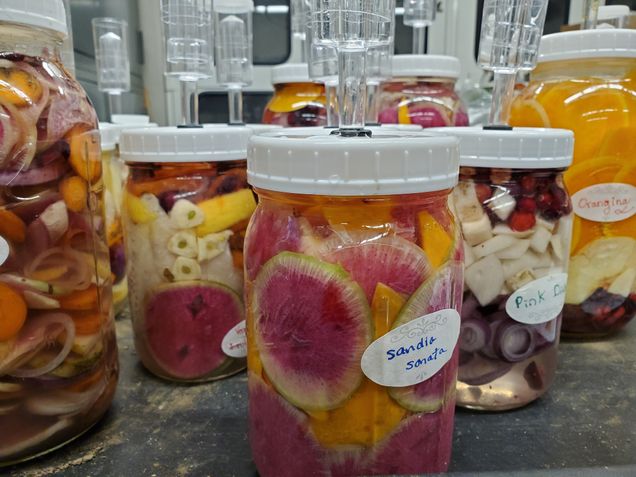
As Joshua pointed out, microbes not only control different physiological processes (e.g. gut-brain axis, microbiome, etc), but have the power to expand our minds. Accordingly, fermented beverages in a variety of cultural contexts have gained significance beyond pure nutrition; for example, beer was once used as a form of currency or salary, and chicha, bread, and wine are linked with spirituality in cultures across the globe. Today, yeast continues to produce delicious breads and brews, as well as some kinds of synthetic insulin and some vaccines.
3) Another microbe, lactobacillus, can survive where many microbes can’t; this often leads to spontaneous lacto-fermentation.
When vegetables are put into a salt water brine, the salt drives out the water in the vegetables. Very few bacteria can survive in this context, with the exception of lactobacillus, which imparts that distinctly sour, tangy flavor we associate with a good yogurt or lacto-fermented pickle. Lacto-fermented foods are found in cultures around the world, from kimchi to sauerkraut, Greek yogurt to miso.
Joshua was quick to point out that for much of human history, fermentation was one of the only ways humans could preserve foods. Until the advent of refrigeration beginning in the 1930s, harnessing microbes was one of the best and most common ways to save food for later.
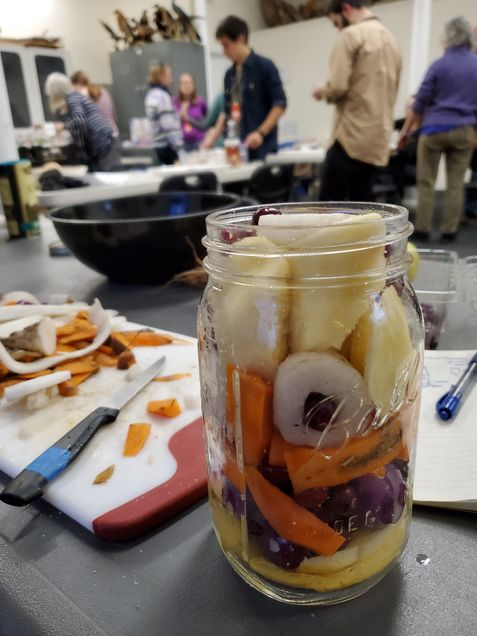
4) Not all pickles are fermented.
As someone who enjoys pickling any and all vegetables, this was something I knew in the back of my mind, but didn’t really want to admit, I guess. Like many impatient, city-dwelling folks living in a shared space, I am always a bit weary about letting things I plan to eat actually ferment. I love vinegar, and am pretty skeptical about the type of microbes that might be living in my apartment....
So what foods are actually fermented? Pickles that undergo spontaneous lacto-fermentation are ‘real’ pickles, according to Joshua. When vegetables are “pickled” in vinegar, their immersion in a highly acidic solution (e.g. vinegar) essentially ensures their preservation. In contrast with a salt water brine that encourages spontaneous chemical reactions, vinegar inhibits any spontaneous microbial activity. In order for the Fermentophone to work, our pickle jars needed to lacto-ferment, thereby releasing bubbles and producing the Fermentophone’s rhythm.
Ultimately, this hands-on experience has made me significantly less afraid to lacto-ferment pickles, and I cannot wait to use New England’s bounty of late summer vegetables and give it a try.
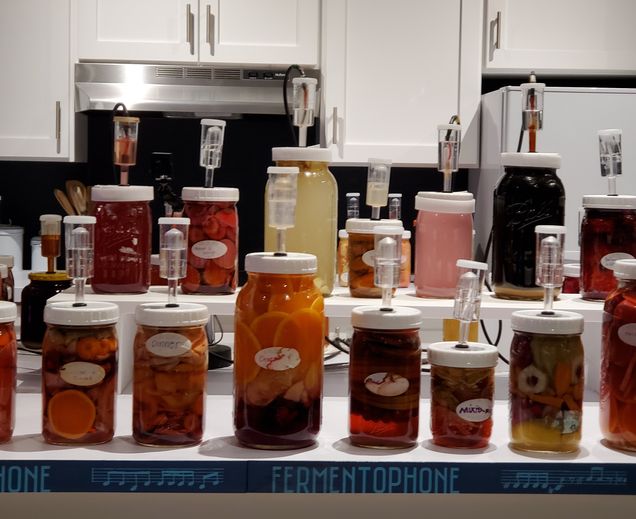
Aside from the fact that Joshua’s installation involved the community in a very hands-on way (Harvard’s Food Literacy Project and students from a local school also contributed mason jars), I think what makes the Fermentophone so clever is that it uses live organisms to create “generative art,” as Joshua called it.
The Fermentophone translates the chemical process of fermentation into a sonoric experience, while also connecting science with visual art, the culinary arts, and questions of cultural significance. While we could curate the colors, shapes, layering, titles, and flavors of each mason jar, the Fermentophone produced “serendipitous” sounds and experiences.
As a student of gastronomy, this experience has made me reconsider the mediums and sensory experiences one can harness to explore topics in food. While I have often found myself wondering what the food in an 18th century kitchen tasted like, I now found myself thinking: what would that kitchen have sounded or felt like? What can I do as a gastronomy student to make better use of sonoric, tactile, and visual mediums in my research or presentations?
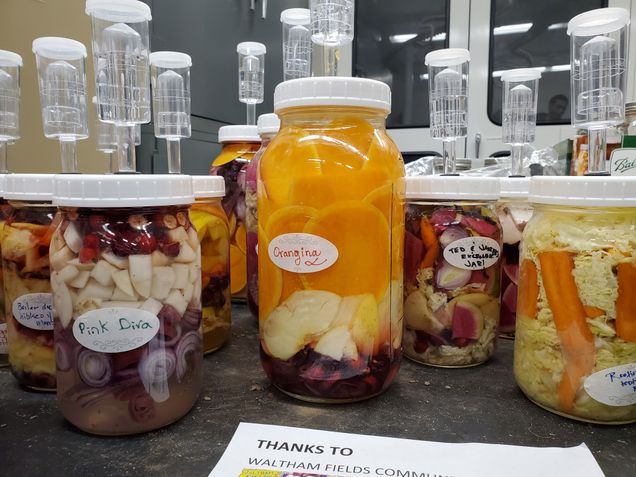
Lastly, a quick apology: the Fermentophone exhibit, to the best of my knowledge, has been dismantled at the Harvard Museum of Natural History. That said, a visit to the museum is certainly worth the while for gastronomy students, especially with the Peabody Museum’s Resetting the Table: Food and Our Changing Tastes exhibit happening right next door until November 28, 2021.
Food Waste Class tours Daily Table in Dorchester
By Christina Grace Setio
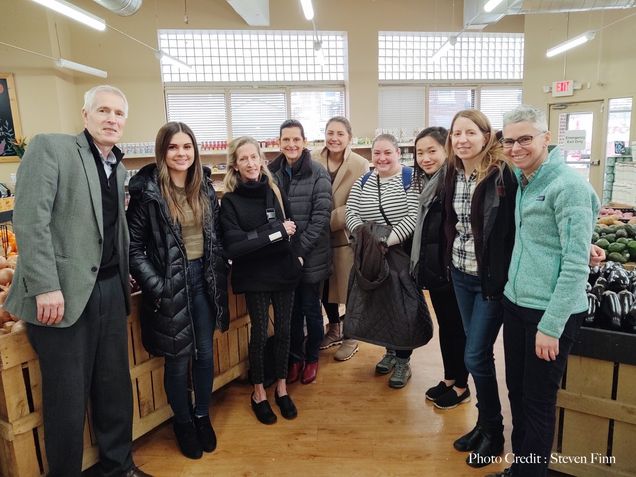
Students in our Special Topics in Food Waste class (MET ML 702) recently had the great opportunity to tour and observe the Daily Table store in Dorchester, Boston.
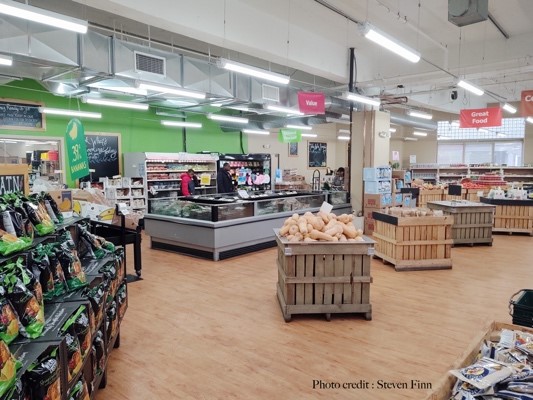
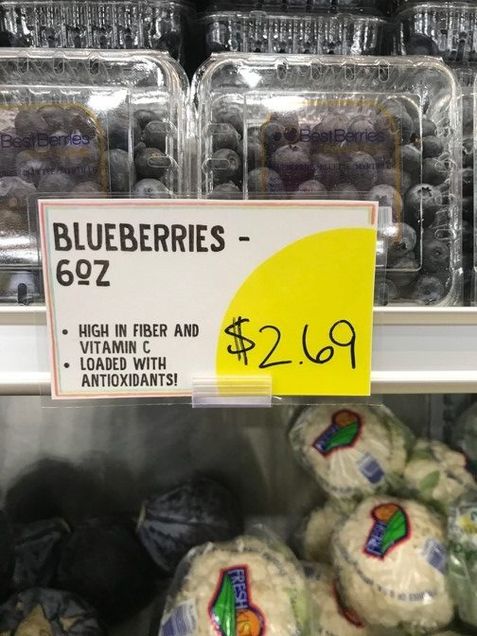
Daily Table is a not-for-profit retail store that provides healthy and affordable food while respecting their customers of diverse community. The Dorchester and Roxbury store are expecting a third location in Boston, expanding with a mission to “help communities make great choices by making it easy to choose tasty, healthy, convenient and truly affordable meals and groceries”. Founded by the former president of Trader Joe’s, Doug Rauch, the store provides fresh produce, proteins, bread, dairy, quality frozen products, grab-to-go meals (prepared daily) and dry food products within an accessible price range. The store aims to promote better eating habits alongside tackling food waste, by repurposing perfectly edible food that was overproduced or rejected due to aesthetic imperfections.
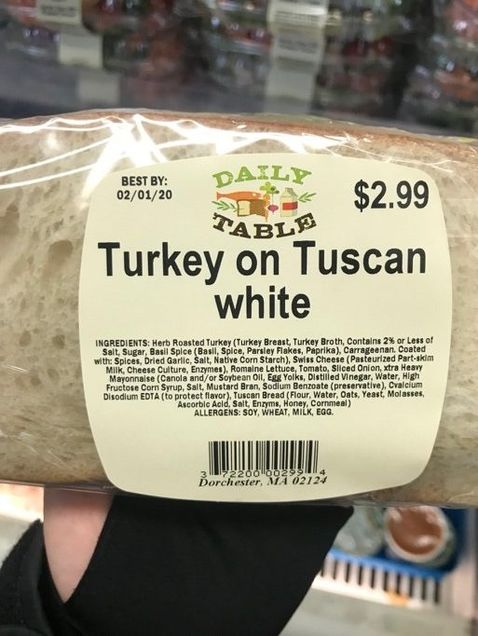
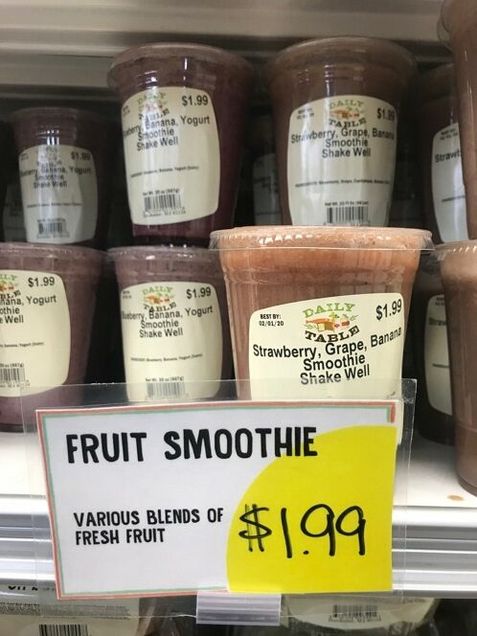
Their delicious and nutritious grab-to-go meals are prepared daily by chefs in store at the Dorchester location. These prepared meals are made with lower sodium and sugar level, also a transparent ingredients labeling. Meals that were not sold will be given out for free at the end of each day.
The class then proceeded to visit the kitchen, talked to the chefs, staffs, meet the volunteers, learn their business model and best of all, try their delicious products!
Partnering with Codman Square Health Center, free cooking classes are held regularly to educate the community on a better diet. Variety of topics offered include; Healthy cooking on a budget, Diabetes friendly cooking, Cooking with your kids, Cooking for weight management, Heart healthy cooking and more.
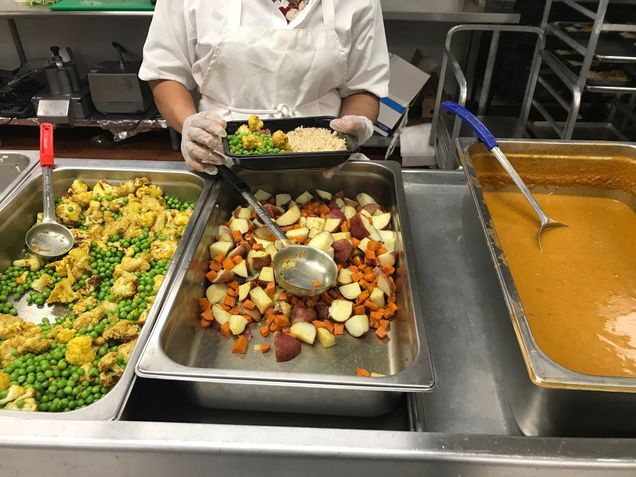
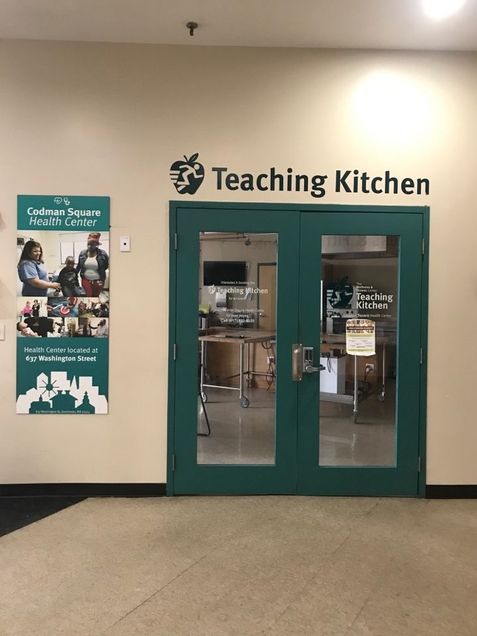
This was our first MET ML 702 Special Topics in Food Waste class trip, a great experience learning straight from people within the industry, seeing firsthand how we can tackle social and environmental issue concurrently. Discussing some of the business’s strategy, organization, and struggles but also the ever so rewarding, expression of customers bringing home full bags of fresh produce for their families.
More information can be found on their website: www.dailytable.org
Gastronomy Program Receives Gift of John Mariani Menu Collection
Gastronomy student Laura Kitchings reports on her initial processing of John Mariani's recent gift of a collection of 20th Century menus. The finding aid she has prepared for the collection is available here.
I am always excited when my archival career intersects with my studies in the Gastronomy Program. This past month I was able to initially process a gift of approximately 300 menus, given to the program by influential food writer John Mariani, and create a finding aid using the Society of American Archivists’ content standards. More information about John Mariani and his extensive career can be found at http://johnmariani.com/.
While organizing the menus and checking the items for immediate preservation needs, I was amazed at the variety of institutions and events represented in the collection. I would see a menu for a restaurant with Michelin stars and then a menu for a restaurant serving delicious sounding barbecue a lower price point.


The menus often contain notations from John Mariani that include the dates he visited the restaurant and what he ate at the restaurant. While I was not able to spend a significant amount of time with each menu, I did find myself considering the variety of Gastronomy courses that could make use of the collection. The Food and Gender class could consider how images of women are used as restaurant advertising on the menu covers and the Food and Visual Culture class could consider how the colors used on menus have changed over time.


Some of the menus were for one-time events and show connections between restaurants while others provide a unique view of a chef at a distinct time in their career.
There are also menus for the same restaurant collected several years apart. This will allow students in the Gastronomy program a unique look into the evolution of these restaurants and consider generalized changes in the restaurant industry. This unique menu collection provides a multitude of potential research topics for both current and future Gastronomy students.


John Mariani spoke at BU on his book "How Italian Food Conquered the World" on Thursday, February 20. Slides from his talk can be viewed here.
Welcome New Students for Spring 2020, part 2
We hope you will enjoy getting to know some of the new students who are joining the Gastronomy and Food Studies program this spring.
Amy Johnson's childhood can best be defined by Lunchables, Pop Tarts and Velveeta Cheese. It was only after she was accepted to the BU Gastronomy Program that she would learn she's the daughter of a member of The Confrérie de la Chaîne des Rôtisseurs, an internationally-recognized Food & Wine Gastronomic Society (she now likes to joke that she joined the family business).
 In addition to her love of food, Amy's passions lie in intellectual storytellings of history and culture. This interest would be the driving force for her pursuits in college, completing dual degrees in Journalism and Anthropology at the University of Arizona. Never considering food as academic exploration until she spent a year in France, Amy discovered how important food studies is in understanding the complexities of culture. Upon her return to the States, a series of very fortunate events would lead her to designate food as her main focus. Living in Tucson, a UNESCO City of Gastronomy, proposed additional courses in food anthropology that she could pursue. A position as a food writer and photographer for a local publication allowed her to connect with the Mexican-American and Native American communities that surrounded her.
Knowing culture isn't just reserved to food, Amy also hopes to receive designations through the Elizabeth Bishop Wine Resource Center.
Amy lays claim to six cities, four states, and two countries, but is finally ready to plant her roots in the city of Boston. She has been eyeing the BU Gastronomy program for the past six years, and is thrilled to now be part of this captivating community of food enthusiasts.
Kris Kaktins obtained a BS in criminal justice at the University of Delaware and a MS in criminal justice at Northeastern University, selecting the field simply because she enjoyed learning about it. She then stumbled into a career within the financial services industry where she remains sixteen years later. Never having a “dream” occupation and facing serious burnout in her current work, in 2018 she engaged a career coach. While the endeavor did not translate into to a new career (as of yet), a confession to the coach about her love of cheese led her to Boston University’s Cheese Studies Certificate. Cooking food, eating food, shopping for food, and reading about food, recipes, and cookbooks have always brought Kris excitement, but this course quite possibly re-engineered her brain’s definition of bliss. The next exploration was Wine Studies Level 1. At the end of 2019 she applied to BU’s Certificate in Food Studies. Kris hopes to make this study of food an opportunity that revitalizes her and perhaps even births a new journey. Kris lives in the suburbs of Massachusetts with her husband, four-year-old son, and slightly neurotic dog. They garden, tend to a variety of fruit trees, and in the spring are foraying into beekeeping.
Welcome New Students for Spring 2020
We hope you will enjoy getting to know some of the new students who are joining the Gastronomy and Food Studies program this spring.
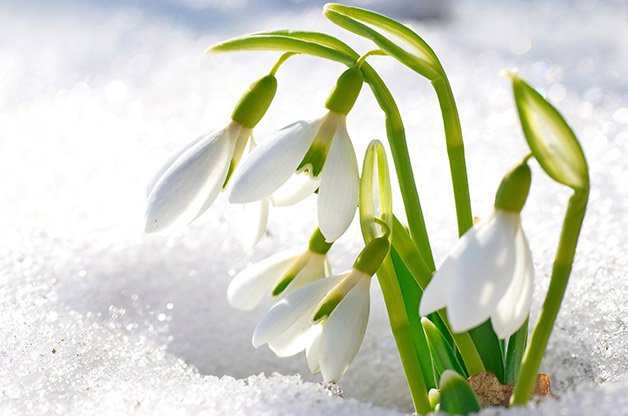
Fascinated by food systems, Dana Ferrante has worked in kitchens, volunteered on farms,  pulled espresso shots, and staged with chefs at home and abroad. A native of Massachusetts, Dana graduated from Harvard College with a degree in Italian History and Literature. Her thesis research brought her to the Italian State Archives in Naples, where she tracked down biographical information on 19th century cookbook author, Ippolito Cavalcanti. In addition to conducting food history research, Dana spent her undergraduate years promoting food literacy, tending to on-campus beehives, editing a student-run food blog, and organizing cheese pairings for a student-run wine society. From an organic macadamia nut farm in Hawaii to a Blue Zone island in Greece, a small goat farm in Sardegna to a bustling restaurant in Crete, Dana is an avid traveler with a strong interest in Mediterranean cuisines, agriculture, global foodways, and sustainability.
Back in Boston, Dana has worked as a pasta maker and prep cook, created content for a sustainably-minded startup, worked as a barista at a local coffee shop/brewery, and interned for culture: the word on cheese magazine. In her free time, she enjoys perusing vegetables at the Somerville farmers’ market, making pasta from scratch, climbing rocks, and exploring the newest cafes, restaurants, and bars in the Boston area. Dana is excited to join BU’s Gastronomy program and continue writing, researching, cooking, and of course, daydreaming about food as much as she can.
Growing up in rural New Hampshire, Carrie Holt eagerly anticipated the day when the sweet  corn came in from the farm down the road. When her family moved to coastal California, the road between home and high school took them through field after field of Brussels sprouts, lettuces, and strawberries. Carrie was struck by the differences between small-scale New England farms and large-scale California agricultural operations in terms of labor practices, land stewardship, and product distribution. While in college in Ohio, she became intrigued by the issues and implications of food access through research on so-called food deserts in the U.S. and on the precipitating events of the Arab Spring.
After graduation, Carrie (a lifelong vegetarian) turned to cooking as a way to ground herself in the present, and sought an environment where she could immerse herself in food and contemplation. Working in the kitchen of a remote Zen Buddhist monastery in Central California provided her with both knife skills and the space to consider interdependence in the context of food systems. Her ruminations on interdependence and the power of community led her next to a food cooperative in Southern California, where observing the gaps between the co-op’s stated ends and actual policy in terms of food access and responsible sourcing became part of her job.
Carrie hopes to learn how to help restructure our food systems by better understanding their current functions and failings, especially as climate change’s impact continues to be felt, and she looks forward to conducting the research that must undergird systemic change. As there are few viable ways to opt out of our current food systems as a living, breathing, eating human, Carrie wants to participate as an informed actor working towards systemic change and creating spaces for more people to do the same.
Mara Sassoon grew up in sunny South Florida, where she learned 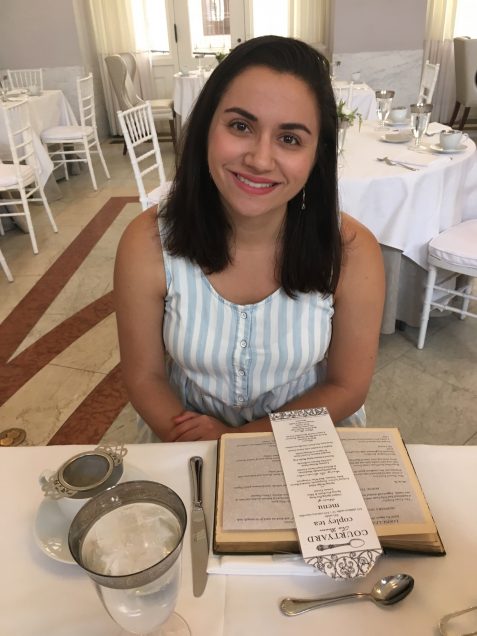 the joys of eating guava pastries in the morning and of shopping at Publix (inarguably the best grocery store). She came to the Boston area to finally experience seasons and attend Brandeis University, where she studied creative writing, English, and art. She then attended the Columbia Publishing Course at Columbia University, an intensive summer graduate program on book, magazine, and digital publishing, before moving back to Boston.
Mara works for Boston University’s Office of Marketing & Communications as a writer and editor, crafting substantive and in-depth stories about BU, its programs, faculty, students, and alumni for various University publications. She loves writing about food as much as eating it and enjoys challenging herself with different baking projects most weekends. She is eager to approach food studies from more historical, cultural, and social perspectives that she has not yet explored before so that she becomes a better-informed cook, diner, and writer.
A decade ago as a young teen, Grace Setio moved abroad from her hometown of Jakarta,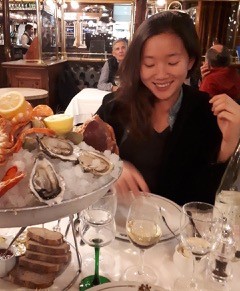 Indonesia. Ever since, she has been traveling from continent to continent, following her curiosity for unfamiliar territories and exciting food cultures, given that there was not a lot of diversity within her own community. She was influenced by her mother who is an amazing cook and grandmother who is an amazing baker. So she packed up and moved to Australia to pursue a career as a professional cook. Three years and an armful of kitchen burns later, she went to Europe to study International Business in Culinary Arts. She learned how to manage restaurants from her lecturers, how to pair food and wine from the locals she met, and how to fuse Swedish with Korean food from her peers. She then developed a love for regional ethnic foods and the interdisciplinary approach of food studies, which led her to an interest in pursuing a higher education within this field. She wishes to bring better food education to her home country and promotes her native cuisine to wherever she wanders off to. After spending a year in a Michelin starred Moroccan restaurant in San Francisco, Grace is very excited to explore the East Coast and being a part of the gastronomy community at BU.
Course Spotlight: Food and Public History
Got Food? Got History? Go Public.
Food and Public History (ML623), Spring 2020
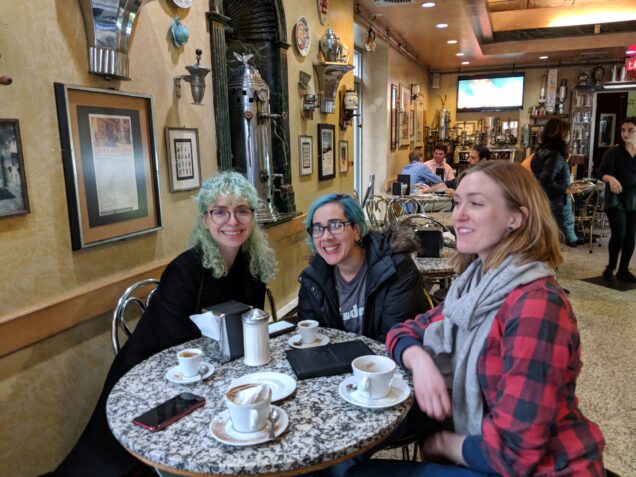
In Food and Public History (4 cr), we will examine interpretive foodways programs from museums, living history museums, folklore/folklife programs, as well as culinary tourism offerings, "historical" food festivals, and food tours. Our goal is to compare different approaches to teaching the public about history or cultural heritage using food. How do we best engage the public? How do we demonstrate the relevance of food as both a historical subject and as a topic of interest today? Through different approaches to public history, can we connect our audience to issues that are so critical today—the future of food movements, for example, or the preservation and understanding of cultural difference? How can we successfully engage the public, whether through displays, tours, or interactive/sensorial experience?
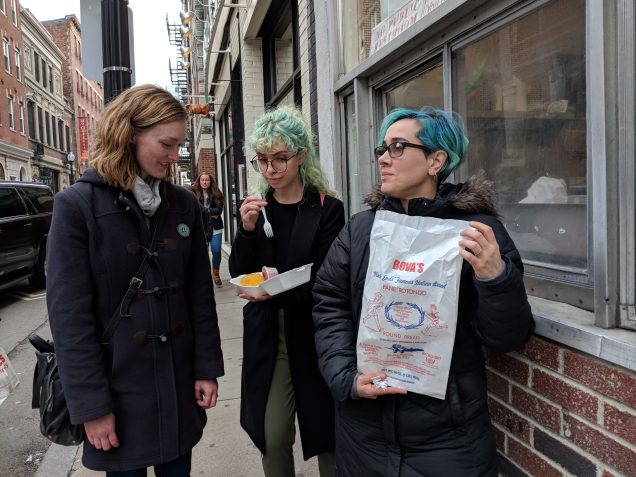 Students will have the opportunity to hear from several experts in historical interpretation, public history, and food history programs. We also will be taking field trips to area museums and food history walking tours in Boston. Last year students took a walking tour of Jewish historical sites in Chelsea, went on the Bites of Boston tour of Chinatown, and had behind-the-scenes tours of Plimoth Plantation and Old Sturbridge Village. These visits served as case studies, allowing students will examine the process of creating mission statements, interpretive goals, and entrepreneurial offerings, as well as different methods of communicating with the public. Students will have similar opportunities this spring.
This is a project-based course involving experiential and hands-on learning opportunities. Student projects will include creatinug proposals for food history tours in the North End, for example. Student also will participate in a semester-long group project, entitled Home Cooks in the Merrimack Valley. The project will involve background research, updating the project proposal, resubmitting a script and proposal for the Boston University Institutional Review Board (IRB), and fieldwork (interviewing home cooks from a range of cultural and ethnic backgrounds), transcribing those interviews, and then creating or adding to an online exhibit.
Hope you will join us!
For more information, contact kmetheny@bu.edu.
MET ML623, Food and Public History, will meet on Wednesday evenings from 6 to 8:45 PM, starting on January 22. Non-degree students who would like to take the class may register here.
Cream Candy from La Cuisine Creole
This guest post is part of a continuing series written by students from Karen Metheny's Cookbooks and History course. Kate Watson documents her recreation of a recipe for 19th century cream candy.
I’ve never tried to follow a pre-1900 recipe before, but for my Cookbooks and History class in the BU Gastronomy program, I chose to recreate a recipe for Cream Candy featured in La Cuisine Creole, an 1885 collection of New Orleans recipes collected by Lafcadio Hearn.
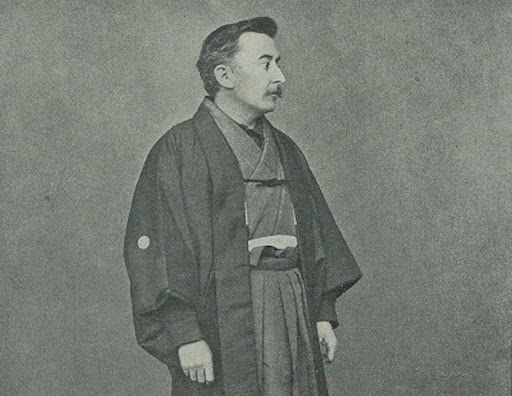
Although it was very hard to decide on just one recipe to recreate, I settled on this Creole recipe for Cream Candy. I chose this because I enjoy candy making— I’ve been gifting my special English Toffee to family and friends every year at Christmas for the past decade, and I enjoy experimenting with new candy types. I also love creamy flavored candies, so I imagined that this recipe would fit the bill.

I assembled my ingredients. Luckily, the measurements were relatively standardized:
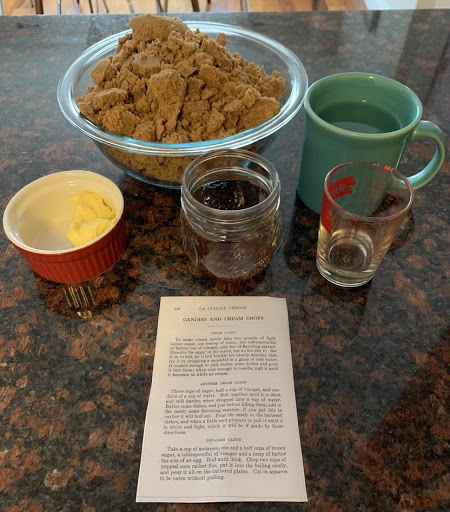
2 pounds light brown sugar (I actually used dark brown)
1 “teacup” of water (I used a mug- when I measured, it was ~1 cup)
2 “tablespoonfuls” of butter (I used salted Kerrygold)
1 tablespoon vinegar (I used plain distilled white vinegar)
2 tablespoons flavoring extract (I used Nielsen Massey Bourbon Vanilla Extract)
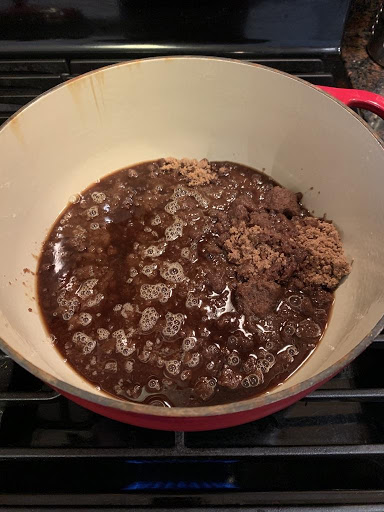
I added all the ingredients to my enameled cast iron pot and turned on the heat. Adding everything at once felt strange, as I would usually add vanilla last, but maybe that’s why there’s so much extract?
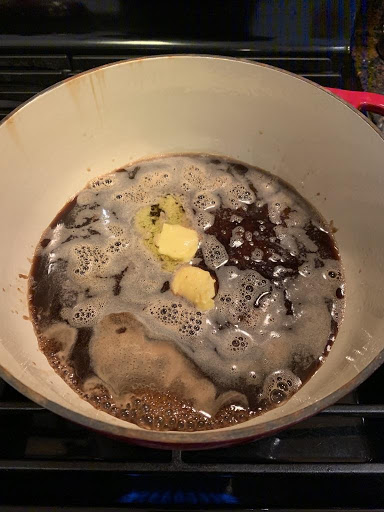
The recipe specifically said not to stir, so I knew I was working with a traditional caramel (something I’d never made before- I’ve always “cheated’ and used recipes that call for a bit of corn syrup). I decided to use a technique to prevent crystallization, even though it wasn’t specifically mentioned in the recipe: a brush to wash down the sides of the pot as the caramel cooked. It was really hard not to stir the ingredients! I was nervous about something burning as it was so dark.
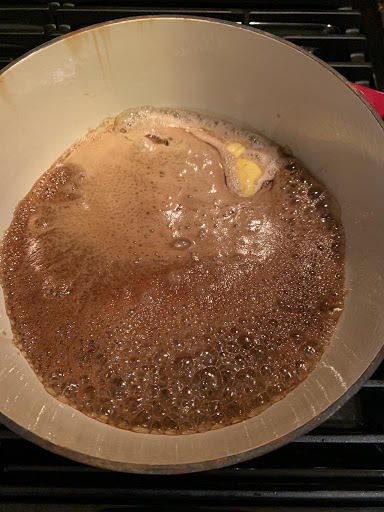
When it came to a boil, I set the timer for 20 minutes and readied a jar of ice water, to test the doneness of the candy. 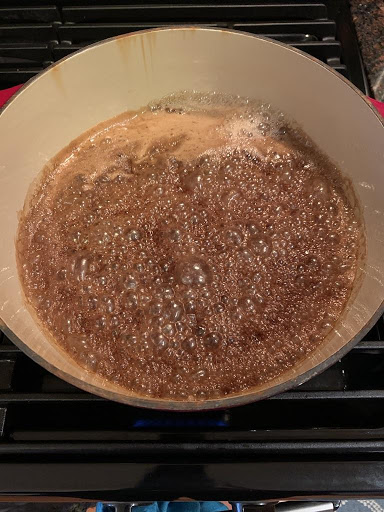
After 20 minutes, my house was filled with the rich smell of vanilla, butter, and cooking brown sugar.
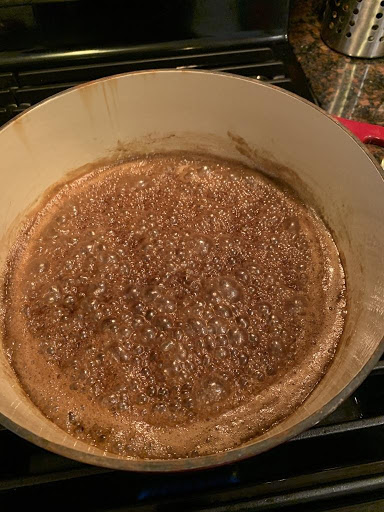
At this point, it was at very soft ball stage. The recipe said that it would be ready when the candy is “cooked enough to pull” but I didn’t really know when that would be. I decided to cook it for a couple more minutes. I usually judge “doneness” of a caramel by color, but since this recipe used brown sugar, it was already so dark that it was impossible for me to judge. At about 22 minutes it had reached medium-hard ball stage, and I decided it was ready.
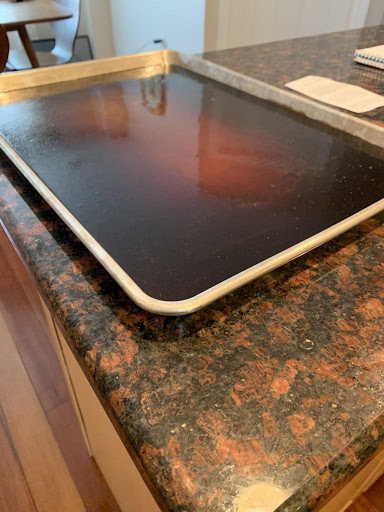
I poured the candy out onto a buttered rimmed baking pan. It was quite beautifully colored and smelled rich and delicious.
It was also scalding hot!
It quickly developed a skin, and after around 5 minutes had cooled enough for me to move it around with my finger.
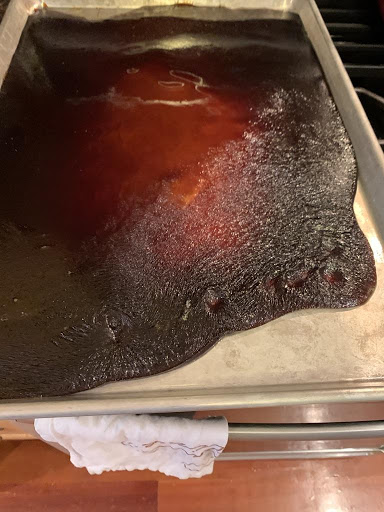
I took a small piece off the edge and began to experiment.
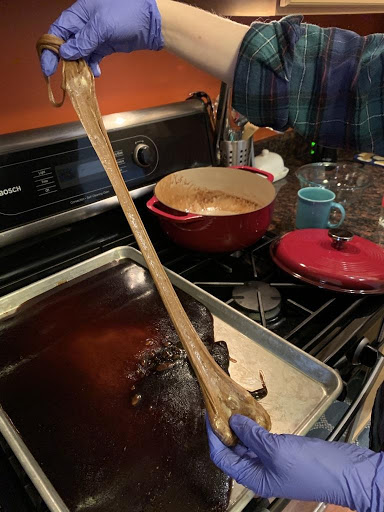
The candy began to lighten as I pulled. It was actually pretty hard to pull- my hands and arms were tired after a little while. It was very hot at first, but cooled after around 5 minutes of pulling, and the strands started to break. I decided to twist it and cut it into pieces with kitchen shears. It never became light as cream, but it did reach a nice café au lait color.
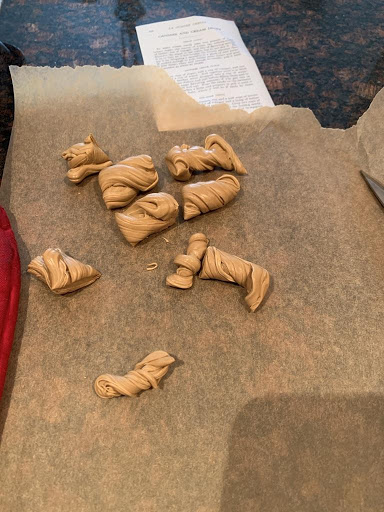
I still had the rest of the rapidly cooling candy to pull- it would definitely have been easier with a houseful of children to help me! I decided to pull the rest of the candy, all at once, before it cooled too much to work with.
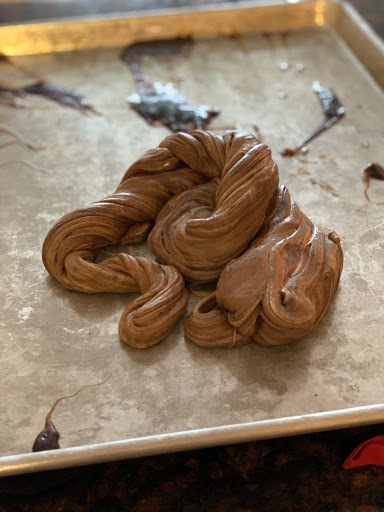
Although it was difficult, it was also pleasurably tactile to pull the warm candy. The repetitive motion reminded me of the repetition of kneading bread. As I pulled, the strands became beautifully pearlescent. The colors progressed from the very dark brown of cooked sugar to a rich mahogany color and looked almost like wood grain as I continued to pull.
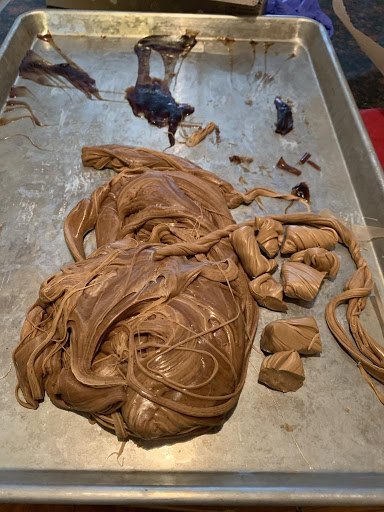
Unfortunately, I couldn’t fully pull all of the candy before it cooled to the point where strands began to snap, but I had plenty for my family and classmates to sample. I snipped strands into small pieces and wrapped them in waxed paper for my class.
These candies, to me, did not taste like what I would expect a “cream candy” to taste, though they were delicious. They mostly tasted like the rich tangy flavor of caramelized brown sugar, with some smooth dairy mouthfeel from the butter. The vanilla was only slightly detectable, but it did add a slight aroma. I couldn’t taste the vinegar at all, and I’m not sure why it was part of the recipe, although I’m sure that acid was needed for some scientific reason.
The texture of these candies was unique and interesting. They were very hard when fully cooled- hard enough to shatter. However, when you put them into your mouth, they softened and became smooth and chewy (dangerous-to-dental-work level chewy, I wouldn’t give these to my grandmother without a warning!). The closest thing I’ve had before is the texture of a See’s candy lollipop- quite hard, so you can bite off a piece, but then also chewy inside your mouth.
If I were to make this recipe again, I’d try it with different types of sugar- both light brown and white. I would also try to take it off the heat at a softer ball stage, to see if that would change the texture. I would add the vanilla after it was taken off the heat, as I usually do, though probably not 2 full tablespoons of vanilla.
Creating a historical recipe made me appreciate the tremendous knowledge cooks of the time must have possessed. Although this recipe was “easy” and used few, simple ingredients, I did need to call upon my knowledge of candy making techniques to understand when it was ready. As I’d never made pulled candy, I was definitely guessing. I wasn’t able to fully process the candy before it cooled- it would have been much easier with a large family full of children to assist me with the pulling process!
Bibliography
Hearn, Lafcadio. 1885. La Cuisine Creole: A Collection of Culinary Recipes From Leading Chefs and Noted Creole Housewives, Who Have Made New Orleans Famous for its Cuisine. New Orleans: F.F. Hansell & Bro., Ltd. https://d.lib.msu.edu/fa/19#page/247/mode/2up
Accessed November 10, 2019
