Student Groups
This information describes how Student Groups are utilized in MyBU Student, including steps to view and manually update Student Groups, if the appropriate security applies. It also outlines processes related to access and Group creation.

Introduction
Student Groups identify a group of students of similar affiliations. Some Student Groups are automatically added to a student based on their population; this process is not covered here. The steps outlined in the sections below outline how to manually update and view Student Groups.
OVERVIEW
Student Groups can be used for multiple purposes. Common applications may be for needs related to charging, tracking/identification, Degree Progress, or enrollment requirement groups. For example:
- Charging: Student Account staff can compile active Student Groups for a term to impact charging for special populations.
- Degree Progress Report: the ‘RXFR-Transfer Student Undergrad’ Student Group is used to determine Hub requirements for transfer students in the Degree Progress Report.
- Enrollment Requirement Groups: can utilize Student Groups to reserve seats for students in those specific affiliations.
Students cannot see Groups they are associated with.
Student Groups vs. Service Indicators
In MyBU Student, a Service Indicator is a flag on a student record that provides or limits services and access for the student user. Service Indicators are sometimes used to identify specific populations of students to facilitate a process, or for reporting. Student Groups can be used similarly to positive Service Indicators for administrative/reporting purposes, but in different contexts. Refer to the Service Indicators resource for more information.
Student Groups List
A list of existing Student Groups along with each group’s responsible School/College/Department can be downloaded here: Student Groups List. Please note that recent updates in MyBU Student may not yet be reflected in this list.
⚠︎ Screen options and menus will vary by user; please note that displays may differ for you based on access that has been granted. All screens shown are for training purposes only. The ability for staff to view and/or manage assigned Student Groups is dependent on their security access and can vary with department and Student Group value.
Security Access
Please be aware of the following considerations related to availability of Student Groups:
- Student Groups are not visible to students.
- Security access determines what Groups staff can view and can vary with Group value. If access is granted:
- Staff can view via queries (some relevant reports are noted in the Common Queries section below).
- Staff can view using the View Student Groups by Student page.
Mli>Advisors can view any Student Group associations for students they have access to view in the Student Details page.
Ability to add/update some student groups is based on security.
Some Student Groups are centrally managed by OUR only. This means that access for some Student Groups won’t be distributed to School/Colleges staff.
- Example: the Student Group, ‘RXFR – Transfer’, will be added to transfer students centrally via batch process, so update access to this Group is not available to most users.
Some Student Groups are for the use of specific Schools/Colleges or populations only. This means that access for some Student Groups will only be made available to staff in those areas.
- Example: the Student Group, ‘RPRI – MET Prison Education Program’, is managed by MET staff.
REQUESTING ACCESS
If there is a business need for a staff member to update Student Groups for the students they support, follow these steps:
- The DSA can request the Manage Student Groups role for the user: BU_SR_STDNT_GRPS.
- The DSA will also need to indicate which Student Groups the staff member is requesting access for.
Manage Student Groups for a Student
The Student Groups page can be used to:
- View the list of Student Groups to which an individual student is already assigned
- Assign a student to certain Groups
- Inactivate Groups already associated to the student
ⓘ If updating information, be sure to add a new row with the appropriate effective date. For more details on working with effective dated rows, refer to the Intro to Using MyBU Student resource.
- Log into MyBU Student.
 In the left menu, navigate to Manage Student Groups > Student Groups.
- If using the Full Site, use the top right NavBar menu to navigate to Records and Enrollment > Career and Program Information > Student Groups.
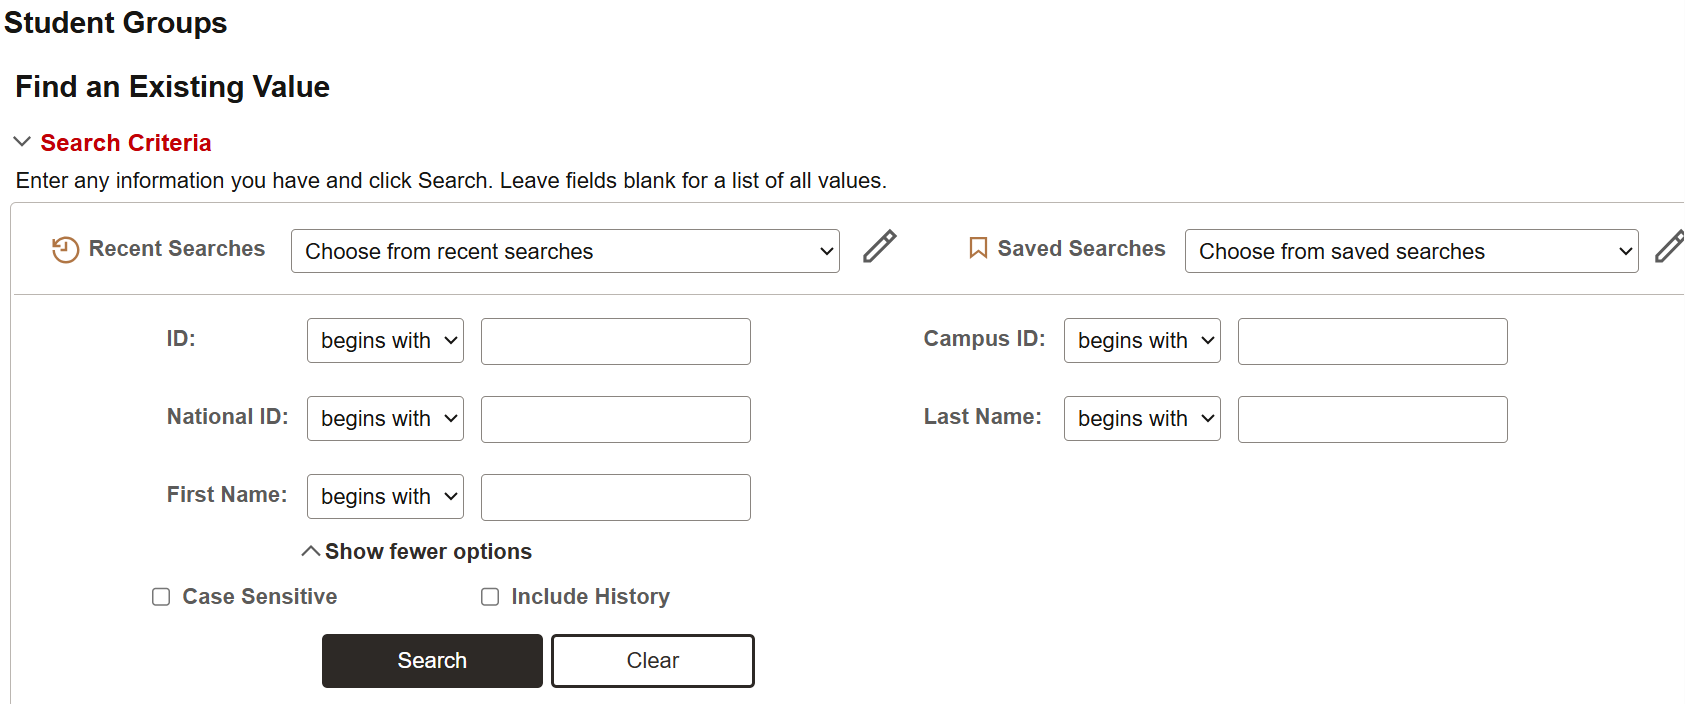
- Search for the student.

- Upon selecting the student from the search results, the Student Groups page will open.
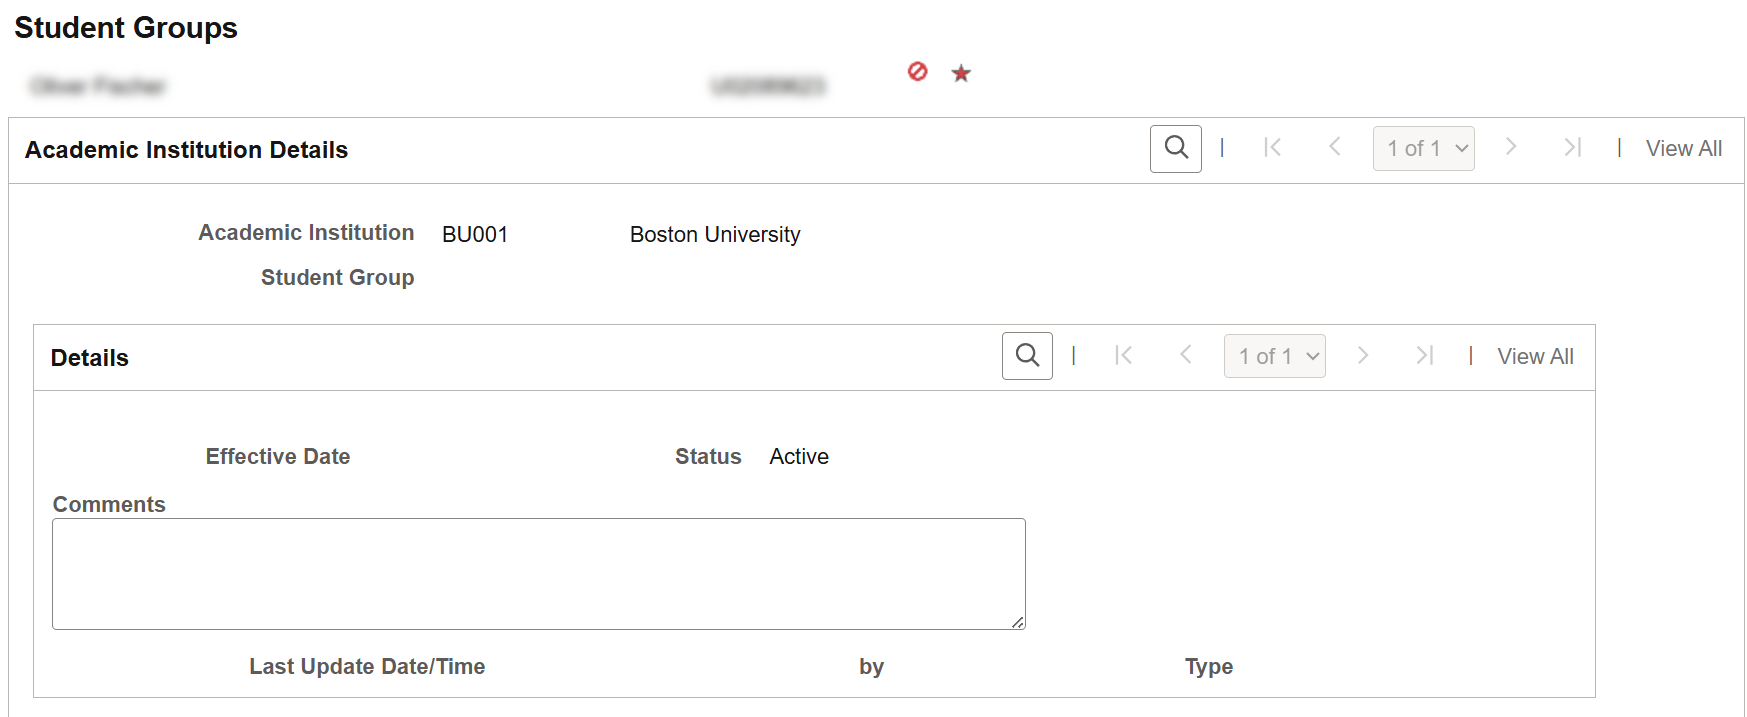
If the student has no Student Groups associated with them, notice the Student Group and Effective Date fields are blank:

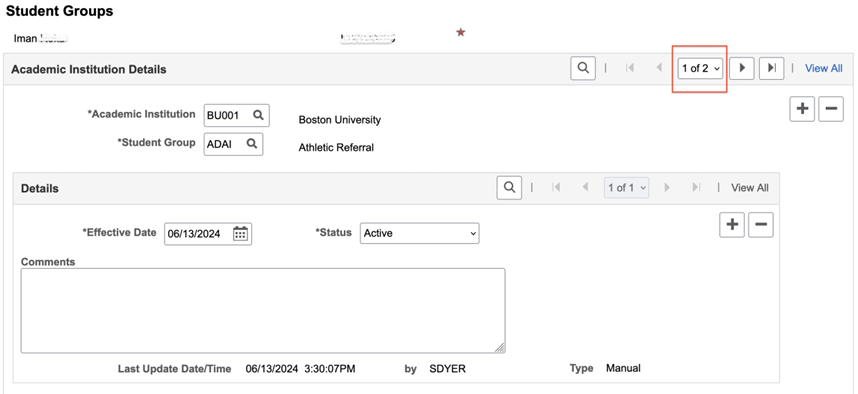
If the student does have associated Student Groups, notice the defined Student Group field. There may be more than one data row indicating additional Student Groups so use the arrows or View All option to review all rows.

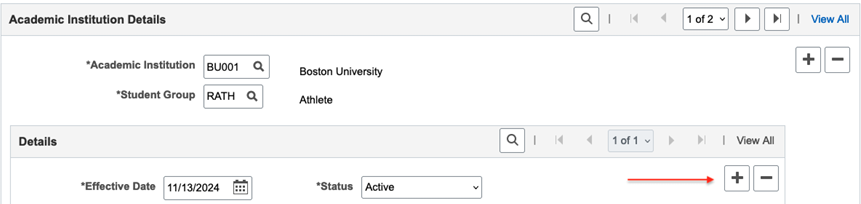
ASSIGN STUDENT GROUP TO A STUDENT
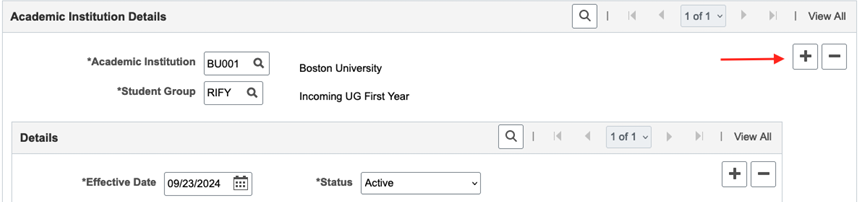
- If a student already has a Group added, click the top level plus icon to add a new row.
- If the student didn’t have any existing Student Groups, then no need to add a row. Start with the blank field, as noted in the next step.

- A new row will be added with a blank Student Group field. Lookup to find the desired value. Note that the availability of Student Groups in the lookup is determined by security.

- The Effective Date field will default to the current date; adjust if needed.
- The Status field will default to ‘Active’; keep as is.

- Enter any Comments; follow any applicable department policies for comment text.
- Click Save.
- To manage Groups for other students, click the Return to Search button.
If adding a Student Group to a student who already has Groups assigned, this will not inactivate prior Groups. Multiple Student Groups can be active simultaneously. Follow the steps in the next section to inactivate an assigned Group.
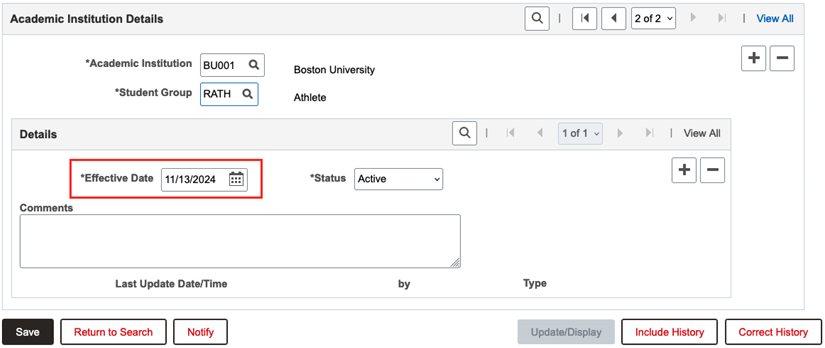
INACTIVATE STUDENT GROUP FOR A STUDENT
- On the Student Groups page for the applicable student, make sure the Student Group that needs to be inactivated is displayed.
- If more than one Student Group has been assigned, use the top level navigator options to ensure the correct data row is selected (arrows, dropdown, or View All button).

- On data row with the Group that is to be inactivated, click the second level plus icon within the Details section.

Notice that for that Student Group, there is now more than one data row.
- In the Status field, lookup to select the Inactive value.

- Enter any Comments; follow any applicable department policies for comment text.
- Click the Save button.
- To manage Groups for other students, click the Return to Search button.
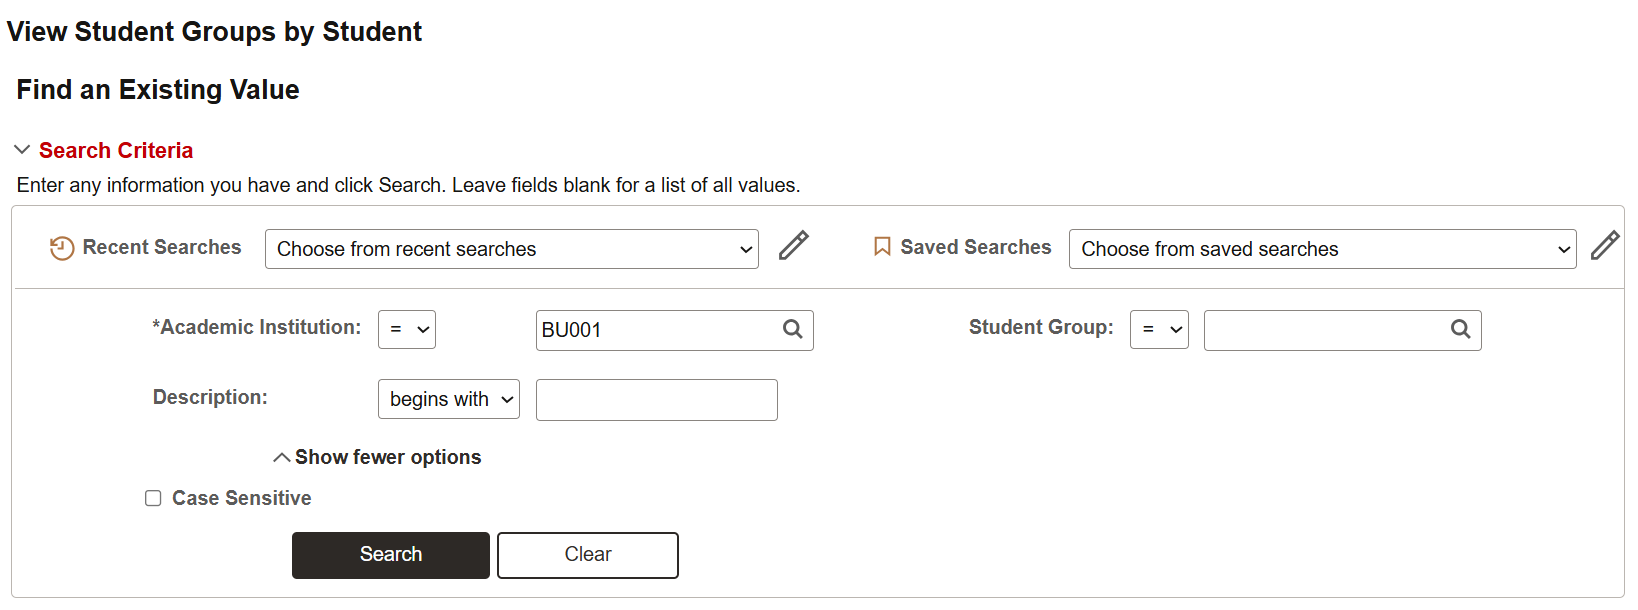
View Student Groups by Student
The View Student Groups by Student page compiles a list of students associated to a certain Student Group.
- Log into MyBU Student.
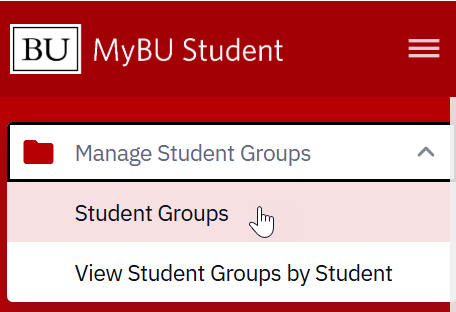
 In the left menu, navigate to Manage Student Groups > View Student Groups by Student.
- If using the Full Site, use the top right NavBar menu to navigate to Records and Enrollment > Career and Program Information > View Student Groups by Student.
- To see the students assigned to a certain Group, lookup and select the desired value In the Student Group field.
- The Description field can also be used to enter Student Group text if preferred.
- Keep in mind that security access may limit which Student Groups users can view.
- Click Search.

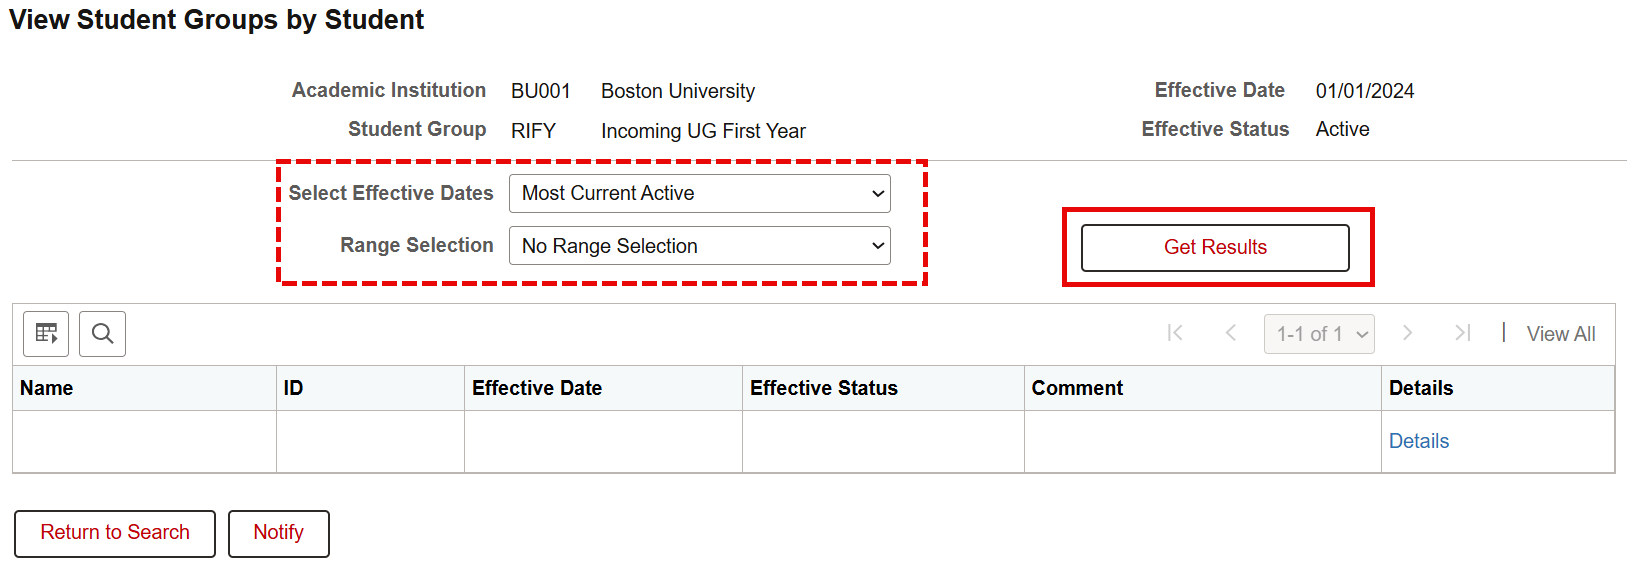
- The View Student Groups by Student page will initially display with a blank list. Additional criteria can be entered to narrow down the results.
- Select Effective Dates: use to filter the list of students by their status:
- Most Current (Any Status)
- Most Current Active
- Most Current Inactive
- Range Selection: use to narrow down the assigned students by ID or name:
- No Range Selection
- Select Emplid Range
- Select Last Name Range
- Click the Get Results button.
ⓘ NOTE: Upon clicking ‘Get Results’, a message may display indicating that selection criteria will return a large number of rows. Clicking ‘Yes’ will still return all results, but it may take some processing time.

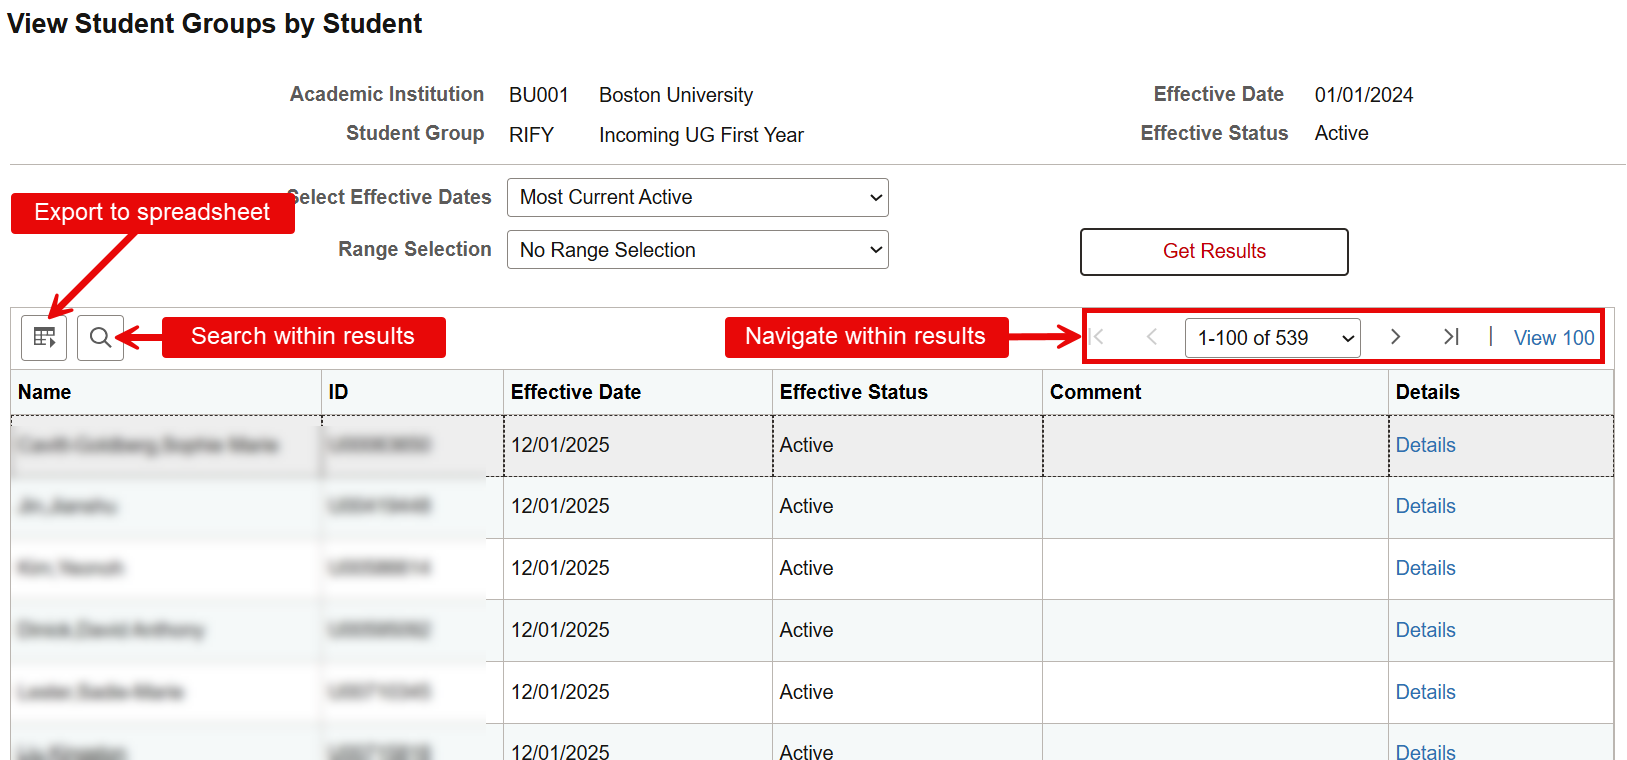
Viewing Results:
- Use the arrows and page navigation options in the top right to review all students.
- Click the download icon to export to a spreadsheet.
- Click the magnifying glass icon to search the list.
- Click the Details link on a student to view the full Student Groups page for that student.

Common Queries
Commonly used queries that use Student Groups:
STUDENT LIST WITH ADVISOR INFO
QUERY NAME: BU_R0046AV_SR_STDNT_ADVR_INFO
This report shows a student list with additional advisor information.
- Enter report criteria that results in list of students with data that includes their assigned advisor(s).
- Student Group Name is an optional search prompt in this report.
STUDENTS WITH STUDENT GROUPS
QUERY NAME: BU_SR_STUDENT_GROUPS
This report shows students listed with associated Student Group(s).
- Specific groups, group status can be searched if desired. There is also a search prompt field to narrow the results to a specific Primary Academic program.
- Student Group is a search prompt and a column displayed in the data for this report.
TIP!To find more reports that use Student Group as a prompt or as fields displayed in the results, use the Query Library Tool. For help with this tool, refer to this Query Report Library guide.
Related Resource: Staff Queries
Request Creation of a New Student Group
If there is a business need to create a new Student Group value, a request may be submitted to the Office of the University Registrar. Refer to the following procedure:
- Be sure to review the list of existing Student Groups (downloaded spreadsheet).
- A Student Group may already exist to suit the identified need, but it may not be shown on MyBU Student screens due to current security restrictions. Refer to the Student Group Access section above for more information and instructions on how to request access to certain Student Groups.
- It may also be helpful to review available positive Service Indicators. There may be an existing Service Indicator that also suits the identified need. Please refer to the Service Indicators resource for more details.
- Once confirmed that there is no existing value to support the need, submit a ticket to ithelp@bu.edu with the subject of “New Student Group Request”.
- The ticket should include the following details:
- The requestor’s name and department,
- A description of the new Student Group value and reason for the request (i.e., how the Student Group will be used),
- Any relevant security considerations
- The Office of the University Registrar will evaluate the request. Additional information may be requested.
ⓘ NOTE: There are other areas of the system to consider when evaluating impacts of a Student Group, so please note that some requests may not be approved. Because of this process, please allow for time for the review.
Page last updated March 2026. For a PDF copy, print this webpage as a PDF.