Running a Deploy
Deploys are when we need to push a new theme or theme update to the production (Live + Staging) server.
Each environment and sandbox has its own manifest file. Production has a manifest file, called cms.ini. www-test has its own, and nm has its own (nm.ini).
Each of these manifest.ini files tells the environment which versions of each plugin/theme/WP-core to use. Every theme and plugin has its own entry in the manifest file. Each time a deploy is done, the deploy tool goes through the manifest file and essentially builds a .zip file of all of the code. After the build is done, the tool sends that file to the environment, erases the environment, and then unzips the file. [This is why deploys take ~15 minutes.]
Caution
When building a manifest, check to see if a manifest is currently being built for the same environment. If so, the manifest may not be built correctly. Wait until that manifest is complete before building in the same environment. On the deploy screen, you can view the current status in the audit log to see if a manifest package is being built.
The deploy tool can only run one deploy at a time– but if you queue up several, there won’t be conflicts unless they’re to the same sandbox/env.
Command Line Deploy
Generally, there is no need to deploy from the command line anymore. The best way is to use the graphical deploy tool detailed below. If needed, IS&T has documentation for a Command Line Deploy.
How to Run a Deploy
Note: These are instructions for running a “typical” deploy — that is, updating a theme in the production environment.
- Go to the deploy tool.
- Select build.
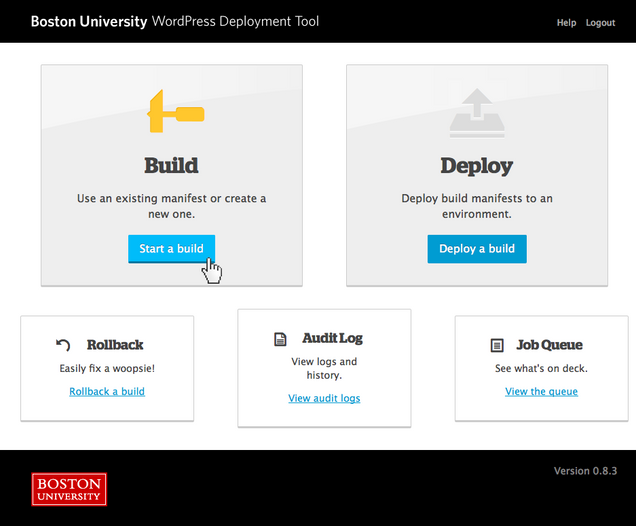
- Select Production as the Environment and CMS as the Install.

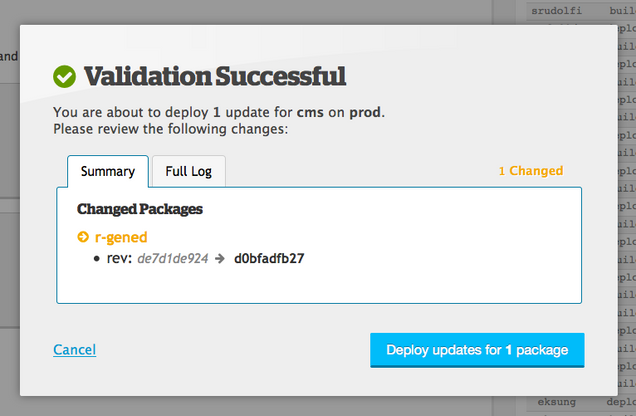
- In the search field, type the theme or plugin you’d like to update, for example, r-gened.
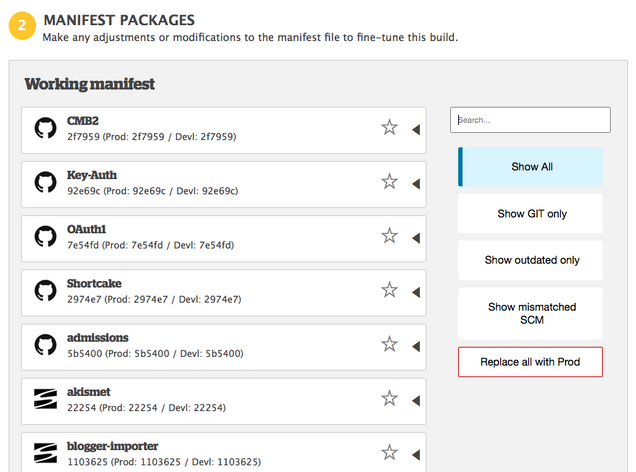
- Double-click the theme name to turn it red. This signifies that it is flagged for updating. Repeat the process to update additional themes/plugins.
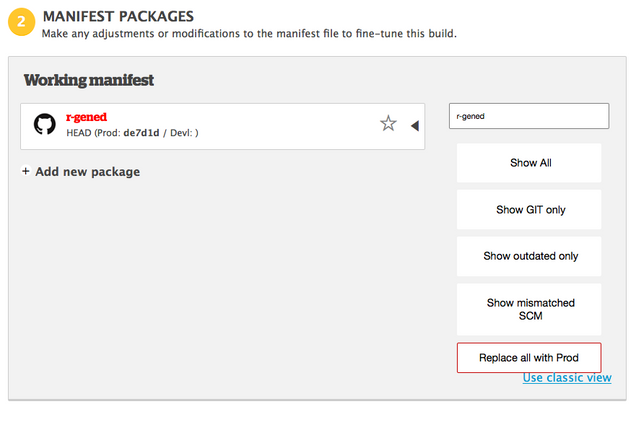
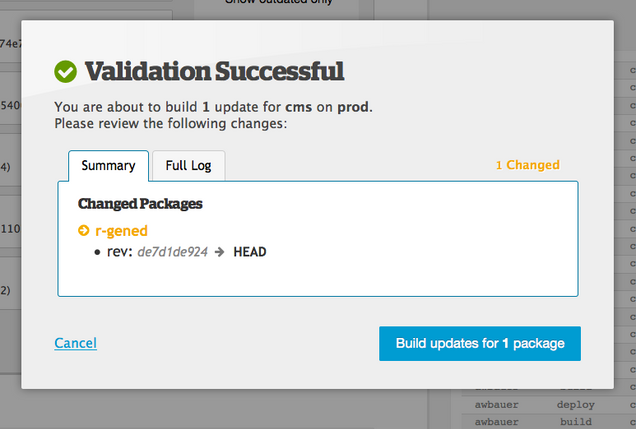
- Scroll down, add a commit message along the lines of “updating r-gened,” then click Validate.

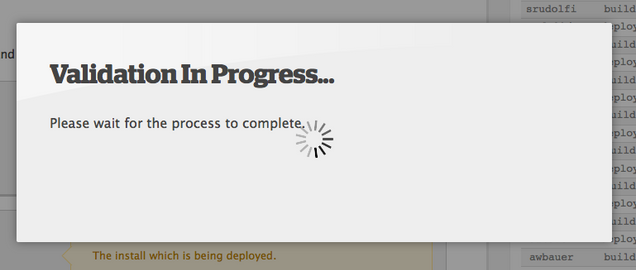
- You’ll wait for the validation to complete, usually ~30 seconds.

- You’ll then get a Validation Successful message. Click the Build Updates button.
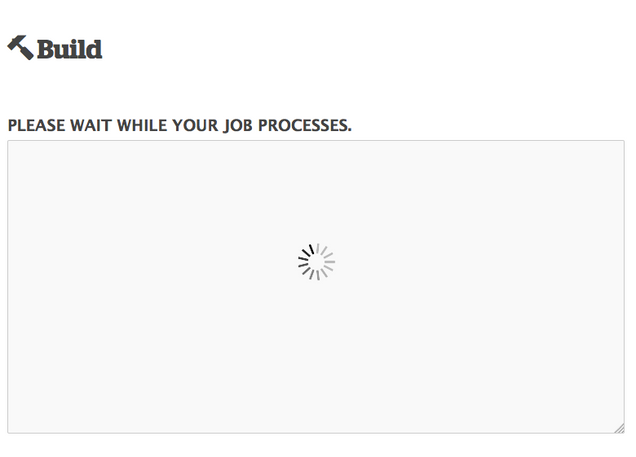
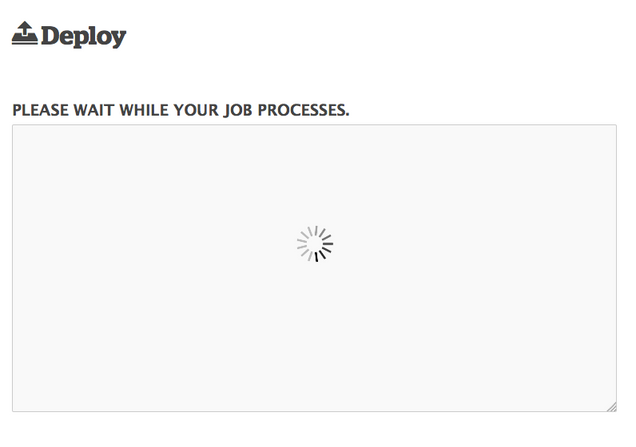
- You’ll then wait for the build to process, ~10-15 minutes.
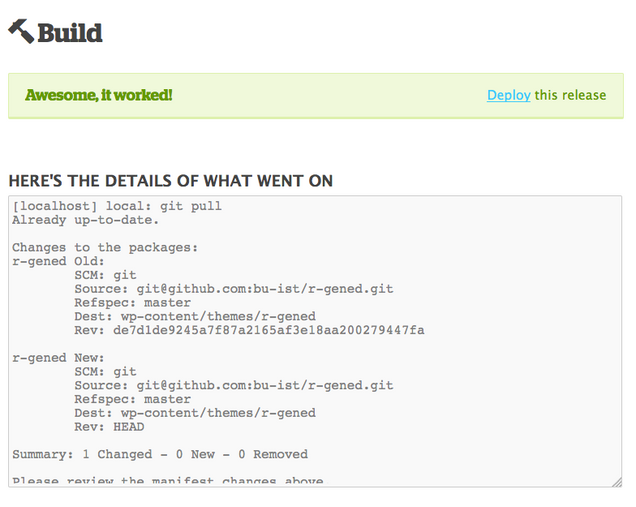
- You’ll get a confirmation message that the build has completed. Click the Deploy this release link.
- On this page, confirm that it is still set to Production as the Environment and CMS as the Install, then click Validate.
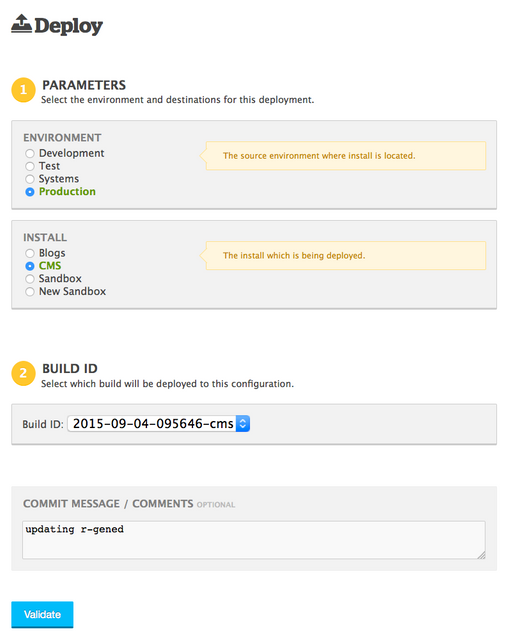
- Wait again for the deploy to validate, ~30 seconds.
- You’ll get a Validation Successful message. Click the Deploy Updates button.
- Wait again for the deploy to complete, ~10-15 minutes.
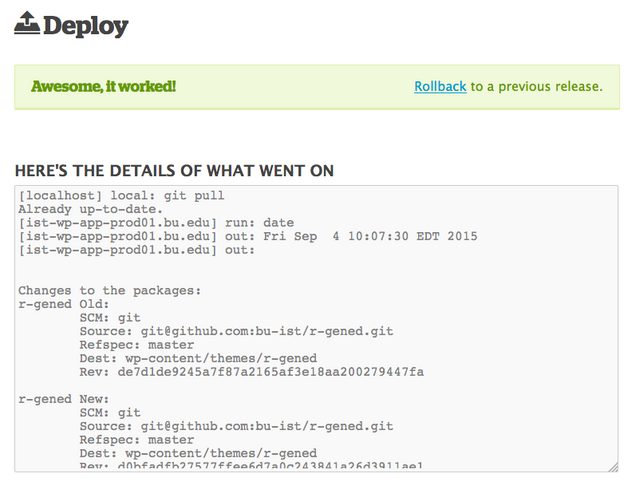
- You’ll get one final Awesome, it worked message. Your deploy is complete. Notify anyone who asked for a deploy that it has completed.