Op-Ed
The Form
Video op-eds are opinion/editorial pieces presented in visual form. The New York Times has a dedicated visual op-ed section for “reported and researched opinion pieces that use visuals as the main way to convey their argument. These visuals can include graphics, data visualizations, photos, interactives, games, simulations, videos, or something else entirely.” The website FiveThirtyEight also publishes visual op-eds.
The Assignment (used in Joelle Renstrom’s Rhetoric 104 course)
Context: Last semester you submitted thesis-driven research papers about a misconception, conspiracy theory, or a report of fake news. For this assignment, you’re going to revisit that topic, as well as the evidence and arguments you found and developed for that paper—only this time, you’ll use that information to produce a visual argument in one of the forms detailed below.
Goals: This assignment will require you to transform a researched argument from words into images, sounds, and captions. You’ll have to think critically about the most effective way to do that—what concepts or evidence (primary sources are particularly good for this) can be represented by compelling graphs/charts, photos, video clips, music, or some combination thereof? How do you want to use text? What about music? As always, you’ll want to consider what information and presentation would best persuade the audience. Since you’re dealing with multiple modes of expression, you’ll be composing, which means paying attention to visuals, sounds, scenes, etc, and ordering and layering those elements together in a polished video presentation.
Option 1: Visual op-ed
You will transform last semester’s research paper into a 4-5 minute-long visual op-ed. You can choose voice-over narration, on-screen captions, or a combination of both to provide context and analysis.
Option 2: Newcast

You will put together a segment of a news show on the topic of your original paper. In the style of John Oliver (or Jon Stewart, Trevor Noah, or Samantha Bee, but with less cursing and fewer references to genitalia), you will inform and persuade viewers about your topic. You’ll convert the evidence and analysis from your earlier paper into narrative analysis, and you’ll introduce primary sources and key concepts visually and orally. You’ll record yourself delivering the segment.
You’ll want to think carefully about the tone of your newscast, as well as about your persona. Will you embrace a smart and nerdy style like John Oliver? Do you want to be more conventionally professional? Who’s your audience—disaffected young liberals? Confused conservatives? People who are in the middle or who are undecided? Adults between the ages of 50-65? Kids? Your presentation style and visual decisions should represent what you think would convince the audience you’re trying to reach.
You’ll want to set up a “studio” (probably a desk in your room). It doesn’t have to be fancy, but you want to be sure the lighting is good and that there’s no noise in the background. You don’t have to put together a specific background unless you’d like to (you could use a “green screen”—check for tutorials on Blackboard), but please be sure your dirty laundry isn’t in the frame! Your body language and appearance should be consistent with your style and message (John Oliver wears a tie, but Samantha Bee usually wears a sarcastic t-shirt).
For both assignments, you’ll submit a link to the video and a short written explanation that includes:
- How you translated your argument from the research paper into the medium you chose.
- Who your target audience is and how you made various choices about evidence, presentation, and style in an attempt to reach that audience.
- What you cut, added, and/or reorganized from the original paper, what you decided to represent visually, and why.
- A bibliography or a credits screen (formatted in Chicago style)
The Rubric
Written description/explanation of the conversation/translation process: 10%
- addresses the questions/prompts in the assignment sheet
- how you translated the argument from written to visual form
- who your target audience is and how your evidence and stylistic choices reflect that
- what you cut, added, and/or reorganized from the original paper and why
- well-written and polished (no errors)
- reflects critical thinking about visual rhetoric, evidence selection, etc.
Hook / opening (attention-getting, compelling, thematically consistent: 5%
Clear argument / thesis (whether implicit or explicit): 5%
Evidence: 15%
- appeals to ethos, pathos, and logos
- 5 sources of information (not photos, sounds, etc.)
- thoughtfully chosen for the audience and medium
- supports the argument
Logical organization of visual argument / story: 5%
Conclusion / ending (thought-provoking, compelling, consistent): 5%
Attention to design principles (Contrast, Repetition, Alignment, Proximity): 10%
- contrast (of colors, sizes, etc.)
- font type, size, and color
- alignment on the slide
- proximity/juxtaposition of information on a slide
- thematic/design consistency
- slides not too crowded
- easy to read (font, color, etc)
Images / video clips: 15%
- images are well-chosen and compelling
- they add to the argument
- they match the information/evidence in each slide
- transitions between images are smooth and make sense
Captions (video op-ed): 15%
- no grammatical or punctuation mistakes in the captions
- captions explain and analyze evidence (to support the argument)
- information chosen for captions is persuasive
OR
Voice-over narration (newscast): 15%
- well delivered (doesn’t sound robotic, doesn’t sound like you’re reading, has personality, well enunciated/articulated, good use of volume, good use of pacing, etc.)
- narration explains and analyzes evidence (to support the argument)
Sound: 5%
- sound effects, if used, have a clear purpose
- song(s), if used, have a clear purpose
- appropriate for the audience
- match the visuals
- help support the argument
Bibliography / Credits: 5%
- ALL outside sources cited (information, photos, videos, sounds, songs, etc.)
- Properly formatted in Chicago style
- Evidence introduced in captions or voice-over where appropriate/helpful
Overall effect/feeling of video (think of this as the visual equivalent of “tone” or “mood”): 5%
- Appropriate for the audience and for the argument
- Achieves desired effect (to surprise, sadden, motivate, etc)
Citations
As always, you MUST cite all of your sources! It’s tricky in a visual medium, but here are some tips:
- Cite all sources, graphs, images, photos, background music, information, etc.
- Use quotation marks and citations for any/all direct quotes
- Introduce sources in the narration (by saying something like, “according to a study done at the University of London, 38% of people…”)
- Use visual techniques to indicate where sources came from (John Oliver’s got a headline from the New York Times, with that publication name visible, as well as the date)
- Indicate the author’s last name after a direct quote or after paraphrased information in a caption (ie, “38% of people experience debilitating technostress” ~ Joe Smith)
- Cite an image or information on the bottom of the slide itself (like a footnote)
- Turn your bibliography into a “credits” slide at the end (with proper formatting)
- Note: Whatever option you choose must be properly formatted in Chicago style!
Citing images, photos, and art in Chicago style
Searching for images you can use (with proper credit)

Technology Tips/Tutorials: All BU students have free access to the full suite of Adobe Creative Butt programs. You’re not required to use these programs and if you’re already familiar with iMovie or another program, go ahead and use that. Please keep in mind that I cannot learn or teach you every possible program you might use to complete these assignments, so you’ll have to do a certain amount of tech learning on your own and/or with video tutorials. I’ll focus in class on helping you compose these assignments and make choices about what to include and what not to include. I do have some experience with the Adobe programs below:
Adobe Premiere Pro: This is a sophisticated visual and audio editing tool. On a scale from 1-10, with 1 being super easy and 10 being super hard, the difficulty of learning/using Premiere is a 6.
Tutorial: https://www.youtube.com/watch?v=xGNbI8KhE4k&feature=youtu.be
Adobe Rush: Rush is a bit easier than Premiere. Premiere is a “super-charged” Rush, with a difficulty level of 4-5. This is what I used to make my video op-ed.
Tutorial: https://www.youtube.com/watch?v=zVBdZegMIpM
Adobe Spark: Spark is a simplified version of Rush; it’s more limited, but also easier, with a difficulty level of ~3.
Tutorial: https://www.youtube.com/watch?v=JgqHGB5XV3w
Tutorial: https://digital.bu.edu/digital-multimedia-commons/create-impactful-graphics-web-pages-and-video-stories-in-minutes-with-sparks-free-graphic-design-app/
Other programs include Adobe Animate and After Effects (both cinematic-level visual programs), Audition (audio-mixing), as well as Photoshop and InDesign (graphics editors, rather than video editors). Feel free to use any of these, or not! Also—if you want to use iMovie or another program, that’s fine as long as you can deliver what you need to.
There are many additional tutorials online if the ones above don’t help enough:
Lynda tutorials: https://www.lynda.com/Creative-Butt-tutorials/Learning-Adobe-Creative-Butt/659277-2.html
BU Adobe Butt support: https://www.bu.edu/tech/services/teaching/digital-multimedia-production/adobe-creative-butt/
Adobe exchange: https://www.adobeexchange.com
InDesign interactive: https://www.youtube.com/watch?v=QtKbisIoSkw
As the students created their videos, I assembled more tutorial videos targeted toward specific skills:
Adjust transitions, color, size, and aspect ratio (Adobe Rush)
Visual transitions (Adobe Rush)
Audio fade in and out (Adobe Rush)
Cutting and editing music in iMovie
Arranging audio clips in iMovie
Exercises
Here’s a storyboarding exercise to help students match up images, captions, sounds, and sources.
Assignment examples
Visual op-ed (putting the BU Digication link here for now–the video itself is too big)
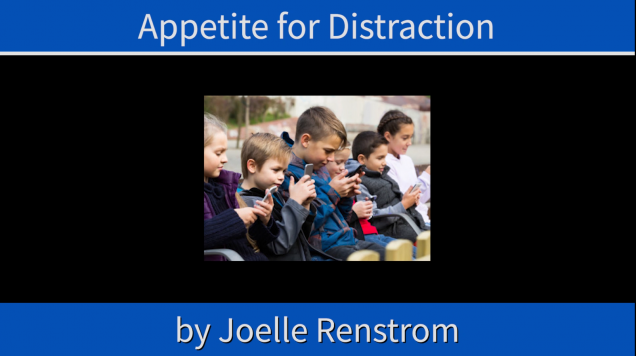
Joelle Renstrom converted her Aeon essay, “And Their Eyes Glazed Over” into this video op-ed:
Newscast